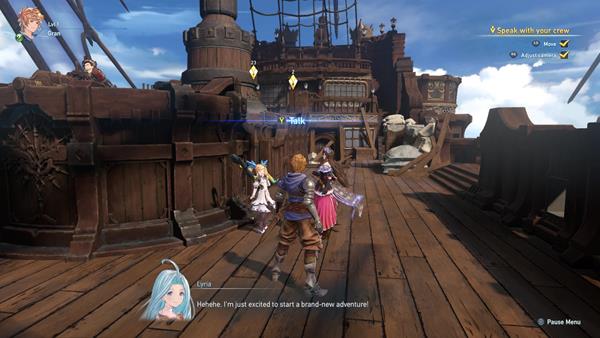
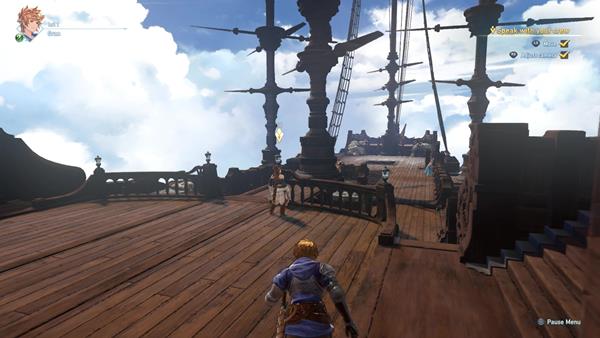
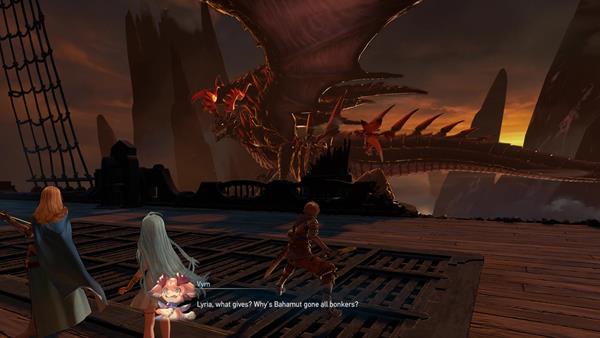
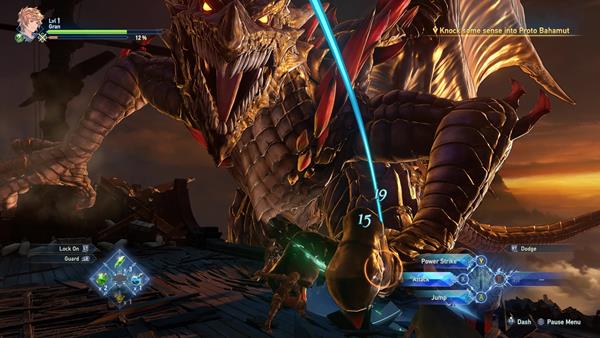
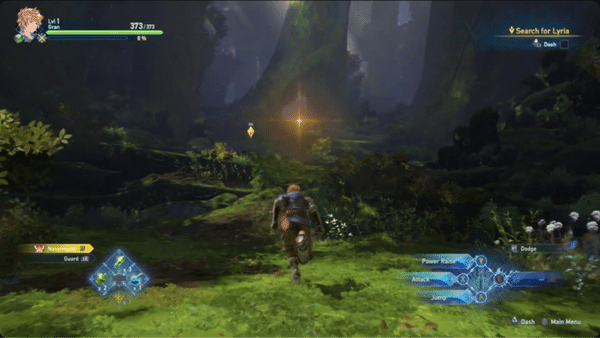
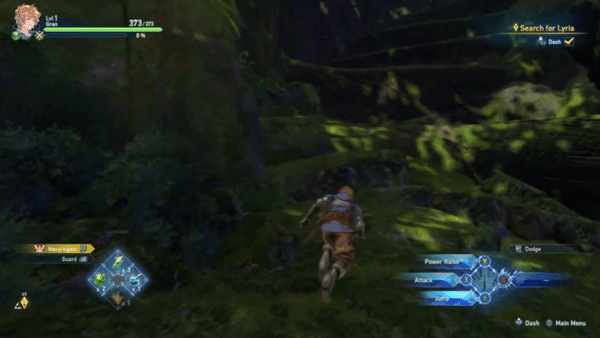
Walkthrough for Granblue Fantasy Relink is a 100% complete comprehensive guide for the various Locations of the game. The Walkthrough Guide for Granblue Fantasy Relink covers detailed location guides, vital information, and pointers for encounters surrounding NPCs, Enemies, Bosses, valuable Equipment, and unique Upgrades. The goal of the walkthrough is to guide players in solving problems or clearing gameplay roadblocks, and ultimately, beating the game. If you would like to check a summarization and recommended progression path for the main campaign, please visit our Game Progress Route page, and for other helpful guides, you can also check the Endings page.
Granblue Fantasy Relink Walkthrough Guide
GBF Relink All Story Chapters
Prologue: The Forgotten Sky is a Main Quest in Granblue Fantasy Relink. The prologue chapter serves as the tutorial sequence of the game where players choose the gender of The Captain and learn about the basic movement and combat mechanics. We find The Captain, along with his crew, battle through a storm and venture forth on an adventure to reach Estalucia. Main Quests in Granblue Fantasy Relink are primarily tied to the story or main campaign of the game which requires a player to complete it to progress story-related events, unlock more game features, discover new locations, and more. This page covers guides, quest objectives, and a complete walkthrough for the "Prologue: The Forgotten Sky" main quest in Granblue Fantasy Relink.
General Information
- Previous: N/A
- Next: Chapter 1: The Western Frontier
- Bosses: Proto Bahamut
- Location: Grandcypher Deck
Quest NPCs
Quest Bosses
Quest Enemies
All Items & Rewards
Weapons
- N/A
Sigils
- N/A
Treasure
- N/A
Key Items & Other
- N/A
Enemy Drops
- N/A
Quest Rewards
Prologue: The Forgotten Sky Quest Information
Prologue: The Forgotten Sky Quest All Chests Locations
- N/A
Prologue: The Forgotten Sky Quest All Shrouded Treasure Locations
- N/A
Prologue: The Forgotten Sky Quest All Omen Stone Locations
- N/A
Prologue: The Forgotten Sky Quest All Wee Pincer Locations
- N/A
Prologue: The Forgotten Sky Quest Objectives
- Speak with your crew
- Defeat the Wyverns
- Knock some sense into Proto Bahamut
GBF Relink Full Prologue: The Forgotten Sky Walkthrough
The Journey Begins, Captain
Welcome to Granblue Fantasy Relink! Before your journey begins, you will have to choose the game's difficulty which can be changed later on via the options menu. Your journey starts with your crew who ventures on an adventure to reach Estalucia. A cutscene begins where we find crewmembers Katalina and Rackam weathering through a storm, Katalina then tells you that the destination is near and that you'll break through the storm, shortly after, you will now get to choose to play as Gran, the male avatar of The Captain, or the female counterpart, Djeeta — please take note that this will not affect combat and any other game aspects, choosing a gender and naming The Captain is purely cosmetic, and changing the gender can be changed later on.

Upon choosing the gender and naming The Captain, a cutscene continues where we meet the other members of your crew (Rosetta, Io, Lyria, Vyrn) as they break through the storm. Play through the cutscene and as you take control of The Captain, you'll receive your first objective, Speak with your crew.
The Captain's Crew
The prologue section of this game serves as a tutorial to learn the basic movements, interactions, and combat mechanics of the game. Take this time to read the tutorial that prompts on your screen, as some of these provide helpful and important notes on the different aspects of the game. You can always check and review all the tutorial notes by checking Lyria's Journal, followed by the Tips section.

You'll find yourself on the deck of the Grandcypher, move with the left stick, and adjust the camera with the right stick. Approach and talk to Katalina who is with Lyria on the left-hand side of the deck to trigger a dialogue cutscene. During this dialogue, you'll be given the chance to respond to Lyria's question, just answer how you want, since this doesn't have any effect or change to the story, however, in some cases, some choices trigger sequences like progressing to the next area of a location or remaining where you are if you need more time to explore.
The next group you'll get to talk to is Rosetta and Io who are standing next to the steering station, manned by Rackam, speak to them to trigger another cutscene dialogue, and then finally, approach Eugen, who's on the second floor of the deck. After speaking to your crew, the next sequence will trigger where you'll be attacked by a flock of Wyvern enemies.
Rush to Lyria's Aid
As you take control of The Captain, run forward and the path will be blocked by a Wyvern, you'll need to complete the combat tutorial by following the objectives which are using basic and unique attacks, blocking, dodging, and then using all the basic mechanics to finish off the enemy. The path then becomes clear and you can rush to Lyria's aid which triggers a cutscene of The Captain and Lyria who joins hands to summon Bahamut.

Bahamut is then summoned and instantly kills the pack of Wyverns, but then, something sinister happens that turns Bahamut into a state to attack the crew. This transitions to combat where you'll now have to fight against Proto Bahamut and withstand the sequence to further progress. Members of your crew (Io, Katalina, Rosetta, Eugen) will now join in the battle against the frenzied dragon. The goal is to deal enough damage while also staying alive for some time.
Be sure to watch out for his claws as his swings cover a wide radius which can be easily dodged by looking at glowing prompts that appear on the ship's deck. Since Bahamut is a towering creature that flies, you'll have to target his front arms when he throws his fist on the deck and grabs a hold of it. If you are hit, you can press and hold the left or up directional buttons of the controller to recover your health. The Up button recovers a small amount of HP, while the left button heals more.
This sequence will progress further once the ship is severely damaged and an exchange of dialogue happens between your crew. Shortly after, Proto Bahamut uses a skill "Reginleiv" which blasts a beam of energy at you, this can be easily avoided by dodging left or right as the beam swings at you. The next sequence is where Bahamut flies to the front of the ship and prepares a devastating attack "Skyfall". Rackam notices this and decides to hit Bahamut with the ship, stopping it, and trapping it near the bow.

Dash towards the bow and be ready to spam attacks while Bahamut is immobilized. Keep attacking and this will complete the battle sequence against Proto Bahamut, you'll receive the following items by defeating the beast in this encounter: Prism Chip, and Fortitude Shard. A cutscene then follows where Lyria contains Bahamut back into the artifact she is wearing which causes her to lose consciousness and fall off the ship. With quick reflexes, The Captain catches her but loses grip on the ship, prompting Vyrn to catch The Captain while he tries to carry the pair back to the deck. Vyrn then loses strength and the three fall from the sky, and soon find themselves in the Sundappled Grove — this formally completes the Prologue act of Granblue Fantasy Relink's main campaign.
Prologue: The Forgotten Sky Quest Notes and Tips
Notes, Tips, and Other Trivia for the Prologue: The Forgotten Sky quest in Granblue Fantasy Relink go here.
Chapter 1: The Western Frontier is a Main Quest in Granblue Fantasy Relink. Players are tasked to reunite with Lyria and the other party members upon stumbling in Sundappled Grove. As the player progresses through the quest, they will encounter a boss called Quakadile. This is where the other party members will also show up and help The Captain in slaying the creature. After defeating the Quakadile, The Captain, along with his crew, heads to the nearby town. After exploring the town, they discover another danger that's taking place in a nearby village. Main Quests in Granblue Fantasy Relink are primarily tied to the story or main campaign of the game which requires a player to complete it to progress story-related events, unlock more game features, discover new locations, and more. This page covers guides, quest objectives, and a complete walkthrough for the "Chapter 1: The Western Frontier" main quest in Granblue Fantasy Relink.
General Information
- Previous: Prologue: The Forgotten Sky
- Next: Chapter 2: Tempest on the Horizon
- Bosses: Quakadile
- Location: Sundappled Grove / Folca, Frontier Town
Quest NPCs
- Vyrn
- Lyria
- Katalina
- Rackam
- Io
- Rosetta
- Eugen
- Sierokarte
- Gruff Blacksmith
- Nearly Retired Adventurer
- Forlorn Peddler
- Lil Pince
- Famed Apothecary
- Rolan
- Flustered Man
Quest Bosses
Quest Enemies
All Items & Rewards
Weapons
- N/A
Sigils
Treasure
Key Items & Other
- Wee Pincer
- Traveler's Journal
- Message from the Defense Corps
- Fishing Tournament Flyer
- Need a Handyman?
Enemy Drops
- N/A
Quest Rewards
- N/A
Chapter 1: The Western Frontier Quest Information
Chapter 1: The Western Frontier Quest Description
As Lyria, Vyrn, and The Captain fall off from the ship, they land in a place called Sundappled Grove. Lyria is separated from the rest, and The Captain is tasked to look for Lyria along with the other skyfarers. They then encounter a large beast called the Quakadile. After slaying the creature, the party heads to the nearest town, and discovers another danger that's happening in a nearby village.
Chapter 1: The Western Frontier Quest All Chests Locations
- From the starting point, move forward and you'll find a narrow path on the left side. Take that path and follow it until you reach the end, you can open a chest there that contains a Prism Chip and some rupies.
- From the second Cobblestone you've looted, turn right and climb up the steps next to the giant tree, you'll find a Chest that contains a Rafale Coin and some rupies.
- After opening the second chest, drop down on your left and climb up the steps in front of you. You'll find another chest at the top that contains a Fortitude Shard and some rupies.
- From the Tempestone loot, drop down and push forward, you'll spot a chest on the left along the way. It contains a Wind Shard and some rupies.
- After clearing the enemies in the area (3 Timber Wolves and 2 Hornbirds), take the narrow path beside the Cobblestone loot, you'll find a chest containing a Glitterstone (S) and some rupies.
- After clearing the blocked path, take the path on the left and you'll find a chest containing a Wind Shard and some rupies.
Chests in Folca
- From the balcony overlooking the town, drop down and climb up the roof of the house on your left by jumping, you can pick up a Prism Chip on the roof if you haven't already, then at the left side, there's a chest on the balcony. It requires a Gold Key to be opened.
- After picking up the document Need a Handyman? Go through the arch stones on your left and turn right, there's a chest near the waterwheel that contains Fortitude Shard x2 and some rupies.
- After picking up the document Need a Handyman? Go through the arch stones on your left, then turn left and go through the bushes, you'll see a Locked Chest there, but it will require a Whitewing Key to open it.
- From the Need a Handyman? document, turn right and take the stairs on your left. Once you go down, take the path on your right and go through the arch, you'll spot a chest nearby containing Rafale Coin x2 and some rupies.
- Down the same street where Io is currently located, you'll spot a Locked Chest near a large wooden door. It requires a Silver Key to be opened.
- A Locked Chest can be found just next to Rosetta. It requires a Silver Key to be opened.
Chapter 1: The Western Frontier Quest All Shrouded Treasure Locations
- There are no Shrouded Treasure Chests for this quest.
Chapter 1: The Western Frontier Quest All Omen Stone Locations
- There are no Omen Stomes for this quest.
Chapter 1: The Western Frontier Quest All Wee Pincer Locations
- Upon starting the quest, follow the marker on your screen, it should lead you behind a small tree with a giant hole in its trunk. As soon as you see the tree, stop and turn right to spot the steps on your right. Make your way up the steps and grab the Wee Pincer on the ground.
Chapter 1: The Western Frontier Quest All Slimes
- There are no Slimes for this quest.
Chapter 1: The Western Frontier Quest All Archives
- After saving Lyria, continue following the quest marker and stick to the left side, you'll eventually spot a purple loot on the ground. Pick it up to obtain the Traveler's Journal.
- Once you reach the nearby town, turn around and grab the Message from the Defense Corps document sticking to the wall.
- After speaking to the blacksmith in town, take the path on your left and go near the pond, on the left side you can pick up the Fishing Tournament Flyer.
- You can pick up the Need a Handyman? document on top of the bench near the waterwheel in town.
Chapter 1: The Western Frontier Quest Objectives
- Search for Lyria
- Defeat the Timber Wolves
- Find a way out of the forest
- Defeat the quakadile
- Head for the nearest town
- Explore the town
- Speak with Katalina
- Speak with Rackam
- Speak with Io
- Speak with Eugen
- Speak with Rosetta
- Wait for your allies at the church
- Chase after the man
- Get ready and head to the dock
GBF Relink Full Chapter 1: The Western Frontier Walkthrough
Wake up, Captain!
The quest starts with Vyrn waking up The Captain from a dream. You'll find yourselves within the Sundappled Grove, and your first objective is to locate Lyria. Before you proceed with the main objective, you can pick up a Wee Pincer along the way. Move toward the quest marker and as soon as you see the tree, turn right then climb up the steps and make your way to the top. You can then pick up the Wee Pincer on the ground.
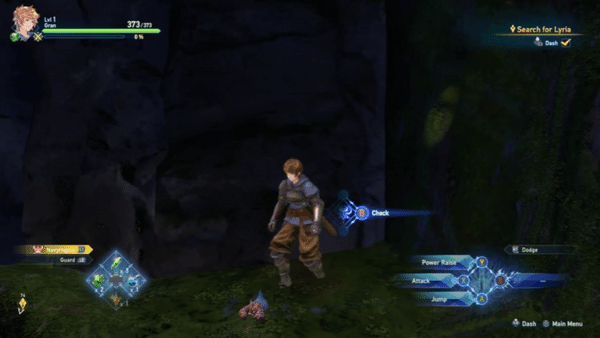
Now descend back down and instead of going through the trunk of the giant tree, take the path on the left and climb to the top. You'll find a loot and once you pick it up you'll obtain a Cobblestone. Drop down and continue following the path ahead, then turn left at the first possible chance, and you'll find another Cobblestone just ahead. From here, turn right and climb up the steps and you'll find a chest just next to the giant tree. The chest contains a Rafale Coin and some rupies. Now turn left and drop down, then climb up the steps in front of you, at the top is another chest, it contains a Fortitude Shard and some rupies.
Now drop down and continue following the main path but you'll see it's being blocked by vines of ivy. You can clear the path by attacking it.
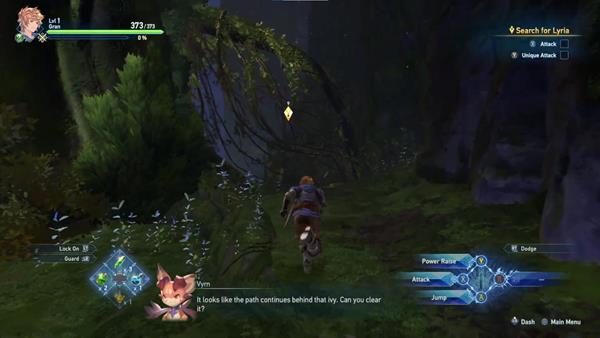
Continue moving forward and you'll see another one blocking the path, on the right is another loot, pick it up to obtain another Cobblestone. After clearing the vines, continue following the quest marker and once you reach the area, it'll trigger a short cutscene. You'll find Lyria about to be attacked by three Timber Wolves. This part of the quest will serve as a tutorial to learn some of the combat mechanics of the game. Take your time to read the prompts that will show up on the screen.
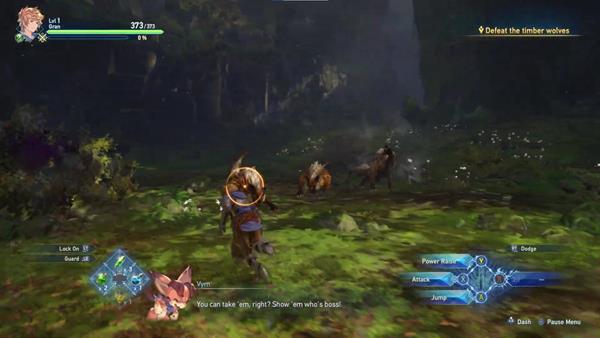
Defeat the three Timber Wolves and be prepared for the second wave with another three Timber Wolves. Once you make quick work of them, a small cutscene will play and three more Timber Wolves will spawn in the area. The game will then guide you on how to your Skills. Just follow the instructions on the screen and you'll take the three Timber Wolves out together in a single blow.
After saving Lyria, your next objective is to find a way out of the forest. Follow the quest marker and along the way, you'll spot another loot on your left, pick it up to obtain another Cobblestone. Just further ahead is another Cobblestone you can loot, and a little further you'll spot a purple loot on the ground, pick it up to obtain the Traveler's Journal.
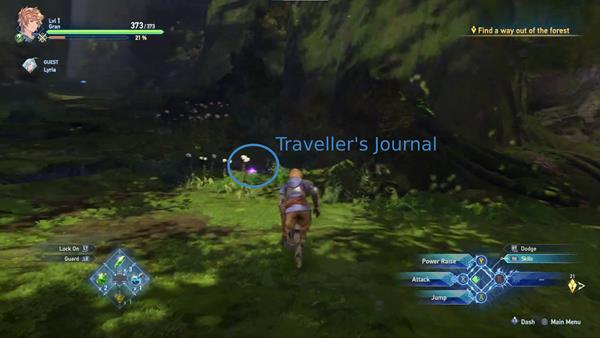
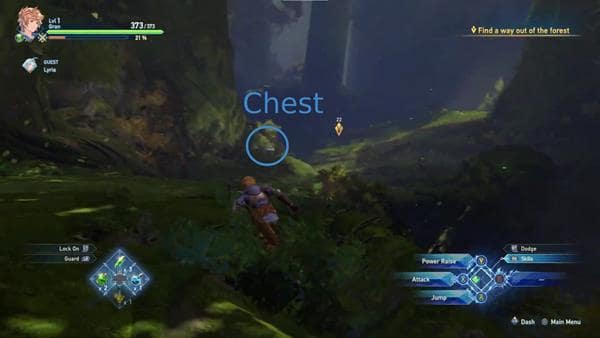
You can check out Lyria's Journal to read notes and other documents you've collected along your journey. Progress forward and at the edge on the right, another loot can be spotted, pick it up for another Cobblestone. The climb up the steps on your right, at the top is another loot. Pick it up and you'll receive a Tempestone. Now drop down and push forward, along the way is another chest you can loot. It can be seen on your left, loot the chest to obtain a Wind Shard and some rupies.
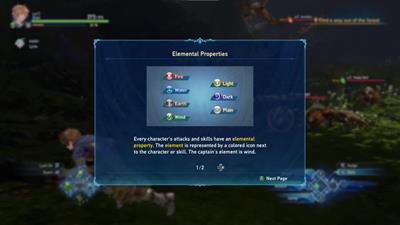
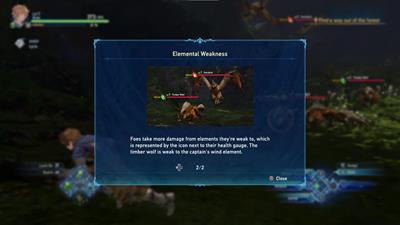
Proceed forward and you'll encounter more enemies, this time a new enemy type called a Hornbird will spawn along with the Timber Wolves. This part of the game will guide you on how Elemental Properties work within the game. The prompt states that every character's attacks and skills have an elemental property and the element is represented by a colored icon next to the character or skill. In this case, The Captain's element is wind. In this game, some enemies are weak to certain elements, and you can determine an enemy's weakness with the icon next to their health gauge. In this case, you'll find out that the Timber Wolves are weak to Wind, so The Captain can deal significant damage to them with his attacks. The Hornbird, however, is weak to Fire, but this doesn't necessarily mean that you'll have to use a Fire element character to take them down, it'll just be faster if you use their weakness against them. For this fight, you'll need to defeat three Timber Wolves and two Hornbirds.
After clearing the enemies, pick up the loot at the corner for a Cobblestone. Take the narrow path behind that loot you just picked up, you'll find a chest containing a Glitterstone (S) and some rupies.
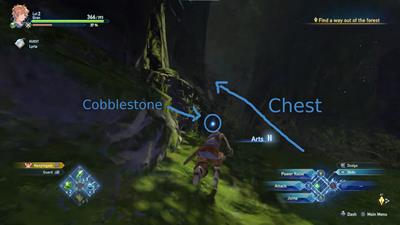
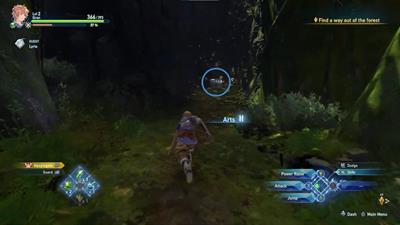
Now continue following the quest marker and attack the wall of ivy trapping a giant boulder to clear the blocked path. Move forward and take the path on your left first, you'll find a chest containing a Wind Shard and some rupies.
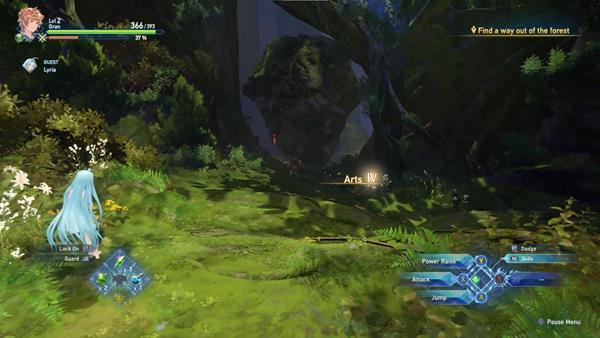
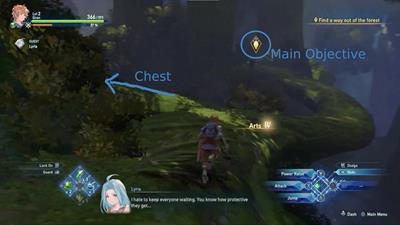
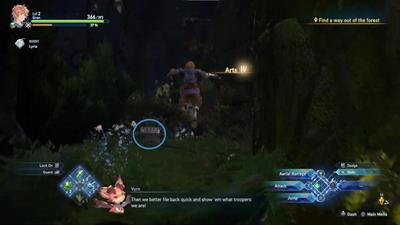
Now head back down and proceed. As you approach the quest marker, you'll hear a voice calling out Lyria and The Captain's name, turns out it was Katalina and Rackam. As Vyrn calls out their name, a giant creature is awoken from its slumber.
Boss Fight: Quakadile
This boss is called the Quakadile, you might be familiar with this boss if you've played the Demo Version of Granblue Fantasy Relink. It has all the same moves from the demo version as well. As you're fighting the Quakadile, you'll hear Katalina scream and attack the Quakadile. Katalina, as well as Rackam and Io, now join your party.
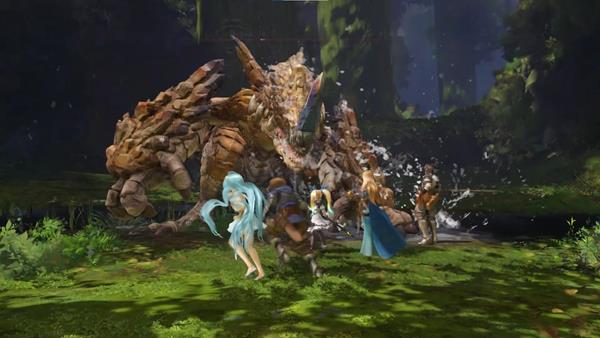
Just like the Greatshield Madbeat, this boss has a yellow bar of meter just below its health bar, and once this fills up, the Quakadile will go into Overdrive Mode and Bloodthirst will take effect. When they are in this phase, Skybound Arts will be rendered ineffective against them while also reducing all the damage they take. However, your attacks will now start depleting the yellow meter instead of building it up, even when using your weakened Skybound Arts. Some bosses will also have access to special attacks that are different from their base form, but this one will only have access to two new moves and retain most of its basic attacks from its base form. This phase will only be temporary but it can happen more than once during a boss fight. When the yellow bar is fully depleted, Bosses will enter a state called Break, rendering them exhausted for a while, this will be your chance to land your biggest attacks.
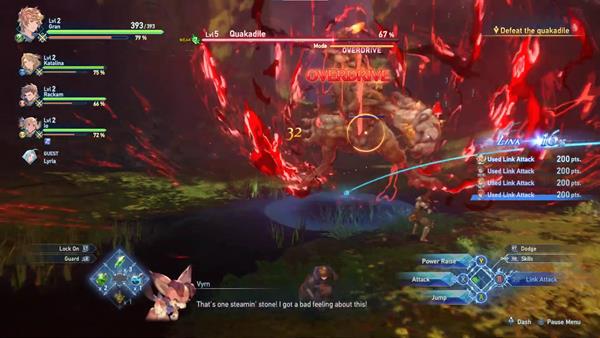
Once you fill up the Quakadile's stun gauge, the game will prompt you on how Link Attacks work. An enemy's stun gauge fills up as they take hits and once it's full, a link chance will trigger. Press 〇 during a link chance to perform a Link Attack with your party members. Performing actions like Link Attacks will raise the party's Link Level, and if all party members perform a link attack at 100% Link Level, you'll gain temporary buffs.
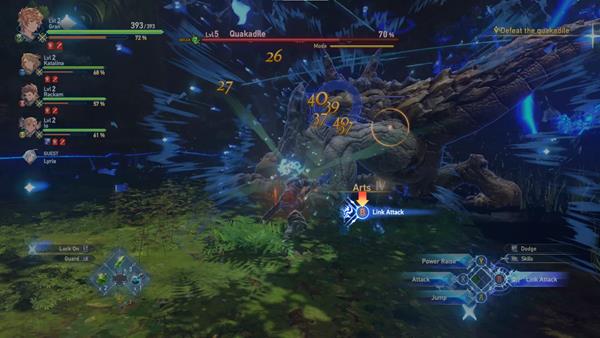
Now continue focusing your attacks on the Quakadile and follow the prompts on the screen and you'll eventually take down the boss. After defeating the boss, you'll receive the following rewards: Landbeast Claw x2, Fortitude Shard, Earth Shard, and Rafale Coin x2.
A short cutscene will trigger after defeating the Quakadile where Rosetta and Eugen land the finishing blow. A short dialogue will play out and the party comes to a conclusion to head to the nearest town.
Reaching Folca, Frontier Town
As soon as you take control of The Captain again, follow the quest marker and proceed ahead. Along the way, you'll encounter two loots ahead, you won't miss it. You'll obtain a Tempestone and a Whorlshroom from picking up the loot. Continue pressing forward until you reach the town, then a short cutscene will play out followed by a dialogue.
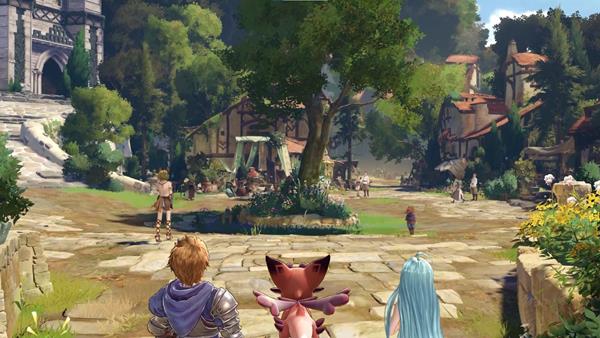
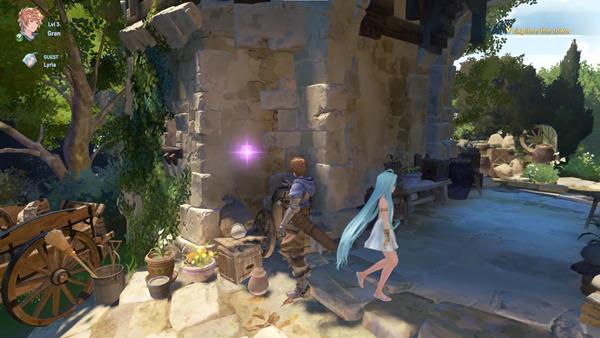
After the dialogue, turn around and grab the purple loot sticking on the wall near the entrance to the town, you'll obtain the Message from the Defense Corps added to your Archives.
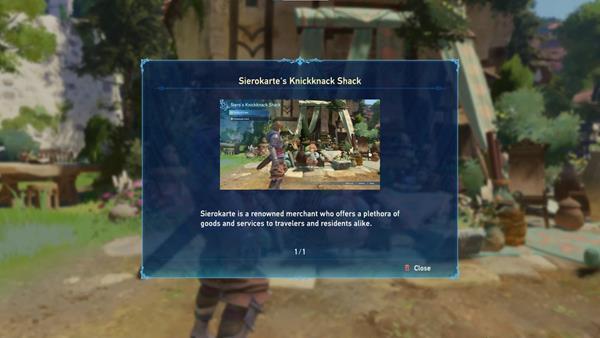
As you progress forward, you'll be interrupted by a short cutscene where you get reunited with Sierokarte. After the cutscene plays out, the game introduces you to Sierokarte's Knickknack Shop and tells you that Sierokarte is a renowned merchant who offers various goods and services and acts as a Merchant in this game. The game then guides you on how trading works. Simply follow the instructions prompted on your screen and trade your Rafale Coins to obtain Fortitude Shards. After trading with Sierokarte, she then informs you about a blacksmith nearby where you can obtain some weapons if needed.
You'll then be teleported to the blacksmith, then the game introduces you to the mechanics regarding Weapons. The blacksmith takes care of all things weapon-related like upgrades and Forging weapons. You can also sell some of your items here if needed. Follow the instructions presented on screen and use the Fortitude Shards you traded for earlier to upgrade The Captain's weapon.
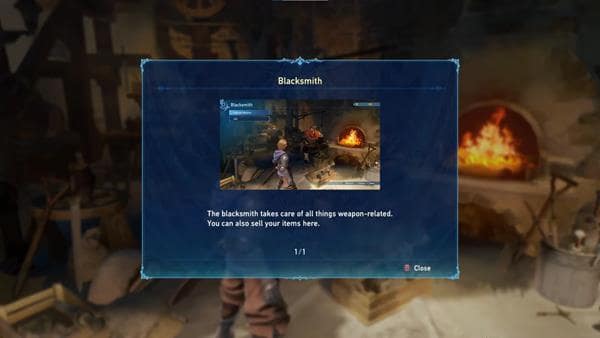
After enhancing The Captain's Traveller's Sword, the game shows you a short guide about navigating towns. You'll see at the top of your screen different icons, each representing where different useful facilities are located. You'll also notice a quest marker at the top indicating your next main objective for the main quests. You are also allowed to save your game at any time from the main menu while in town.
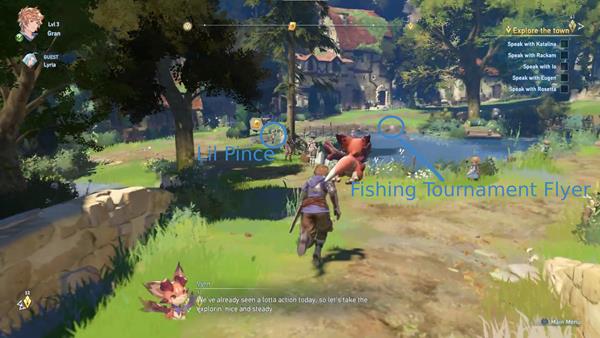
After speaking to the Blacksmith you can either explore the town to discover loot and open chests or talk to your crewmates to progress with the main story. To get started with some of the loot, take the path on your left and go near the pond, on the left side you can pick up the Fishing Tournament Flyer.
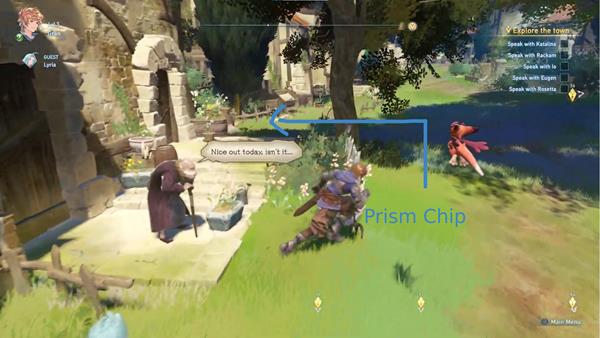
Now turn around and further right next to the old man with a cane, you'll find another loot, pick it up to obtain a Prism Chip.
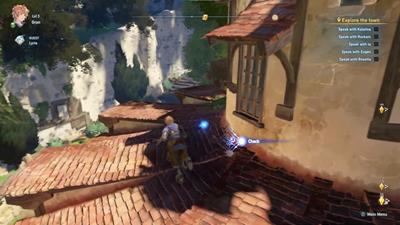
Continue through the narrow path ahead and pick up a Rafale Coin along the way. Continue up the steps until you reach a balcony. You can see most of the town from here. You'll also see a loot on the roof of the house on your left, picking it up will reward you with another Prism Chip. From the roof, go left, and at the balcony of that house is a Locked Chest. When you try to open it, the game will tell you that some chests require a special key to open them, for this case, it requires you to have a Gold Key.
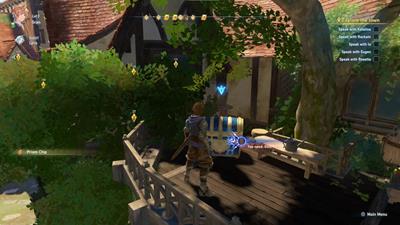
Drop down from the balcony and head up the stairs, turn right and continue following the path, you'll see a purple loot glowing from a distance on top of a bench. Pick it up to receive the Need a Handyman? document.
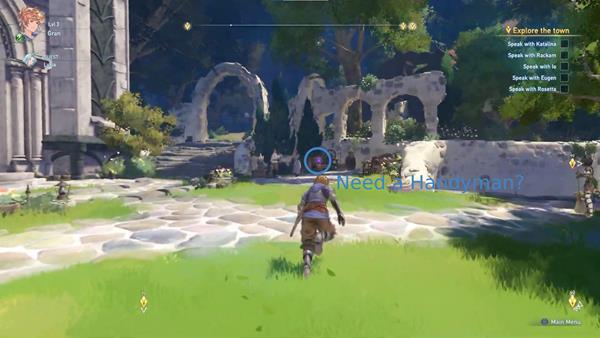
From the bench, go through the arch stones on your left, then immediately turn right, there's a chest near the waterwheel, open the chest to receive Fortitude Shard x2 and some rupies. There's another chest located just past the arch stones, on the left side of it, go through the bushes and a Locked Chest can be seen there, it requires a Whitewing Key to be opened.
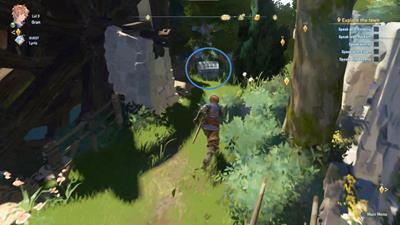
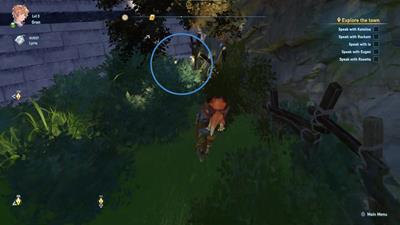
Now backtrack a bit and exit through the arch stones again, then go down the stairs on your left then take the path on your right and go through the arch, you'll spot a chest nearby, it contains Rafale Coin x2 and some rupies.
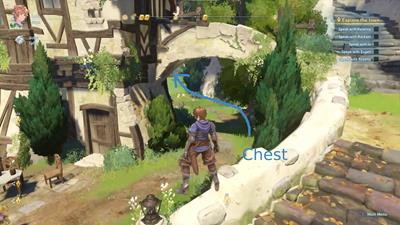
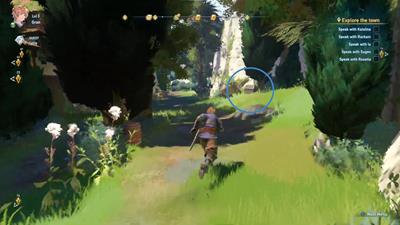
Continue following the path ahead and you'll end up where you started where you met Sierokarte. From here, you can take the path on your left and spot Io, and if you progress further down the street, you'll find another Locked Chest near a large wooden gate. It requires a Silver Key to open it.
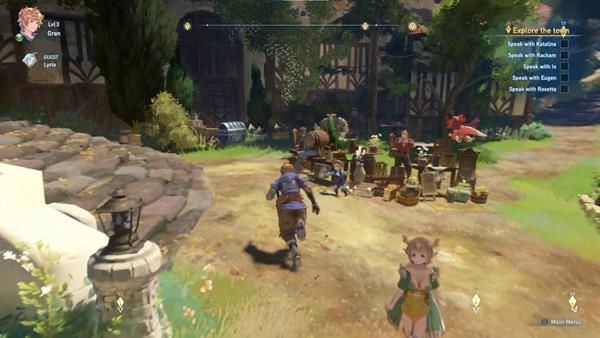
Backtrack for a bit and to where you the Fishing Tournament Flyer near the pond, talk to the NPC near it named Lil Pince. If you accept his first quest called Save the Crustaceans, you can give him the Wee Pincer you just acquired to receive a Crabby Resonance Sigil as a reward. Lil Pince is a special NPC that collects Wee Pincers, he'd be happy to trade them with you for a reward. From here. You'll spot Rosetta nearby, there's a Locked Chest near her that requires a Silver Key to be unlocked.
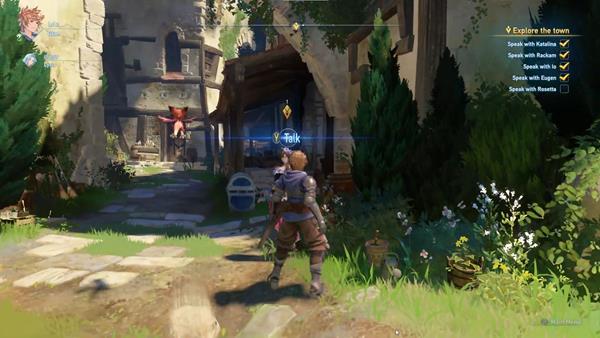
Once you've picked up all possible loot and explored the town, you can start talking to all of your party members to progress the quest. After talking to all of them, follow the quest marker and make your way to the church. Once you reach the area, press the corresponding button shown on the screen to wait for them, and a short dialogue will play out. Once the rest of your party members arrive, you'll be introduced to Rolan. But before he gets the chance to formally introduce himself, he is interrupted by a townsfolk asking for help about a tornado hitting their village out of nowhere. After hearing the news, Rolan rushes out of the scene before you can ask what's going on.
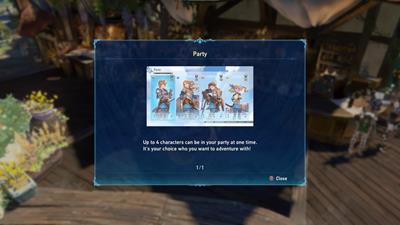
As you regain control of The Captain, follow the quest marker to chase after Rolan. Once you reach him, you'll get to hear someone explain the situation to Rolan. Your party then tries to convince Rolan to join him, he is reluctant at first but he is able to agree at the end. After your conversation with Rolan, the game will give you a chance to form your party and choose the Allies that will be accompanying you. You can select up to 4 characters to form a party, and the leftmost slot is the character you will control. For the Main Quests, The Captain must be in the party at all times, but you have the option to play any character you like.
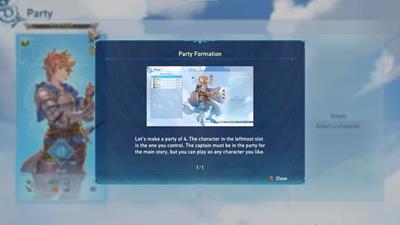
After forming your party, you'll then be directed to the Quest Counter, this is where you can clear other quests and raise your level to obtain resources for upgrading weapons and sigils. You will also earn Mastery Points (MSP) that can be used to unlock new skills and stats. The Fate Episodes will also be introduced here, this is where you can learn more about a character's backstory, and it's also a good way to gain extra stat boosts.
Once you're done assembling your team, head back to the dock and speak to Rolan. Once you interact with him, he will ask if everyone's ready before the ship departs. This will give you the chance to depart and take off to carry on with the main quest, or explore the town more and do side quests if you wish to do so. Once you choose to depart, you along with your Allies will go aboard the ship and take off — formally concluding this quest and officially beginning Chapter 2: Tempest on the Horizon.
Chapter 1: The Western Frontier Quest Notes and Tips
Notes, Tips, and Other Trivia for Chapter 1: The Western Frontier quest in Granblue Fantasy Relink go here.
Chapter 2: Tempest on the Horizon is a Main Quest in Granblue Fantasy Relink. Players are tasked to rescue the villagers from the goblins that have seized the small town. Main Quests in Granblue Fantasy Relink are primarily tied to the story or main campaign of the game which requires a player to complete it to progress story-related events, unlock more game features, discover new locations, and more. This page covers guides, quest objectives, and a complete walkthrough for the "Chapter 2: Tempest on the Horizon" main quest in Granblue Fantasy Relink.
General Information
- Previous: Chapter 1: The Western Frontier
- Next: Chapter 3: Creation of the Stars
- Bosses: Greatshield Madbeat
- Location: The Hills, Zeghard Fortress
Quest NPCs
- Brave Man
- Caring Man
- Cowardly Girl
- Exhausted Man
- Gentle Old Man
- Impatient Man
- Listless Woman
- Muscle Connoisseur
- Rolan
- Skyfarer Fan
- Sobbing Woman
- Terrified Woman
Quest Bosses
Quest Enemies
- Greatshield Madbeat
- Goblin Archer
- Goblin Soldier
- Goblin Stormer
- Goblin Tanker
- Goblin Witch Doctor
- Goblin Wolfrider
Omen Stone Enemies
- Frenzied Archer
- Goblin Pyromancer
- Goblin Trooper
- Mud-Covered Swordsman
- Rowdy Bord
All Items & Rewards
Weapons
- n/a
Sigils
- Attack Power I
- Attack Power II
- Critical Hit I
- Health I
- Health II
Treasure
- Chieftain's Braid
- Cobblestone
- Fortitude Shard
- Glittercrystal
- Glitterstone (S)
- Rafale Coin
- Tempestone
- Valley Bloom
- Wind Shard
Key Items & Other
Enemy Drops
Quest Rewards
Chapter 2: Tempest on the Horizon Quest Information
Chapter 2: Tempest on the Horizon Quest Description
The party finds a floating island besieged and ransacked by Goblins who've become agitated and violent because of the unusually harsh winds in the area. They resolve to defeat the Goblins and rescue all the islanders that the Goblins have captured.
Chapter 2: Tempest on the Horizon Quest All Chests Locations
- From the first Hallowed Ground, head straight and turn left to find a wooden chest amidst some breakable objects containing a Wind Shard and rupies.
- As you formally enter The Hills, immediately turn left and follow the cliff until you reach another cliff that you can drop down to. You'll find a silver chest that contains a Wind Shard, Rupies, and 2 MSP
- From the entrance of the Hills, head straight until you reach the tunnel that's on the center of the mountain. A silver chest can be located after you free the first group of villagers just before the next Hallow Ground next to where you'll find a Wee Pincer that contains a Fortitude Shard, Rupies, and 2 MSP
- Just to the left of the last silver chest, you'll find a wooden platform that you can drop down to guarded by a Goblin Stormer. Once you defeat the goblin, you'll see a silver chest that contains Flitterstone S, Rupies, and 2 MSP
- Once you go through the mountain where you found the last 2 chests, move forward a bit until you see a house to your left. Loop around the house to find a silver chest on the right side of the house containing 3 Fortitude Shards and rupies.
- A wooden chest can be found in front of the first shrouded treasure that you encounter just before you cross the bridge going to the Windmill Settlement. The wooden chest is on the 2nd level of a very old broken-down stone building containing 4 Fortitude Shards and Rupies.
- A golden chest can be found just above the old stone building connected to a cliff. The golden chest is on the end of the cliff containing Critical Hit Rate I, Rupies, and 3 MSP
- From the second Hallowed Grounds, go right and you'll see another wooden chest guarded by multiple goblins in the upper part behind some wooden crates just before dropping down to the Water Settlement. It contains 3 Fortitude Shard and Rupies.
- In the waterfront settlement, find the golden chest behind the small waterfall to the right containing Attack Power I, 3 MSP, and rupies.
- In the Water settlement, jump to the top of the structure to the right of the wooden arch, on the same side as the waterfall, to find a silver chest containing a Glittersone (S), 2 MSP, and rupies.
- On the left side of the Water Settlement, climb up the wooden houses until you make your way to some broken houses in between the Windmill Settlement and the Water Settlement. A Wooden chest will be located in one of the broken-down houses here containing a Fortitude Shard, 1 MSP, and Rupies.
- Once you cross the bridge near the first shrouded treasure that you encounter, from the Windmill settlement, make a sharp right and hug the cliff until you find a wooden platform that you can drop down to. You can find a silver chest containing Health I, 2 MSP, and Rupies here.
- In the windmill settlement, head to the lower left to find a burning house near a windmill. Hop to the top to find a wooden chest containing a Rafale Coin and rupies.
- Once you get past the Windmill Settlement or the Water Settlement, before proceeding further to the objective marker to rescue a new set of islanders, stop in the middle of the road that interconnects the 2 settlements and you'll find a wooden chest beside a tree containing a Wind Shard and 2 Rupies.
- A silver chest can be found in front of the tall wooden gate where you fought the three Gobline Soldiers.
- In Zeghard Fortress, the last chest can be found before dropping down to the boss area of this chapter. Walk past the Hallowed Ground and Siero, then check the right-hand side of the wooden platform with the red flags just before the drop point to find the last chest containing Fortitude Shard, Rupies, and 1 MSP.
Chapter 2: Tempest on the Horizon Quest All Shrouded Treasure Locations
- Past the second Hallowed Ground, on the way to the windmill settlement, you can find a Shrouded Treasure on your left facing the objective marker, containing Attack Power II and 1397 rupies.
- After freeing the villagers in the Waterfront Settlement, you can find another Shrouded Treasure just across where the villagers were being held captive.
Chapter 2: Tempest on the Horizon Quest All Omen Stone Locations
- In the windmill settlement on The Hill, past a burning structure with a wooden chest at the top containing a Rafale Coin, there's an Omen Stone at the edge of a cliff.
- Before completing the final objecting at The Hill and speaking to the rescued villagers, there's an Omen Stone nearby in the last mall area of The Hill.
Chapter 2: Tempest on the Horizon Quest All Wee Pincer Locations
- The first wee pincer can be found as you start Chapter 1. After the "Caring Man" npc shows you the hallowed ground, walk up a bit and look to the left, you'll see the Wee Pincer on a stone, just by the entrance of the cave leading to The Hills.
- As you formally enter The Hills, immediately turn left and walk onto the dilapidated wooden platforms, you'll see the second Wee Pincer on one of those wooden platforms.
- The third Wee Pincer can be located after you free the first group of villagers. Move to the next section right before the second Hallowed Ground and look to your right where you'll see a parted fence and a chest by the cliff. Walk to the edge of the cliff that has a parting to find the third Wee Pincer.
- The fourth Wee Pincer can be found inside the Windmill Settlement next to a Wooden Hay Hanger. The Wooden Hay Hanger can be seen to the right of a burning Windmill at the far back of that settlement.
- The fifth Wee Pincer can be found just to the right of the Windmill Settlement on a cliff beside a bridge with a bunch of barrels and boxes. It's easiest to find this if you go down the center of the map near the Giant mountain in the middle, then cross the little bridge, and immediately turn left to see the cliff with breakable barrels and boxes.
- Upon entering Zeghard Fortress, the sixth Wee Pincer can be found to the left behind a broken-down wagon, opposite of the Hallowed Ground. Walk forward slightly and you'll see the broken-down wagon on the left.
- Also in Zeghard Fortress, the last Wee pincer can be found before dropping down to the boss area of this chapter. Walk past the Hallowed Ground and Siero, then check the left-hand side of the wooden platform with the red flags just before the drop point to find the last Wee Pincer.
Chapter 2: Tempest on the Horizon Quest Quest All Slimes
- You'll be able to find a slime enemy after you run past the second hollowed ground just beside one of the stone walls before proceeding to the Water Settlement.
- The next Slime can be found before crossing the bridge and going to the Windmill Settlement to the left. It's near one of the Omen Stones in the Windmill Settlement.
- A slime can be found behind one of the burning houses to the left near the Wee Pincer and Omen Stone in that area.
- At the Water Settlement, a slime can be found beside a silver chest on top of one of the houses in front.
Chapter 2: Tempest on the Horizon Quest All Archives
- At the very beginning of Chapter 2, the archive: Ferry Service Pamphlet can be found just behind The Captain on the ship.
- Another Archive entitled Rules for using the Windmill can be found behind the second house to the right at the Windmill Settlement.
- An archive entitled Fisherman's Log can be found to the left of the wooden arch inside the Water Settlement.
Chapter 2: Tempest on the Horizon Quest Objectives
- Search for the islanders who failed to escape
- Rescue the islanders at other settlements
- Liberate the windmill settlement
- Liberate the waterfront settlement
- Rescue the pursued islanders
- Defeat the Goblins
- Speak to the islanders
- Rescue the captured islanders
- Defeat Greatshield Madbeat
GBF Relink Full Chapter 2: Tempest on the Horizon Walkthrough
Down The Hill
As they start, players will find the playable party, consisting of Gran, Katalina, Rackam, and Io, trying to navigate through unusually harsh winds to get to a floating island in Tempeal. Other characters appear to be with the party but are not playable and don't seem to contribute to the fights in any way. Once they finally land, they find out that goblins have become agitated by the unusual weather and have taken to attacking the islanders. Some were able to run away, but the rest got left behind. Eager to help, the party steps up and takes it upon themselves to find the other islanders and rescue them.

When players finally get control of the party, they'll be able to check the main menu and check on each member's Skills, Support Skills, Weapons, Sigils, and Skybound Arts. When you're ready, turn around first and look to the left of the flying ship near a shivering villager to find a blue orb which is two Cobblestone. Head back and move forward to progress the Quest.
As you move forward, look to your right to find another blue orb amidst some breakable objects. Pick it up to get a Tempestone. Approach the Caring Man near the floating green crystal to get a tutorial on Hallowed Ground and how to use the main character of the game. Before entering the opening, head to the left to find some breakable objects and a wooden chest containing a Wind Shard and 73 rupies.
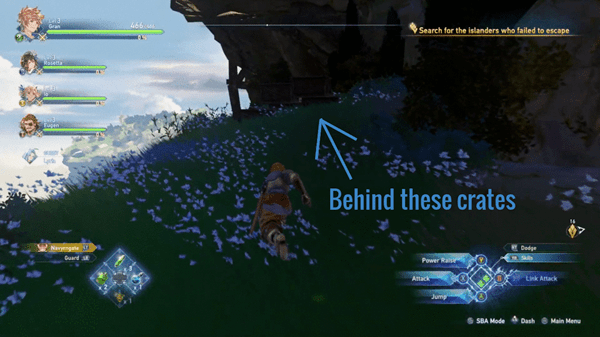
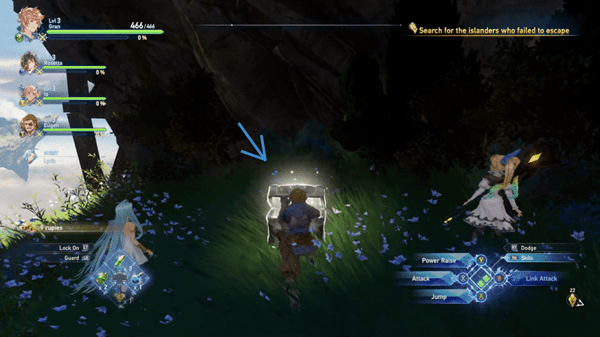
Head back and then follow the objective marker through a short tunnel and come out to The Hills. Once you enter the Hills location, you'll find the first Wee Pincer of this area. Immediately go to the left of the area and you;ll find the Wee Pincer by a wooden platform by the ledge.
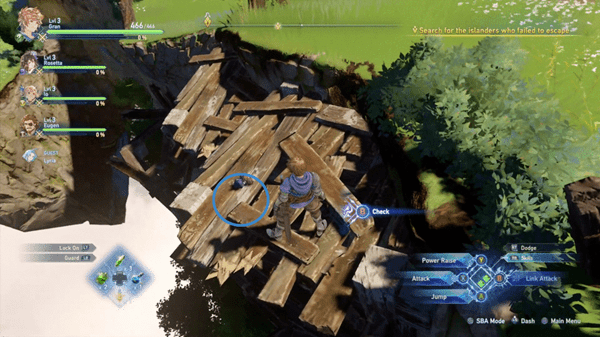
You'll hear some screams shortly and be prompted to help. For your first fight in the game, you'll be fighting some Goblin Stormers. They're weak to the Wind element which is probably why they they got agitated, but it means they're weak to Gran's attacks. Follow the various tutorials and dispatch them to rescue the first villagers. Interact with them to untie them and Rolan will come around with the ship to pick them up. There are more settlements to check so you'll have to continue on your way.
When you regain control, loop around the house to your left to find a wide ledge around the hill. There's a silver chest here containing three Wind Shards and 181 rupies.
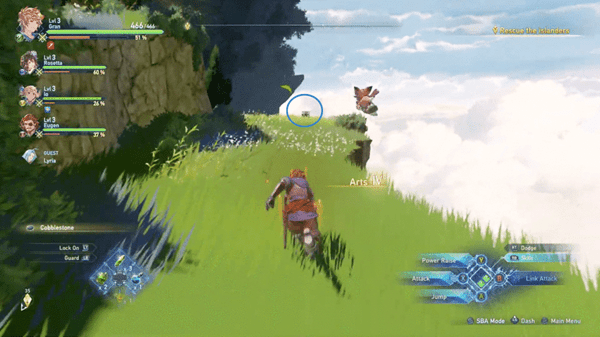
Head back and follow the objective marker to move forward. As you enter the enclosure there's another silver chest waiting for you, this time containing ten Fortitude Shards and 187 rupies. Across from it, you can check a blue orb on the wooden ledge for another Cobblestone. Afterward, just to the left of the silver chest, you'll find a wooden platform that goes downward and another silver chest that is guarded by a Goblin Stormer.
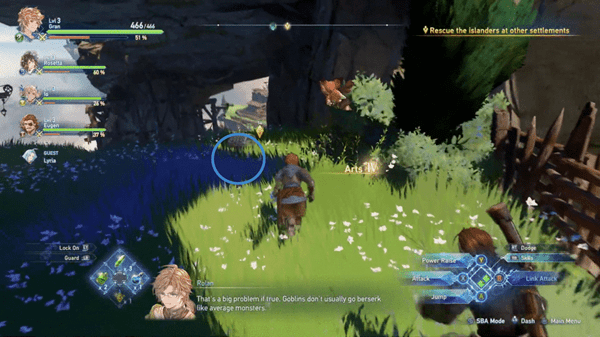
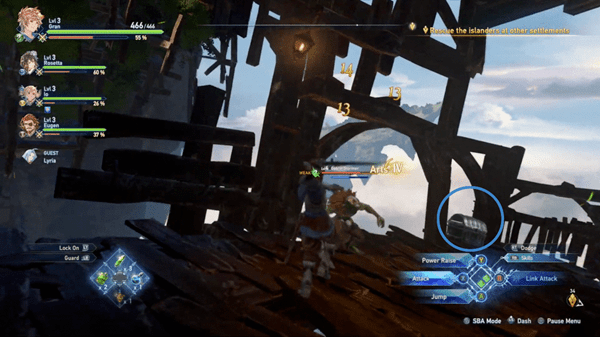
Head out of the enclosure to find another Hallowed Ground you can use if you need to on your left. From here there are two settlements to liberate. Head to the path to the left first to the windmill settlement. You'll be ambushed by some more Goblins near a raised house to your left. After you dispatch them, you can find a wooden chest near the house containing a Fortitude Shard and 73 rupies. Across the house is another blue orb of two Cobblestones in some bushes.

As you continue to the objective marker in the windmill settlement, you'll find your first Shrouded Treasure. After you dispatch the Goblin Wolfrider, examine the blurred treasure chest to your left to get a tutorial on Shrouded Treasures. These are special chests that you can only open after completing a mini-game of sorts entailing the collection of mirage stones within a set time limit. After you collect all the mirage stones you'll be automatically transported back in front of the golden treasure chest, containing Attack Power II and 1397 rupies.
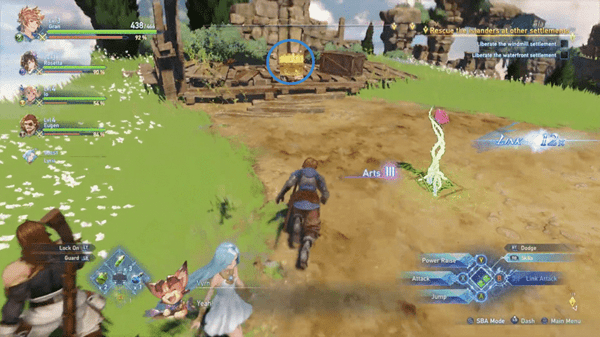
Head back across the Shrouded Treasure and head back up the ruins. Turn right after the first set of stairs to find a wooden chest containing four Fortitude Shards and 79 rupies. Head all the way to the top this time to find a high hill overlooking the plains. You'll find a golden chest here containing a Critical Hit Rate I and 656 rupies.
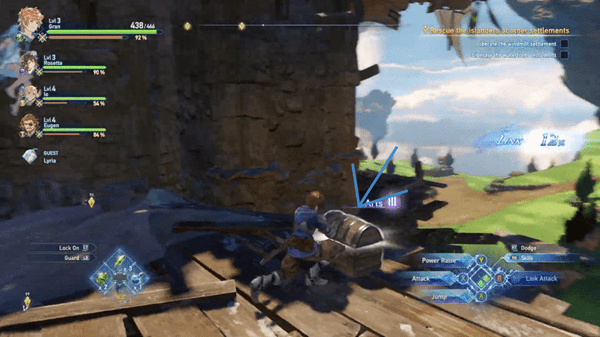
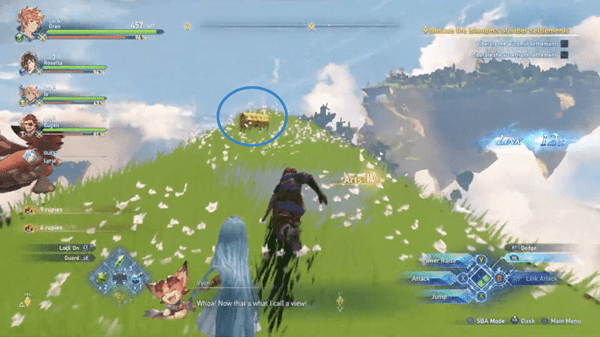
When you're ready, head to the objective marker to find the windmill settlement besieged by Goblin Witch Doctors, guarded by some Goblin Tankers. Both are weak to the water element so Katalina can make quick work of them. Afterward, jump to the top of the burning house to the left of the makeshift cart that the prisoners were tied on to check a blue orb and obtain a Valley Bloom. Turn around and head back down toward a windmill to find another blue orb and pick up another Cobblestone.

Turn around to find an Omen Stone on your right at the edge of the hill. These are stones with a red hue that when interacted with start a challenge wherein players will have to defeat empowered Enemies before the time limit runs out, and then a stronger opponent after that, in exchange for good rewards. Past it will be another burning house you can get to the top of by jumping, for a wooden chest containing a Rafale Coin and 73 rupies.
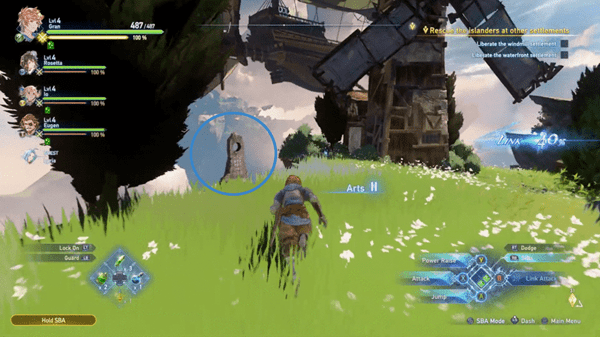
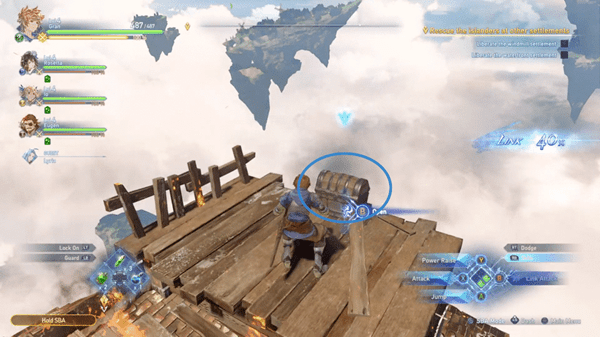
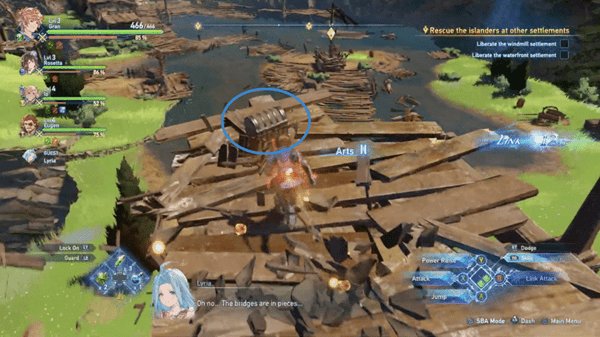
When you're ready, head back to the main center road. You can head back to the Hallowed Ground first and heal up if you need to. Head down the path to the right first to find some Goblin Stormers around a campfire. They're guarding a wooden chest on the broken bridge right past them. Ultimately, you'll now need to follow the objective marker down to the waterfront settlement. As you do, you'll find a blue orb as the path branches out to the left. Pick it up for a Whorlshroom. If you follow this path across the bridge to the end you'll find some Enemies and then you can jump to the top of a house again to find two Tempestones as you examine another blue orb.
Jump down from here to get to the waterfront settlement where some villagers have been tied up again. This time you'll be pitted against some Goblin Archers and a few Goblin Wolfriders. They're weak to Rackam's fire element so he'll be able to fight back against them easily. Be mindful of the laser lines that telegraph where their arrows will fly toward. When you clear them small fry out, a Goblin Soldier will try to come at you. This one's weak to Gran's attacks, but it's a bit larger than the rest. Watch out for when it glows red and make sure to dodge out of the way as he spins around to attack. He'll be alone though, so it'll be easy to build up his stun gauge and keep the pressure on.

After you defeat it, go the the captured villagers and free them. When you regain control, head to the small waterfall to find a golden chest behind it, containing an Attack Power I and 658 rupies. On the same side of the waterfall, toward the exit arch, jump on top of the structure to find a silver chest containing a Glitterstone (S) and 185 rupies.
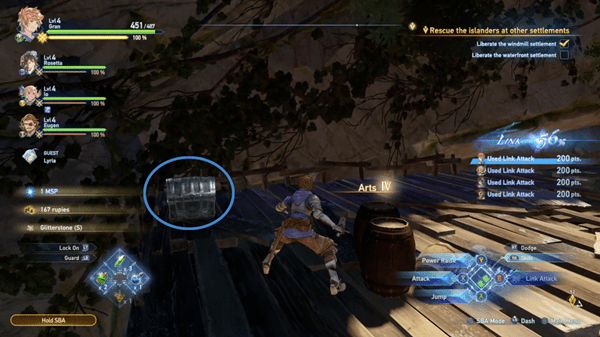
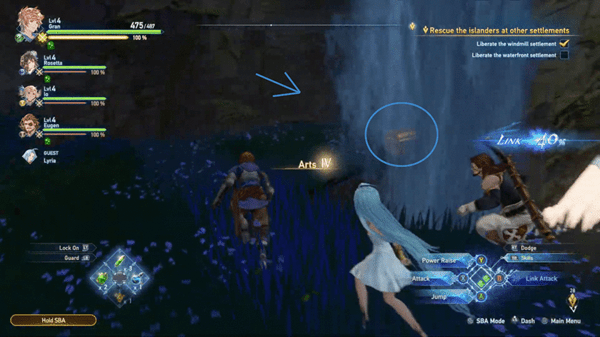
After freeing the villagers in the Waterfront Settlement, you can find another Shrouded Treasure just across where the villagers were being held captive.
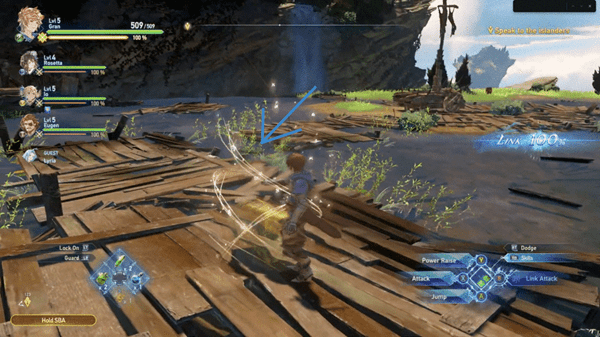
Flying on the ship, Rolan will find some more islanders running from Goblins so you should make your way to them post-haste. As you follow the objective marker, look to the left toward the burning windmill settlement to find a wooden chest containing a Wind Shard and 74 rupies.
Head to the objective marker and fight through the Goblins to get to the villagers. You'll be fighting a group of Goblin Stormers first and then three of the large Goblin Soldiers, so use what you've learned so far and give them a good beating. Your best bet is to pile on just one target, just as you dispatched the Goblin Soldier from the waterfront settlement.
When you're done you can speak to the villagers. However, before you do, you can find another Omen Stone here if you turn around and look to your right. This one will have you fight some empowered versions of the Goblin Archers you've fought so far, in addition to Goblin Pyromancers, Goblin Troopers, and Mud-Covered Swordsmen. You'll need to defeat them within a set period of time, so lay on your strongest attacks. Skybound Arts are essential here to hit as many of them as you can in a singular attack. After you slay them, you'll need to defeat a Rowdy Bord, but with no time limit this time. It's essentially a stronger version of the Goblin Soldier, but with way higher health and damage, so employ the same tactics but try to avoid getting hit as much as possible. If any of your party members die, revive them as soon as you can but time it right to keep avoiding damage. If you're successful with this challenge, a golden chest will appear containing Health II and 1407 rupies. Speaking to the villagers before examining the stone will have you skip to the next location immediately.
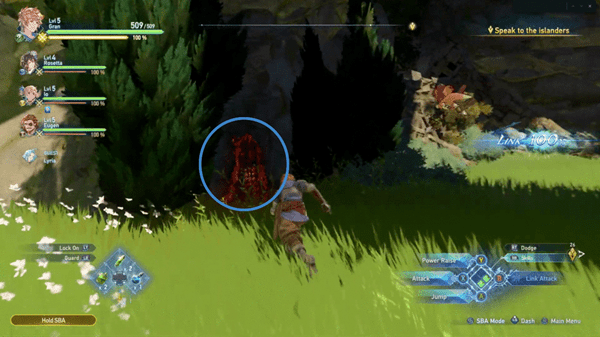
You can now move forward to speak to the villagers. They'll understandably be mostly frightened, but hearing Rolan's voice through the communication device will assure them of their safety. Unfortunately, there are more villagers that got taken deeper into the Goblins' territory. Naturally, the party will resolve to rescue them as well.

Storming the Fortress
You'll be automatically transported to Zeghard Fortress to rescue the captured islanders. Move forward to find a Hallowed Ground you can use if you need to, along with Sierokarte. Sierokarte makes it so that you can buy Items and access the Blacksmith whenever you're near a Hallowed Ground. However, this feature is just mentioned in this demo but is not actually accessible. Head toward the objective marker to find a blue orb you can pick up for a Whorlshroom. When you're ready, approach the edge for a scene.
It seems like you've stumbled into some kind of arena for the Goblins and they've let loose quite a contender for you to fight. This will be the Boss fight for this Main Quest so be ready with everything you've got.

Boss Fight: Greatshield Madbeat
This fight gives you a taste of what colossal Boss fights will be like for this game. You'll find their large health pool right at the top of the screen, as well as a Mode meter. Hitting the Greatshield Madbeat, aside from damaging its health, will also fill up the yellow Mode meter. As with any of the Enemies you've fought, it'll still have a Stun gauge so pile on the hits and keep the Link Attacks going for maximum damage. Greatshield Madbeat can charge with its shield and unleash an attack where it jumps up high into the air to crash into the ground, so keep yourself nimble and be ready to dodge any time you see the attacks coming. When it lets out a quick red aura, it'll lift up its shield and smash it into the ground in front of him a couple of times so be sure to dodge away.
The shield also greatly decreases damage done to it from the front so you'll want to keep trying to reposition behind it to deal any meaningful damage. Occasionally, it will let out a roar to push everyone away while calling some minor Enemies to help him out. They can get annoying, the way flies are annoying, so promptly deal with them so you can focus on the biggie.

When it fills up, Bosses go into an empowered state called Overdrive which can have various empowering effects. Greatshield Madbeat goes into Bloodthirst mode which makes it stronger while also lessening the damage it takes from Skybound Arts. However, your hits will now deplete the yellow meter instead of building it up, including hits from your weakened Skybound Arts, so still keep piling on the damage. Once the bar is depleted, Bosses will Break and be rendered exhausted and immobile, and so vulnerable to your biggest attacks. Repeat this cycle until the beast finally goes down.
Without their big bad, the Goblins will run away scared, and the party notes the harsh winds they encountered all throughout the fight. Lyria and the others determine that Tempeal's primal beast might be the real root of this problem and resolve to solve it.
Chapter 2: Tempest on the Horizon Quest Notes and Tips
Notes, Tips, and Other Trivia for the Chapter 2: Tempest on the Horizon quest in Granblue Fantasy Relink go here.
Chapter 3: Creation of the Stars is a Main Quest in Granblue Fantasy Relink. Players are tasked to put a stop to the primal beast's rampage in the Tempeal area. Upon reaching the altar, they fight against the Primal Beast, Furycane. The Skyfareres emerge victorious, but a mysterious group emerges from the clouds and surrounds the party. The Skyfarers are no match for the Mysterious Swordsman, and the group abducts Lyria in the process. Main Quests in Granblue Fantasy Relink are primarily tied to the story or main campaign of the game which requires a player to complete it to progress story-related events, unlock more game features, discover new locations, and more. This page covers guides, quest objectives, and a complete walkthrough for the "Chapter 3: Creation of the Stars" main quest in Granblue Fantasy Relink.
General Information
- Previous: Chapter 2: Tempest on the Horizon
- Next: Chapter 4: Skies Forever Blue
- Bosses: Furycane
- Location: Mines of Tempeal / Halewind Altar
Quest NPCs
Quest Bosses
Quest Enemies
All Items & Rewards
Weapons
- N/A
Sigils
Treasure
- Tempestone
- Prism Chip
- Valley Bloom
- Cobblestone
- Whorlshroom
- Glitterstone (S)
- Fortitude Shard
- Fortitude Crystal (S)
- Standard Refinium
Key Items & Other
- Miner's Meeting Minutes
- Tempeal Disaster Report
Enemy Drops
- Rupies
Quest Rewards
Chapter 3: Creation of the Stars Quest Information
Chapter 3: Creation of the Stars Quest Description
Rolan drops off the Skyfarers near the primal beast's rampage. The party needs to stop the primal beast before it ultimately destroys the nearby village. The Skyfarers don't know that the primal beast isn't the only one waiting for them at the altar.
Chapter 3: Creation of the Stars Quest All Chests Locations
- From the starting area, turn right and go near the edge of the broken bridge, you'll spot a chest there, open it to obtain a Prism Chip, some rupies, and 1 MSP.
- Follow the quest marker and along the way you'll find a chest inside a small hut that contains a Rafale Coin and some rupies.
- Complete the first Omen Stone challenge to receive a Gold Chest. Opening this chest will reward you with Attack Power II, some rupies, and 5 MSP.
- Continue following the quest marker and as you reach the tracks, make your way up the platform on your right, there's a chest at the top that contains a Health I Sigil and some rupies.
- After lowering the second bridge, take the path on the right before crossing the lowered bridge and open the chest to obtain a Glitterstone (S), some rupies, and 2 MSP.
- After escaping the collapsing bridge, you'll immediately see a chest nearby a purple loot (Miner's Meeting Minutes). Opening the chest reward you with Fortitude Shard x10, some rupies, and 1 MSP.
- After opening the shrouded chest, turn around and drop down on the area to your left, turn around and you'll see a gold chest in a corner. Open the chest to receive Fortitude Crystal (S) x3, some rupies, and 3 MSP.
- After exiting the cave and reaching Halewind Altar, you'll find a chest just ahead containing Fortitude Shard x10 and some rupies.
- A silver chest can be found next to a Hallowed Ground upon reaching Halewind Altar. The chest contains an Attack Power I, some rupies, and 2 MSP.
Chapter 3: Creation of the Stars Quest All Shrouded Treasure Locations
- After escaping the collapsing bridge and making it safely inside the cave, follow the path ahead and turn right, you'll spot the shrouded chest behind some barrels. This chest contains a Critical Hit Rate II, some rupies, and 2 MSP
Chapter 3: Creation of the Stars Quest All Omen Stone Locations
- Once the primal beast emerges through the altar, turn right and you'll immediately spot the Omen Stone from afar near the tracks.
Chapter 3: Creation of the Stars Quest All Wee Pincer Locations
There is a total of 3 Wee Pincers in this chapter.
- After picking up the chest inside the small hut, continue moving forward. Before following the quest marker, continue moving forward and make your way to the left-most area, you'll find a Wee Pincer around the corner.
- After lowering the first bridge, you'll encounter some Goblin enemies. After clearing the enemies, check the area under the broken tracks before you lower the second bridge. You'll find another Wee Pincer on the ground near the edge.
- After making it through the collapsing bridge, follow the tracks ahead. On the right side, you'll spot a shrouded chest behind some barrels. Climb up the platform and you'll also see a Wee Pincer behind one of those barrels.
Chapter 3: Creation of the Stars Quest All Slimes
- You can find a slime nearby the first chest you first looted. From the chest, turn around and move forward, and take a u-turn, you'll find a Slime next to the wall near a watchtower.
- From the first Omen Stone, climb up the stairs near it and turn right, you'll find a Slime near the tracks beside some boxes.
- After picking up the Miner's Meeting Minutes archive, check the left side of the area and you'll spot a Slime there.
Chapter 3: Creation of the Stars Quest All Archives
- After escaping the collapsing bridge, inside the cave you'll find an archive called Miner's Meeting Minutes. Just follow the tracks ahead and you'll immediately spot a purple loot on the ground.
- After your encounter with the mysterious group who abducted Lyria, check the bedstand beside you to pick up the Tempeal Disaster Report.
Chapter 3: Creation of the Stars Quest Objectives
- Stop the primal beast's rampage
- Escape the collapsing bridge
- Climb the shaft
- Escape the shaft
- Stop Furycane's rampage
- Defeat Furycane
- Defeat the mysterious man
- Meet up with your crew
GBF Relink Full Chapter 3: Creation of the Stars Walkthrough
Locate the Primal Beast
Upon starting the quest, the ship will drop you off at the Mines of Tempeal. From the get-go, you'll immediately spot a Hallowed Ground in front of you. There are a couple of nearby loot and a chest around the area that you can check before you proceed. On the right side, you can pick up a Tempestone, and on the far right you can pick up a Cobblestone x2.
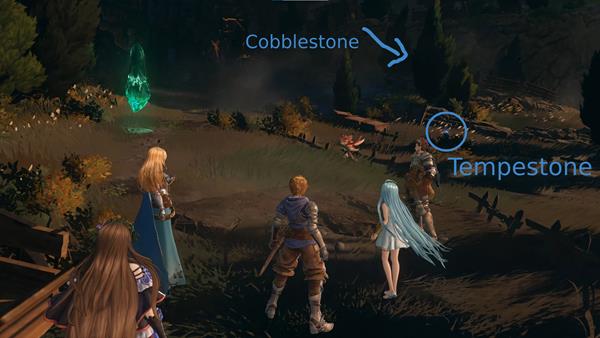
There's also a chest at the edge of the broken bridge nearby, open it to obtain a Prism Chip, some rupies, and 1 MSP. On the left corner, you'll spot another loot behind some breakable objects. Attack the breakable objects to get some extra rupies, then pick up the loot to obtain a Valley Bloom and some rupies.
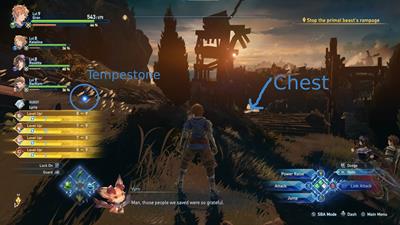
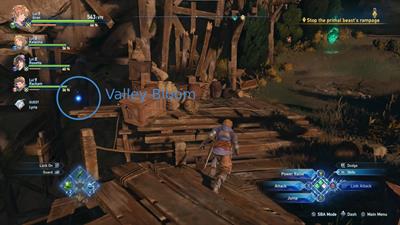
After picking up the loot near the Hallowed Ground, continue following the quest marker and pick up the loot on the left side along the way to receive Whorlshroom x2. Continue pressing forward and you'll spot a chest inside a small hut. Open it to receive a Rafale Coin and some rupies.
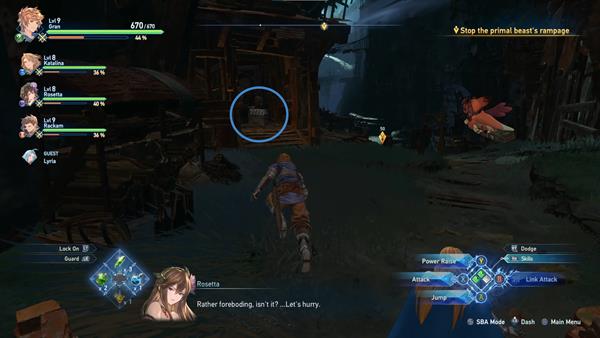
After getting past the small hut, a strong gust of wind sweeps through the air and a primal beast emerges from the altar. As you progress forward, turn right and you'll immediately spot an Omen Stone from afar near the tracks, and across it is another loot you can pick up that gives you another Tempestone.
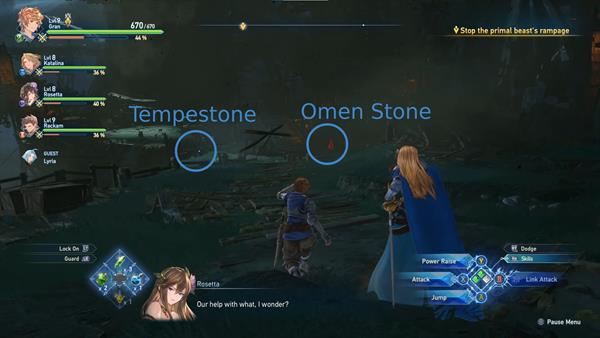
From the Omen Stone, climb up the stairs next to it and follow the tracks. As you reach the quest marker, make your way up on the platforms on your right before you proceed with the main objective, there's a chest at the top that contains a Health I Sigil and some rupies.
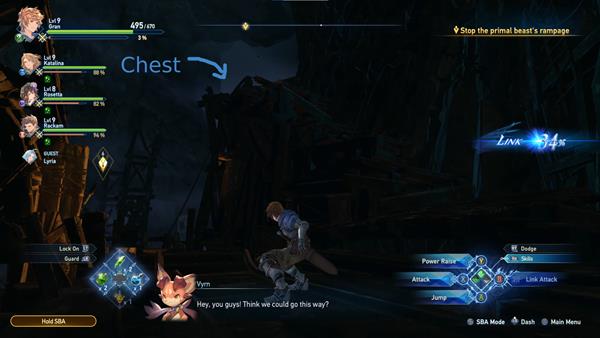
After opening the chest, drop back down and pull the lever to lower the bridge. Cross the bridge and defeat the enemies waiting for you. You'll have to defeat 2 Goblin Stormers and 2 Goblin Witch Doctors. After clearing the enemies, check the area under the broken tracks before you lower the second bridge. You'll find another Wee Pincer on the ground near the edge. Now follow the quest marker and pull down another lever to lower another bridge. But before you cross the bridge, take the path on your right and open the chest you'll immediately spot on the tracks. Opening it will reward you a Glitterstone (S), some rupies, and 2 MSP. Be wary that a Goblin Soldier will drop from above after opening the chest.
After dealing with the Goblin Soldier, cross the bridge to trigger a short cutscene. As you make your way through the tracks, the primal beast blasts through the bridge, destroying parts of it and making it slowly collapse. You are then separated from your party, and you'll have to escape the collapsing bridge as fast as you can and make it safely through the cave. Just follow the quest marker and don't stop running to reach the cave.
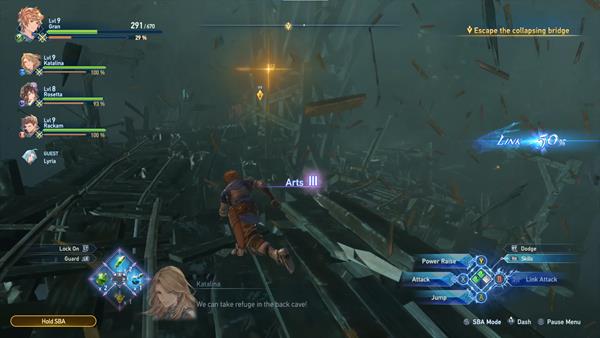
After making it through the collapsing bridge, you'll immediately see a purple loot on the left side of the path. Pick it up to obtain the Miner's Meeting Minutes document. Just next to it is a chest that contains Fortitude Shard x10, some rupies, and 1 MSP. On the right side, you'll find a Shrouded Treasure Chest hiding behind some barrels. Collecting the mirage of stones within the time limit will reward you with a Critical Hit Rate II, some rupies, and 2 MSP. You can also pick up a Wee Pincer beside the shrouded chest.
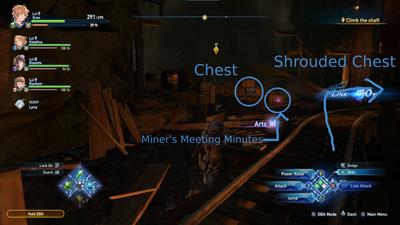
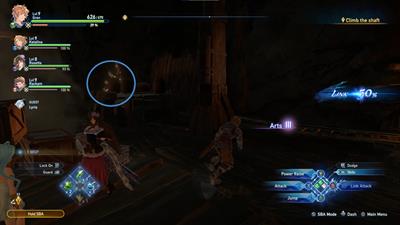
Before proceeding to the main path, drop down on the left and turn around, there's a gold chest there containing Fortitude Crystal (S) x3, some rupies, and 3 MSP.
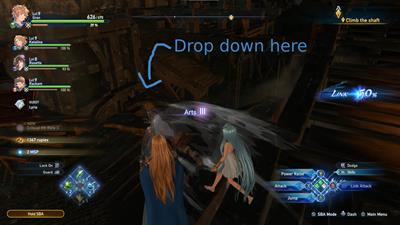
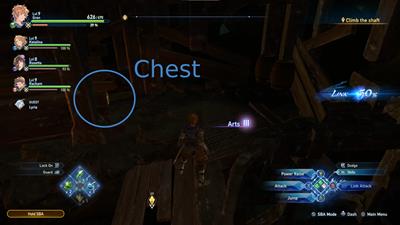
Now make your way back up and continue climbing the shaft. Once you reach the quest marker, the primal beast once again blasts through the area, making the structural integrity of the cave fall apart. Run as fast as you can til you reach the next quest marker. There will be some goblin enemies along the way but you can completely run past them and make your escape.
Boss Fight: Furycane
After exiting the cave, you'll find yourself at the Halewind Altar. Continue following the quest marker and just ahead you'll spot a chest. Open it to receive Fortitude Shard x10 and some rupies. Further ahead is a Hallowed Ground and next to it is another chest, this one contains an Attack Power I, some rupies, and 2 MSP. Make sure to use the Hallowed Ground to restore your party's health and save the game.
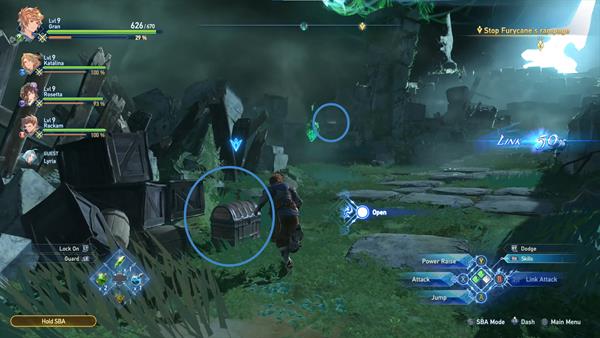
Now continue following the path ahead until you reach the altar. Once you reach the quest marker, a short cutscene will play out, and the primal beast will reveal its true form. Now you'll have to fight the boss called Furycane. This boss has a lot of Wind-based attacks, and it is weak against Fire. Just like most Bosses, this too will have an Overdrive Mode once the yellow meter below its HP fills up, it'll have access to more powerful moves, make your Skybound Arts weakened, and take less damage overall.
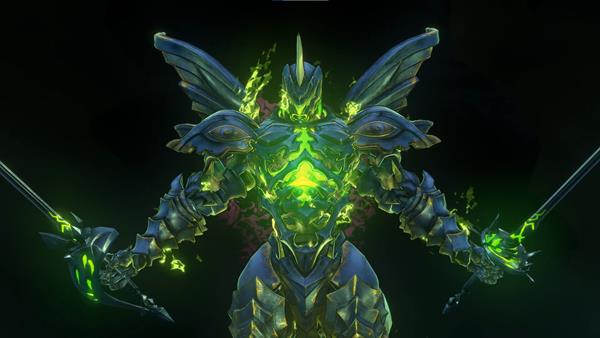
Once it enters into Overdrive, be cautious of the move called Savage Cyclone, this attack is where the Furycane jumps into the air and slams down on the ground, with the impact creating a powerful shockwave that constantly pushes anyone away from itself. After a brief moment, it summons multiple powerful cyclones that swirl aggressively throughout the entire arena.
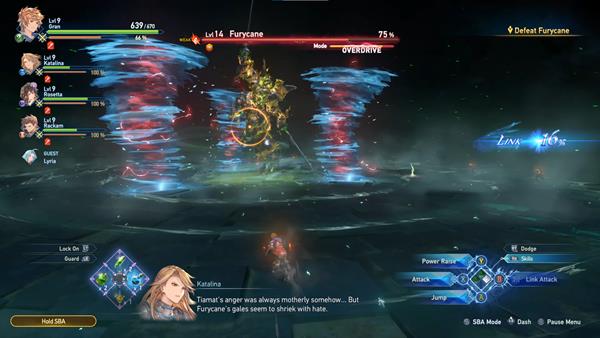
It'll also have a move called the Shrieking Squall where it transforms to its previous form and flies around the area, it then charges down in a straight line to knock anyone who gets in its way. You'll see a red line on the ground indicating where the Furycane is headed for this attack. You cannot hit the Furycane with melee attacks at this point, but after a few seconds, Lyria will summon a barrier where you'll need to go inside and shield yourself from the Furycane's attack. As it charges toward your party, the barrier breaks but it also stuns the Furycane. Lyria then summons a Bahamut and strikes the Furycane, dealing massive damage.
The Furycane then flies away for a brief moment, it then uses Transfiguration to transform into a different form that floats around, this time it only wields a single long sword. It has a move called Fluttersword where it slams its weapon onto the ground and the impact creates a cyclone that travels throughout the arena, similar to the Savage Cyclone move.
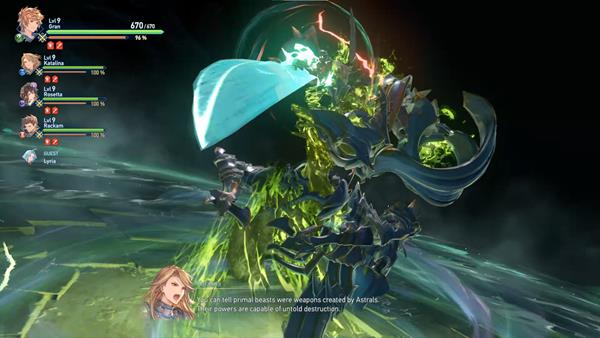
The move Ring of Death will suck everyone in the area, drawing everyone closer to the Furycane. There will be red circles marked on the ground indicating where a blast will occur. Try to avoid the marked area.
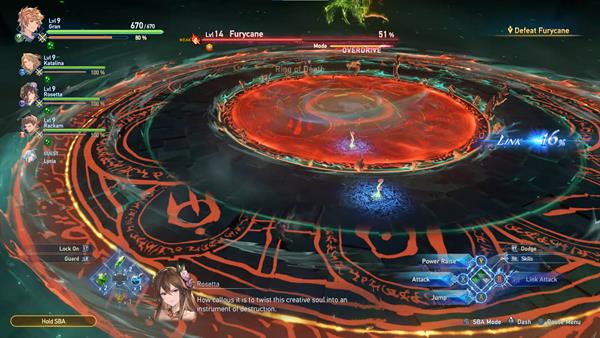
Most of its moves will be executed more than once throughout the boss fight, even the special moves performed during Overdrive Mode. Get a hang of the attacks, anticipate, and dodge precisely. Keep stacking up damage until you completely reduce its health to zero. After defeating the Furycane, you'll receive a Standard Refinium, Prism Chip, Fortitude Crystal (S) x3, Health I, and 10 MSP.
A Mysterious Swordsman Appears
Just as you defeat the Furycane, a short cutscene will play out. Lyria will unwillingly absorb the Furycane and a giant ship appears in the area. An army of soldiers march out of the ship and surround your party. They try to take away Lyria, but of course, your party will not let that happen. A Mysterious Swordsman then steps in and says he'll end the fight in 90 seconds.
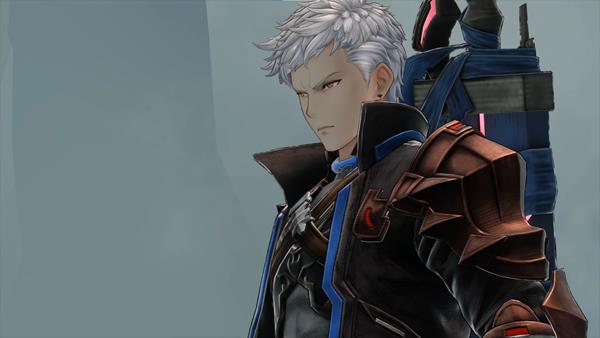
You will now enter into another boss fight but take note that you cannot win this fight, and will end with your party losing no matter what you do. He will cut everyone down one by one until you're the only one left standing. Another cutscene will play out where it ultimately shows your party's defeat. A mysterious woman also appears on the scene and introduces herself as Lilith. It's revealed as well that the mysterious swordsman's name is Id. Ultimately, they end up capturing Lyria in the process.
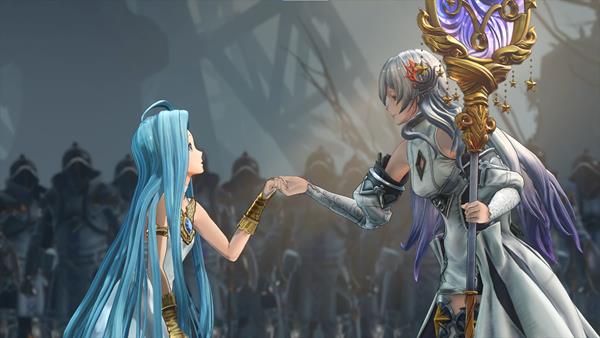
The Captain then wakes up from a nightmare and ends up on a bed with Vyrn waiting for the captain to wake up. Once you regain control of your character, check the bedstand beside you and pick up the Tempeal Disaster Report. Now meet up with your crew and discuss what happened. Rolan thinks that they took Lyria to Leautagne Island. The group that abducted Lyria is called The Church of Avia. Rolan insists on helping you and your crew as he cannot sit idly by after what happened. After the meeting with your crew along with Rolan, this quest is completed and officially starts Chapter 4: Skies Forever Blue.
Chapter 3: Creation of the Stars Quest Notes and Tips
Notes, Tips, and Other Trivia for the Chapter 3: Creation of the Stars quest in Granblue Fantasy Relink go here.
Chapter 4: Skies Forever Blue is a Main Quest in Granblue Fantasy Relink. This Main Quest will show the battle between Gran and the forces of Avia in the Leautagne Airspace. Main Quests in Granblue Fantasy Relink are primarily tied to the story or main campaign of the game which requires a player to complete it to progress story-related events, unlock more game features, discover new locations, and more. This page covers guides, quest objectives, and a complete walkthrough for the "Chapter 4: Skies Forever Blue" main quest in Granblue Fantasy Relink.
General Information
- Previous: Chapter 3: Creation of the Stars
- Next: Chapter 5: Shadows in the Snowscape
- Bosses: Gallanza
- Location: Leautagne Airspace
Quest NPCs
- N/A
Quest Bosses
Quest Enemies
- Aviaeth Saber
- Aviaeth Lancer
- 20mm Ether Autocannon
- Droita Balsam
- Aviaeth Flagbearer
- Aviaeth Archer
- Droita Mother
All Items & Rewards
Weapons
Sigils
- N/A
Treasure
Key Items & Other
Enemy Drops
Quest Rewards
Chapter 4: Skies Forever Blue Quest Information
Chapter 4: Skies Forever Blue Quest Description
The party manages to reach the Avia Mothership and is in for an intense battle in the skies of Leautagne in attempts to rescue Lyria.
Chapter 4: Skies Forever Blue Quest All Chests Locations
- Do take note that on the last battleship, you'll find a golden chest on the front of the ship to the right guarded by 2 Droita Mother enemies which contains a Wheellock Axe.
Chapter 4: Skies Forever Blue Quest All Shrouded Treasure Locations
- There is no Shrouded Treasure for this quest.
Chapter 4: Skies Forever Blue Quest All Omen Stone Locations
- There is no Omen Stone for this quest.
Chapter 4: Skies Forever Blue Quest All Wee Pincer Locations
- A Wee Pincer can be found at the first battleship you enter just in the top left corner. After defeating the Aviaeth Lancer enemies that intercept you on the bridge connecting to their battleship, enter and then head toward the upper left section of the ship. The Wee Pincer can be found on the deck of the ship. This is the only Wee Pincer for this chapter.
Chapter 4: Skies Forever Blue Quest Quest All Slimes
- There are no Slimes for this quest.
Chapter 4: Skies Forever Blue Quest Quest All Archives
- Once you can start exploring the grandcypher, immediately turn left and pick up an archive entitled Installation Request near an Elther cannon.
- Another Archive entitled Mission Orders can be found next to a Control Unit at one of the Battleships you enter.
Chapter 4: Skies Forever Blue Quest Objectives
- Get ready and head to the dock.
- Speak with Rackam.
- Fight off Avia's Forces
- Chase the red ship
- Fight back with an ether cannon
- Neutralize the enemy ships
- Escape from the enemy ship
- Chase the red ship
- Destroy the grapnels
- Chase the red ship
- Neutralize all enemy ships
- Escape from the enemy ship
- Defeat Gallanza
GBF Relink Full Chapter 4: Skies Forever Blue Walkthrough
At Folca
The quest begins with The Captain and his crew preparing to head to the dock. Your first objective is to prepare by talking to each of your crew, starting with Katalina and Eugen, who is inside the house where you first spawn. Speaking with Katalina gives you the dialogue options to encourage her that you will be able to save Lyria. She will agree with you and say that no matter what happens, she won't give up on saving her. Speaking with Eugen will have him apologizing for not taking things seriously enough. He'll admit that when he first saw that red ship, he already had a bad feeling about it, yet he ignored the warning bells. He'll then begin to say that he too will not give up on Lyria and will not stop until he brings her home.
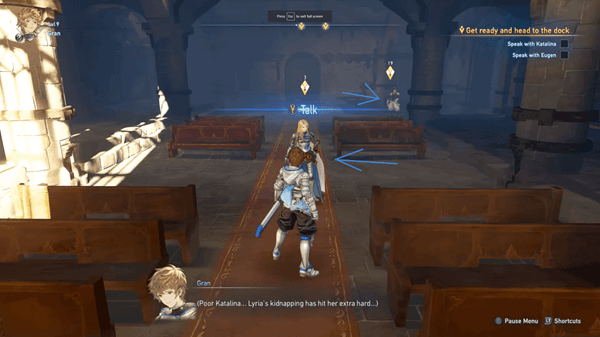
Afterward, exit the Church and speak with the others. Rosetta will be by the stairs before you, lost in thought. She'll ask you how you're feeling, and you can reply to her by saying that you're pretty good. She'll acknowledge your confidence and be glad you've already healed up. Next, Io will be down the stairs of Folca where you spoke with Rosetta. Io will ask you if you remember the promise she made with Lyria, where they will both ask Rosetta to teach them how to put on makeup. She'll continue to speak about how Lyria must be scared at the moment and that you all need to save her. Shortly after speaking with Io, Sierokarte will interrupt by saying that he heard what had happened to Lyria and will give you a crewmate card. A crewmate card will let you call specific allies of your choosing to join you in battle. Afterward, you'll see Rackam up the staircase in front of you. Rackam will seem very worried about Lyria and will ask The Captain if you think they're gonna do anything to Lyria. Just reply that you hope not, and Rackam will say that he thinks that they do not intend to hurt her based on what he saw. He'll be glad that you all know where the Red Ship is going.
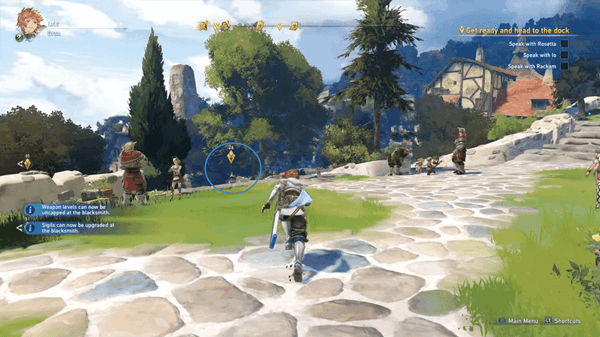
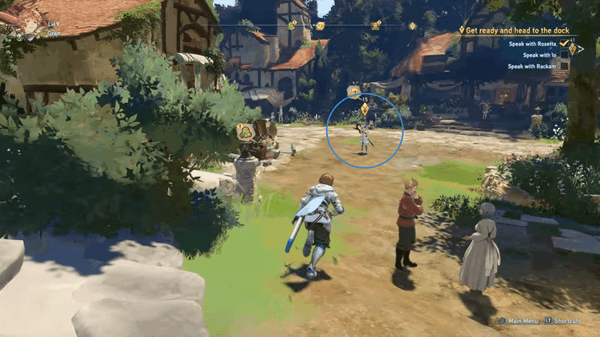
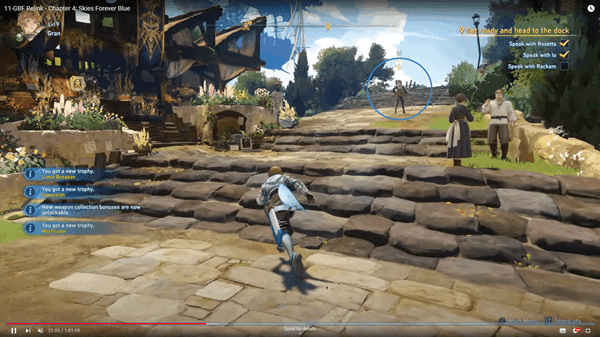
Once you finish speaking with your crew, head to the docks and speak with Rolan. Rolan will immediately ask if you're ready to take off. You can either choose "prepped and ready" or if you still need to do something within Folca. As soon as you board the ship, there will be noticeable changes and upgrades to it. Rackam will be shocked with the new Elther Cannons and will tell Rolan that it's a recipe for disaster. Rolan will then explain to Rackam the details of the new cannons, and Io will be a bit surprised that Rolan is a weapons maniac.
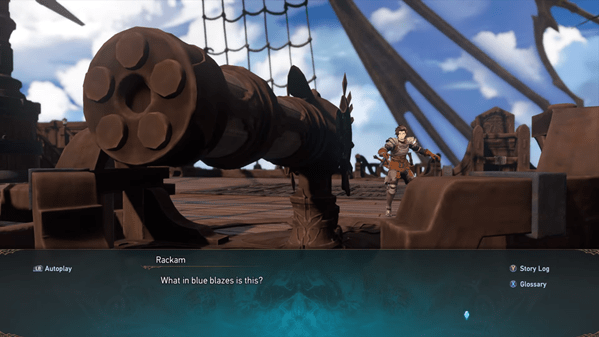
Katalina will then ask The Captain how the Life Link between him and Lyria is. You can either answer that it seems okay or if you're not optimistic. Vyrn will agree with you, and Rosetta will conclude that if The Captain is healthy, then Lyria is healthy as well. Eugen will agree and will suggest that since Lyria was referred to as a shaman, he doubts that they will harm her. After everyone agrees with the statement, Rolan will then announce that the next destination is Leautagbe Island and your target will be Avia's flagship, which is Ameretat.
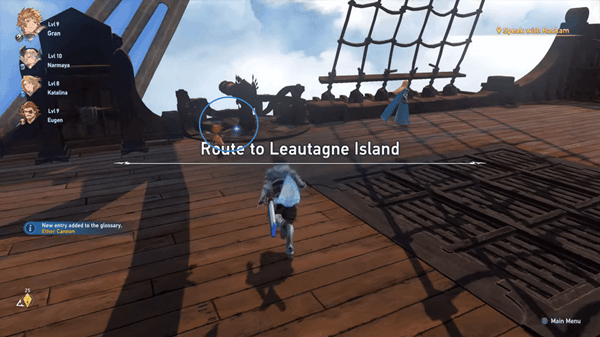
Once you can start exploring the ship, immediately turn left and pick up a purple orb near an Elther cannon.
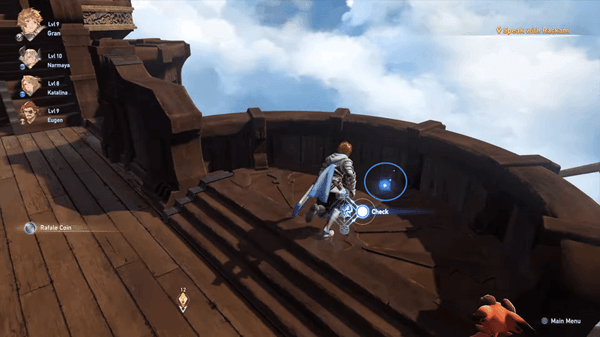
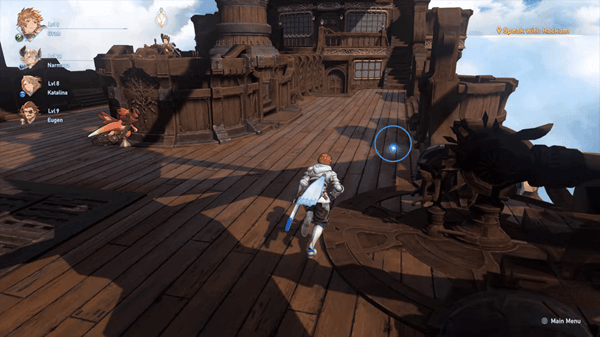
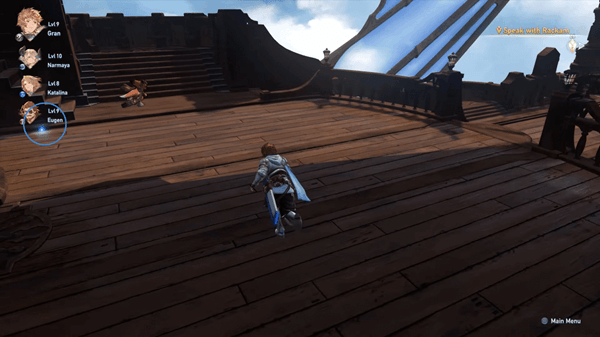
You'll also find 2 blue orbs near Eugen to his left which drops a Rafale Coin and a Prism Chip. Finally, the last orb is just behind the ship near Rackam on the upper deck which contains a Rafale Coin.
At Leautagne Airspace
Once you are done exploring the Grandcypher, speak with Rackam so you can depart and start the next objective. A cutscene will play in which the Grandcypher is chasing the Aviaeth ship from behind. The enemy ship will fire a blast, and then Rackam will try to evade but fails. Rackam jumps out of the pilot bay which causes the Grandcypher to fly without the pilot. Rolan, seeing this, will take over and try to pilot the Grandcypher. After a while, smaller enemy ships will try to attack the Grandcypher, and the crew members will do their best to fend them off. Afterward, the smaller enemy ships will drop enemies into the Grandcypher which will start a battle. The enemies will consist of Aviaeth Saber, who are equipped with a sword and a small shield.
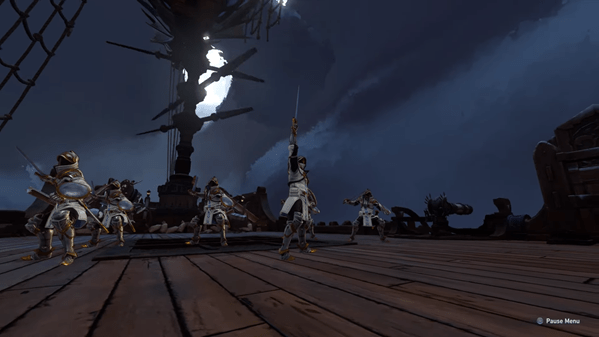
Once the area is cleared of enemies, a bigger enemy ship will appear to the right of the Grandcypher. You'll need to use the Ether Cannons to combat the ship. The ether cannon is quite easy to use. You can fire normal rounds or use a charged shot for heavier damage. The cannon also overheats when you continuously use it, so expect a bit of cooling delay while using it.
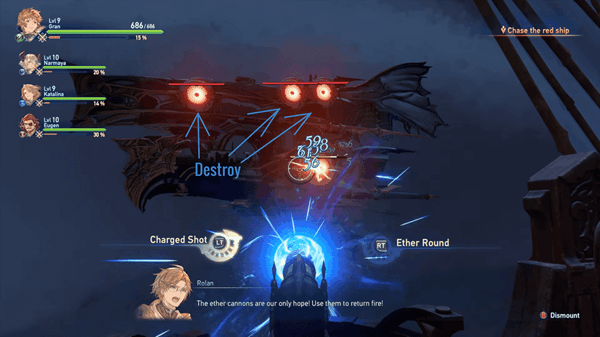
Once you destroy the guns of the enemy ship, it will then try to ram the Grandcypher. Upon ramming your ship, it will drop a bridge which will connect their ship to yours. You'll then see enemy Aviaeth Lancer charging towards the ship. Once the charging enemies have been defeated, board their ship and destroy the remaining enemy Ether Autocannons. The Aviaeth will then deploy a new set of enemies which are Droita Balsam. These are floating droids that have both melee and ranged attacks.
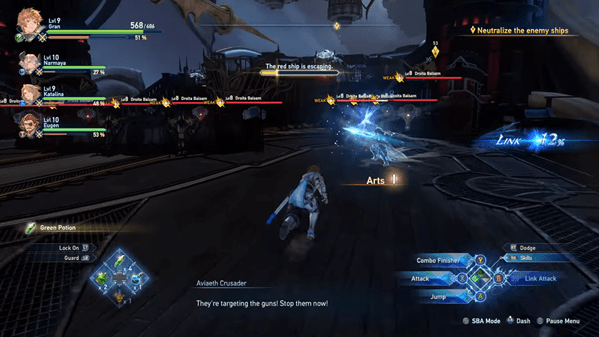
Once the enemies have been defeated and you have destroyed the remaining Autocannons, head to the front of the enemy ship and destroy the control unit.
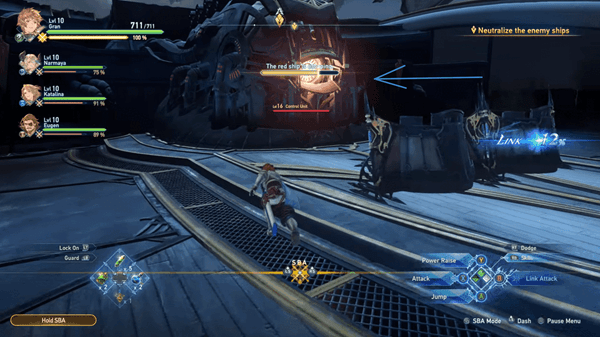
This will cause the ship to start falling, and you'll need to escape. Follow the waypoint to the bridge that connected your ship to the enemy ship and cross. Once you cross, a cutscene will play out of another battleship that will appear. This battleship will hook an anchor to yours. You'll then need to destroy the 2 anchors that are hooked to your ship. After destroying the anchors, a few more Droita Balsam will appear.
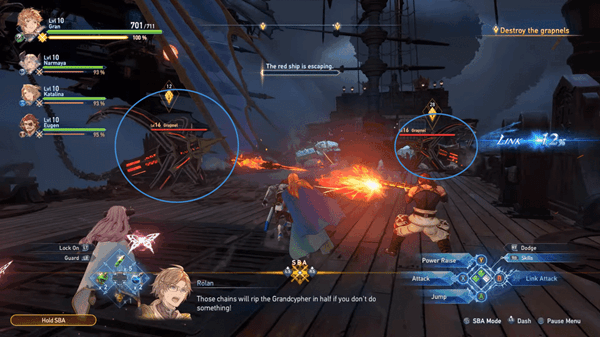
Afterward, the whole enemy fleet will begin to attack you, and a new set of anchors will attach to your ship. Destroy the anchors first and then more Aviaeth enemies will board the ship to attack you. Once you've dealt with the enemies that attempted to board, you'll need to neutralize the last 2 battleships to your right and left. Your Ether Cannons have been destroyed, so you'll need to destroy the 2 battleships the same way you did with the first one earlier, by boarding the 2 ships and destroying their guns and control unit.
Do take note that on the last battleship, you'll find a golden chest on the front of the ship to the right guarded by 2 Droita Mother enemies which contains a Wheellock Axe.
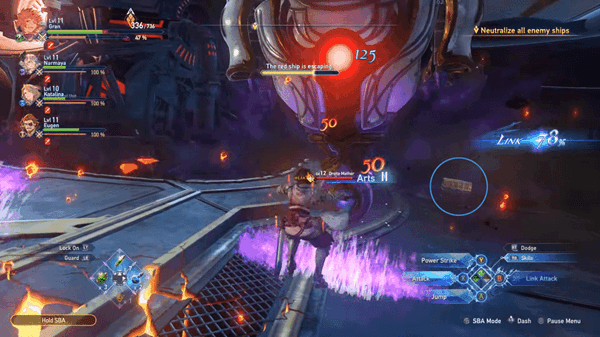
Once you destroyed the control unit of the last ship, slide down the enemy ship to escape and land on the Grandcypher. Afterward, a cutscene will play out that shows the crewmembers ready to approach the mother ship.
Boss Fight Gallanza
But before they can get close, a lone enemy will jump to the Grandcypher which gives an aura of a boss. This boss is named Gallanza.
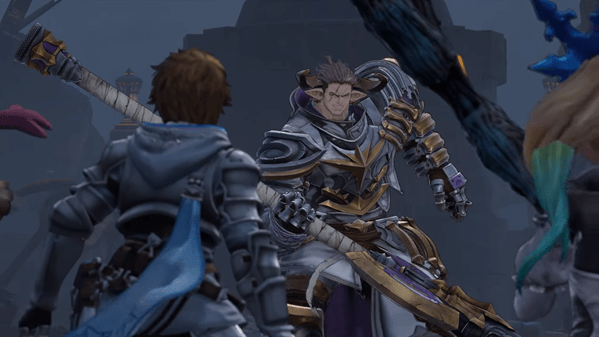
Once you defeat Gallanza, the boss will drop a Fortitude Crystal (S), an Earth Shard, and a Standard Refinium. This will also trigger a cutscene where Gallanza laughs and is shown to be thrilled by the battle. Gallanza says that if he falls in this duel, then it will have fulfilled his life. Suddenly, a mysterious voice will speak, stating that Gallanza has had quite enough entertainment, hinting a signal to retreat. Gallanza refuses but appears to be startled by the mysterious person. The mysterious person will then tell Gallanza what he will do if he ends up lying on the ground and how he will explain it to their lady. Gallanza will then tell The Captain that the next time they meet, it will only be one man standing. Gallanza will then proceed to throw his big spear towards the mother ship and will jump on it, making it transportation. The crew will also notice that the mysterious lady has disappeared, and Rosetta will observe that the lady has quite the talent, suggesting that they should keep her in mind. This will mark the end of this quest.
Chapter 4: Skies Forever Blue Quest Notes and Tips
Notes, Tips, and Other Trivia for the Chapter 4: Skies Forever Blue quest in Granblue Fantasy Relink go here.
Chapter 5: Shadows in the Snowscape is a Main Quest in Granblue Fantasy Relink. This quest shows how the party makes their way to the monastery to seek aid from Rolan's acquaintance to help save Lyria from the Church of Avia. Main Quests in Granblue Fantasy Relink are primarily tied to the story or main campaign of the game which requires a player to complete it to progress story-related events, unlock more game features, discover new locations, and more. This page covers guides, quest objectives, and a complete walkthrough for the "Chapter 5: Shadows in the Snowscape" main quest in Granblue Fantasy Relink.
General Information
- Previous: Chapter 4: Skies Forever Blue
- Next: Chapter 6: In Search of Hope
- Bosses: Nazarbonju, Scarmiglione, Managarmr, Id (Boss)
- Location: Mt. Neigelith, Leautagne Is.
Quest NPCs
Quest Bosses
Quest Enemies
- Frosty Bones
- Slime
- Withered Holy Knight
- Silverslime
- Cyaegha
- Neigelith Elemental
- Aqua Gyre
All Items & Rewards
Weapons
Sigils
- Glaciate Resistance I
- Attack Power II
- Stun Power II
- Health II
- Health III
- Attack Power I
- Attack Power III
Treasure
- Snow Pillow
- Ice Spire
- Frosted Flower
- Eternal Snowflake
- Standard Refinium
- Rafale Coin
- Fortitude Shard
- Water Shard
- Bizarre Wing
- Fortitude Crystal (S)
- Prism Chip
- Glitterstone (S)
- Champion Merit
Key Items & Other
- Frozen Note
- Wee Pincer
- Sequestration's Verse
Enemy Drops
- Rupies
- Rafale Coin
- Snow Pillow
Quest Rewards
- Ice Spire x1
- Bizarre Wing x5
- Fortitude Crystal (S) x8
- Glaciate Resistance I x1
- Bleak Bone x5
- Water Shard x3
- Standard Refinium
- Champion Merit x2
- Health II
- 15 MSP
Chapter 5: Shadows in the Snowscape Quest Information
Chapter 5: Shadows in the Snowscape Quest Description
The crew makes their way to the monastery to seek aid from the overseer of Melosse Monastery, Historiath. As they continue their journey, countless obstacles come their way. The party eventually reaches their destination and finds Lyria, but something's not right.
Chapter 5: Shadows in the Snowscape Quest All Chests Locations
- From the starting point, continue following the quest marker. Before you destroy the wall of ice blocking the way, take the path down on your right, you'll find a chest entrapped in ice that contains an Attack Power I, some rupies, and 2 MSP.
- After picking up the Wee Pincer, follow the main path ahead. Before you go through with the main quest, take the path on the right and make your way up the top. Turn around and you'll see a Gold Chest entrapped in ice. Break the ice and open the chest to receive Standard Refinium, some rupies, and 3 MSP.
- From the Gold Chest, drop back down and continue following the main path. On the left side is a chest that contains Rafale Coin x2 and some rupies.
- From the Shrouded Chest, drop down and along the main path, there's a chest trapped inside an ice chunk. This chest contains Fortitude Shard x7, some rupies, 1 MSP.
- Keep following the main path and go up the stairs and cross the bridge. Once you reach the quest marker, you'll find another chest trapped in an ice chunk. This chest contains Water Shard x2, some rupies, and 1 MSP.
- From the second Hallowed Ground you encounter, you'll find a chest nearby. This chest contains Fortitude Crystal (S) x3, some rupies, and 2 MSP.
- After defeating Nazarbonju. you'll find an Omen Stone in the area. Completing the challenge will reward you with a Gold Chest that contains Attack Power III, some rupies, and 20 MSP.
- Upon reaching Snowquilt Ravine, go to the edge of the cliff on the left side, you'll find a chest behind a pillar. The chest contains a Prism Chip and some rupies.
- Once you enter the ravine, break the first giant ice block that's blocking your path, then go through the narrow path on the left, you'll find a chest trapped in an ice chunk. This chest contains Glitterstone (S), some rupies, and 1 MSP.
- In the ravine, destroy the second wall of ice blocking your path, turn right, and go up the slope. Jump across the other side and within the area you'll find three chests. The chest on the left contains Fortitude Shard x7 and soem rupies.
- In the ravine, destroy the second wall of ice blocking your path, turn right, and go up the slope. Jump across the other side and within the area you'll find three chests. The chest in the middle contains Stun Power II, some rupies, and 2 MSP.
- In the ravine, destroy the second wall of ice blocking your path, turn right, and go up the slope. Jump across the other side and within the area you'll find three chests. The chest on the right contains Fortitude Crystal (S) x5, some rupies, and 3 MSP.
- Once you make it to the top of the ravine, you'll find another frozen chest near the exit. This chest contains Fortitude Shard x7, some rupies, and 1 MSP.
- Once you exit the ravine, continue heading in a straight direction, and on the edge of the cliff is a chest that contains Water Shard x3 and some rupies.
- From the third Hallowed Ground, go up the stairs and take the narrow path on the left and continue following the path until you see a Gold Chest. Open it to receive Health II, some rupies, and 3 MSP.
- After protecting Historiath from the horde of enemies, take the path on the right before you go through the door. You'll find a chest in the area that contains Glitterstone (S), some rupies, and 1 MSP.
- Complete the Omen Stone challenge in the area where you first protected Historiath and you'll be rewarded with a Gold Chest that contains Health III, some rupies, and 10 MSP.
- Before entering the Tredame Sanctum, check the area on the left, you'll find a chest trapped in ice. Break the ice and open the chest to receive Water Shard x2, some rupies, and 1 MSP.
- On the right side near the sanctum, there's a chest that contains Fortitude Shard x7 and some rupies.
- On the rightmost part of the area near the sanctum, you'll find a chest on the cliff. This chest contains Prism Chip x3, some rupies, and 2 MSP.
- Once you enter the Felfrost Altar, check the left side of the room and you'll find a chest that contains Fortitude Crystal (S) x2 and some rupies.
- Once you enter the Felfrost Altar, check the area ahead before going upstairs, you'll immediately see a chest on the left side. Open it to receive Glaciate Resistance I, some rupies, and 2 MSP.
- Once you enter the Felfrost Altar, check the area ahead before going upstairs. Destroy the wall of ice on the right side of the area and you'll find a Gold Chest that contains Fortitude Crystal (S) x3, and a Flame Rapier.
Chapter 5: Shadows in the Snowscape Quest All Shrouded Treasure Locations
- After picking up the Ice Spire, just across you'll spot a Shrouded Chest. Collecting the mirage of stones within the time limit will reward you with an Attack Power II, some rupies, and 3 MSP.
- In Snowquilt Ravine, destroy the second wall of ice blocking your path and press forward, you'll find the Shrouded Chest on the right side of the area before heading up the slope. Collecting the mirage of stones within the time limit will reward you with Health II, some rupies, and 3 MSP.
Chapter 5: Shadows in the Snowscape Quest All Omen Stone Locations
- After defeating the boss Nazarbonju, you'll find an Omen Stone in the area before you continue with the main objective.
- After protecting Historiath from the horde, you'll find an Omen Stone on the left side of the area before entering the Tredame Sanctum.
Chapter 5: Shadows in the Snowscape Quest All Wee Pincer Locations
There is a total of 6 Wee Pincers in this chapter.
- After picking up the first Frosted Flower, on the left side of the cliff is a Wee Pincer.
- From the first Shrouded Chest, continue following the quest marker. Once you reach the quest marker, there will be two paths, take the one on the left, you'll find a chest entrapped in ice. From there, jump down on the platform below. You'll find a Wee Pincer on the ground.
- From the first Gold Chest (entrapped in ice), jump back to the other side and stay at the top. Continue moving forward and on the right side, you'll find a Wee Pincer in the corner.
- From the third Hallowed Ground, continue following the quest marker. As you proceed, stick to the right side, then jump over the pile of rocks on the right side and make you way at the very top, you'll find a Wee Pincer on the edge.
- After going through the sealed door that Historiath just opened (leading to Tredame Sanctum), head straight and climb the ledge on the left side, at the top is a Wee Pincer.
- Once you enter Felfrost Altar, head to the area in front where you'll find two chests. On the left side, you'll find a Wee Pincer inside an open chest.
Chapter 5: Shadows in the Snowscape Quest All Slimes
- From the first Shrouded Chest, continue following the quest marker. Before you head up the bridge, check the left side, there's a Slime beside the pillar.
- From the first chest behind the pillar in Snowquilt Ravine, continue following the quest marker. Break the first 2 walls of ice blocking your path, then stick to the left side and break the wall of ice to open up a narrow path. Enter the area and you'll spot a Slime near an chunk of ice.
- After exiting the ravine, turn left and head straight. You'll find a Slime in the corner.
Chapter 5: Shadows in the Snowscape Quest All Archives
- After your first encounter with the Frosty Bones, you can pick up the Frozen Note document on the left side behind an ice chunk.
- Once you reach the Felfrost Altar, head up the stairs, on the fountain you'll finde the Sequestration's Verse archive.
Chapter 5: Shadows in the Snowscape Quest Objectives
- Head to the monastery
- Defeat Nazarbonju
- Proceed through Snowquilt Ravine
- Head to the monastery
- Fight off the horde of cyaegha
- Wait for Historiath to finish incanting
- Head to Tredame Sanctum
- Protect Historiath
- Head to Tredame Sanctum
- Protect Historiath
- Head to Tredame Sanctum
- Defeat Id
- Defeat Managarmr
- Speak with Rackam
GBF Relink Full Chapter 5: Shadows in the Snowscape Walkthrough
Head to the monastery
Upon starting the quest, you'll find yourselves in Mt. Neigelith, Leautagne Is. Follow the path ahead and break the first clump of ice blocking your path. Proceed forward and break the second wall of ice, be careful of this second one as it'll start collapsing once you destroy it, and huge chunks of ice will crash down, and you'll see a red-marked area as to where the chunks will drop. Avoid the marked area to not get hit.
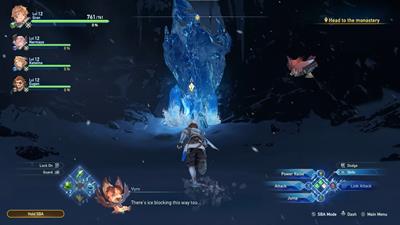
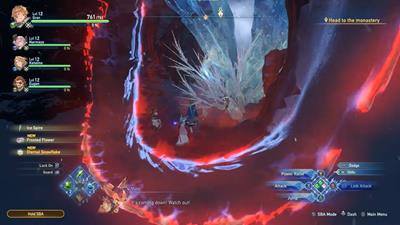
After going through the blocked path, you'll see lights from afar, indicating the location of the monastery. Continue heading forward until you reach the quest marker. A new enemy type called Frosty Bones emerges from the ground. Clear the enemies in the area before proceeding.
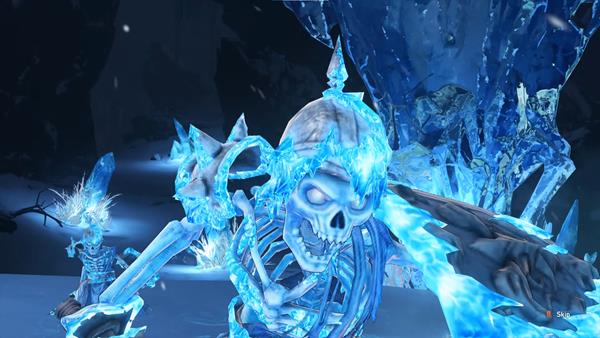
After clearing the enemies, you can pick up the Frozen Note document on the left side behind an ice chunk.
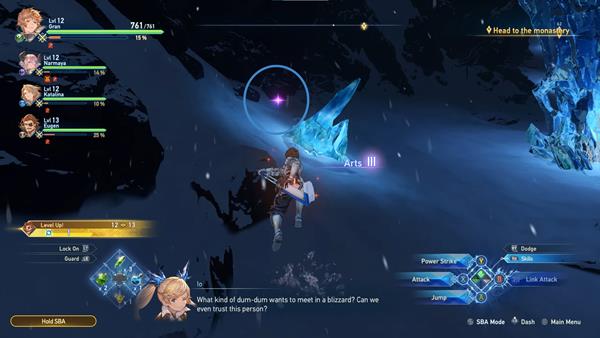
Another loot can be found on the right side of the area, pick it up to obtain a Frosted Flower.
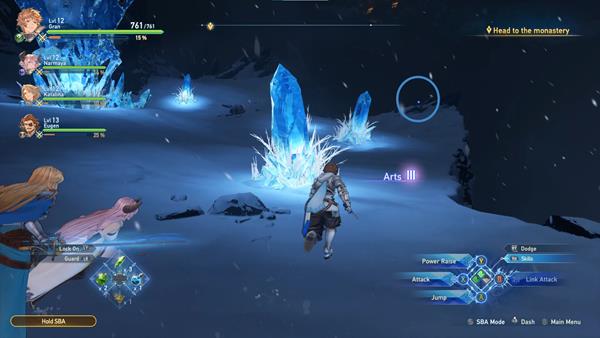
On the left side of this. you'll find a Wee Pincer.
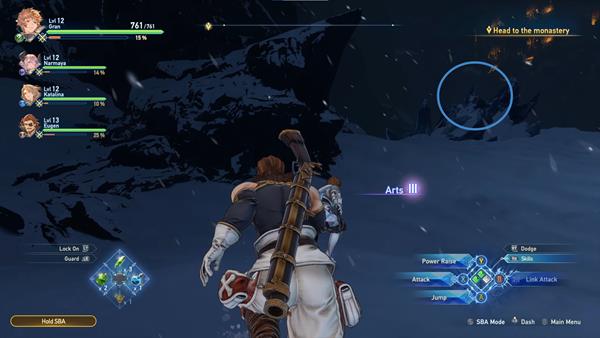
After picking up the Wee Pincer, progress forward. Before you head toward the main objective, take the path on the right and make your way up the top. Turn around and you'll see a Gold Chase entrapped in ice. Break the ice to release the chest and open it, it contains Standard Refinium, some rupies, and 3 MSP.
Now turn back and continue following the main path but stay up top, there's a loot on the right side, pick it up to obtain an Ice Spire. Just across you'll spot a Shrouded Chest. Collecting the mirage of stones within the time limit will reward you with an Attack Power II, some rupies, and 3 MSP.
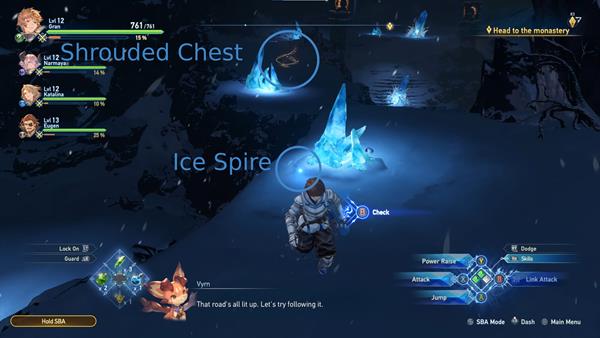
Now go back down and backtrack a bit, along the way is another chest. Open the chest to receive Rafale Coin x2 and some rupies.
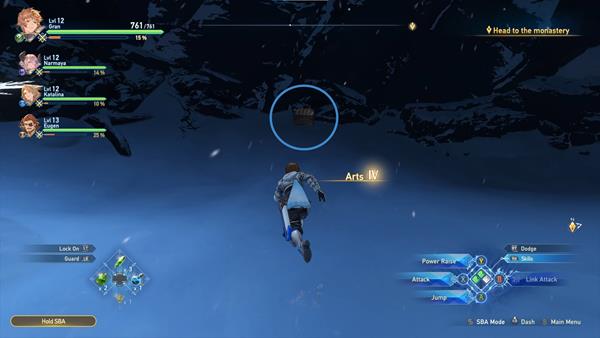
Now head back on track, you'll encounter some Frosty Bones and along the way. Before you proceed in following the quest marker, you'll see a chest trapped inside an ice chunk under the bridge. Break the ice and open the chest to receive Fortitude Shard x7, some rupies, 1 MSP. You can try destroying the other chunks of ice to obtain some Ice Spire loot from some of them. Under the stairs, you can also pick up a Frosted Flower and another Ice Spire loot.
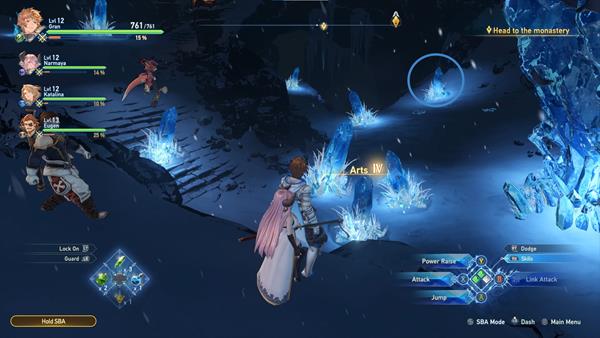
Go up the stairs and cross the bridge, note that more Frosty Bones will spawn in the area, and some of them can break from ice chunks scattered throughout the area. Once you reach the quest marker, you'll notice on the left side is another chest trapped in an ice chunk. This chest contains Water Shard x2, some rupies, and 1 MSP.
Go down the slope and you'll see a Hallowed Ground near a bridge. Nearby is another chest, open it to receive Fortitude Crystal (S), some rupies, and 2 MSP.
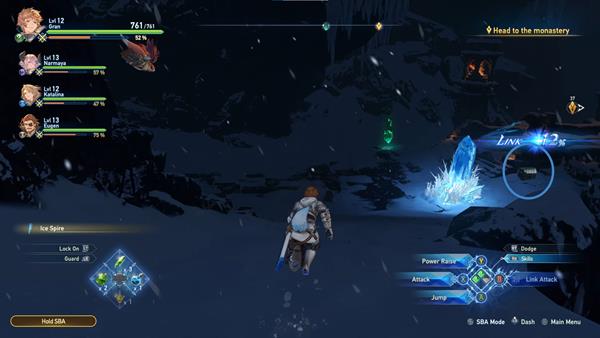
If you're low on health and other recovery items, make sure to interact with the Hallowed Ground. Reach the middle of the bridge to trigger a short cutscene. A mysterious member of The Church of Avia appears and prevents the party from reaching the monastery by destroying the bridge. The Captain along with the other members falls down the mountains. Once the group recovers from the fall, a creature awaits in the shadows.
Boss Fight: Nazarbonju
Once you regain control of your character, you will face off against the Nazarbonju boss. The Nazarbonju is regarded as an ill omen perched on sacred mountains, with their bodies comprised mostly of a massive eye. They have accumulated sufficient frost and mana, capable of freezing a wildfire with just a single glare.

This boss floats around and mainly uses frost-based attacks and is weak against Earth. Similar to other Bosses, this one will enter Overdrive Mode once the yellow meter beneath its HP gauge is filled. During this mode, it gains access to new special moves, weakens your Skybound Arts, and reduces the overall damage it takes. Once it enters into Overdrive, keep an eye out for the move called Glacial Tomb where the Nazarbonju shrieks and a giant ice block drops on the ground, along with small multiple ice chunks that drop within the area. This move will be executed once the boss enters Overdrive. Keep an eye out on the red circles that will appear on the ground indicating where the ice block and ice chunks will drop to avoid getting hit. After this, it'll immediately use the attack Freeze Ray. The Nazarbonju charges up briefly and releases a focused ray of ice, then spins around while continuously blasting the chilling projectile. The trick here is to hide behind the giant block of ice that the boss dropped earlier when performing the Glacial Tomb. Wait out until the boss stops spinning, it'll eventually stop after a few seconds. Once the Nazarbonju stops spinning, it'll drop down on the ground, making it vulnerable for a while. You can destroy the giant ice block if the boss is within range to deal damage, then continuously attack before it regains consciousness.
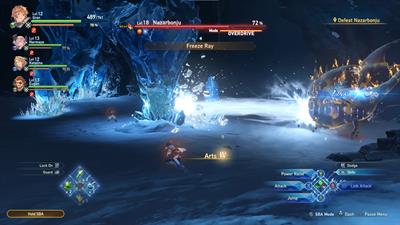
You can also lead the Nazarbonju to the ice blocks that are situated in each corner of the arena. You'll see about 4 of them, so you'll have the option to lead the boss near it and destroy the ice block to stagger the boss and land a counterattack while it's vulnerable.
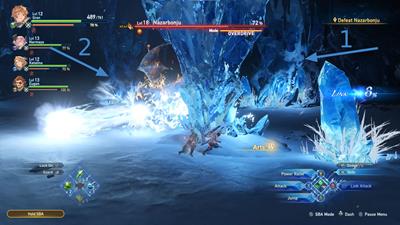
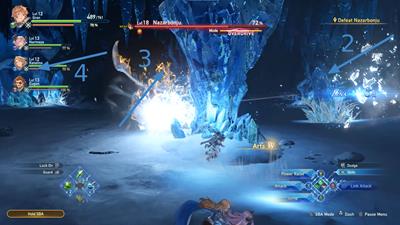
After defeating Nazarbonju, you'll receive an Ice Spire, Bizarre Wing x5, Fortitude Crystal (S) x3, Glaciate Resistance I, and 5 MSP.
Proceed through Snowquilt Ravine
Before you proceed with the main objective, check the area and you'll find an Omen Stone and an Ice Spire in the corner. If you decide to release the seal for the omen stone, you'll have to fight 6 Withered Hollow Knights and defeat them within the time limit.
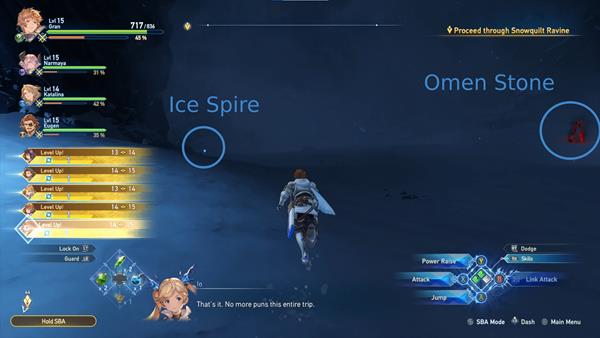
Continue following the quest marker, once you reach Snowquilt Ravine, check behind the pillar on the left to find a chest. This chest contains a Prism Chip and some rupies.
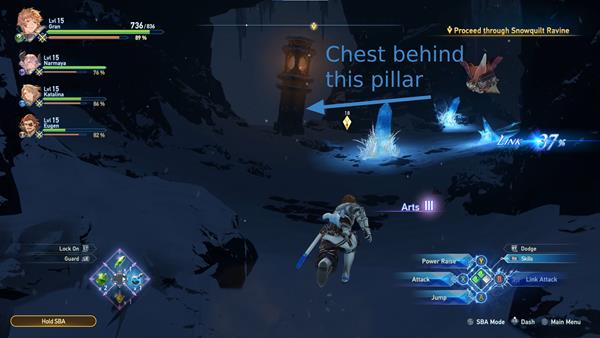
Now proceed and follow the main path, on the left side you can pick up Snow Pillow x2. Once you reach the quest marker, destroy the block of ice that's blocking your path to proceed, you'll also get an Ice Spire from breaking the ice block. As you proceed, you'll notice multiple ice chunks and massive ice walls blocking your way in the ravine. Destroy the first ice wall and pick up the loot on the left side to obtain Snow Pillow x2. As you press forward, enemies will spawn in the area. Deal with them swiftly, then before you destroy the next ice block, you'll notice a narrow path on the left side, take that path and pick up the Snow Pillow x2 on the way. From here, you'll find a chest trapped in an ice chunk. Break the ice and open the chest to receive Glitterstone (S), some rupies, and 1 MSP.
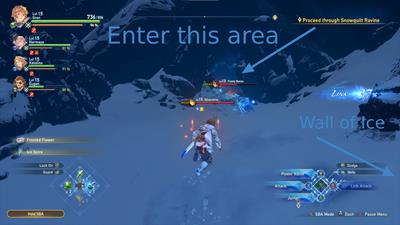
Go back to the main path and destroy the second wall of ice. There will be more enemies here. Once they've been dealt with, take the path on the right, go up the slope, and pick up a Frosted Flower loot at the top. Jump across the other side and within that area, you'll find three chests. The chest on the left contains Fortitude Shard x7 and some rupies. The chest in the middle contains Stun Power II, some rupies, and 2 MSP. The chest on the right contains Fortitude Crystal (S) x5, some rupies, and 3 MSP. You can also break the ice chunks in the area to receive an Ice Spire and a Frosted Flower.
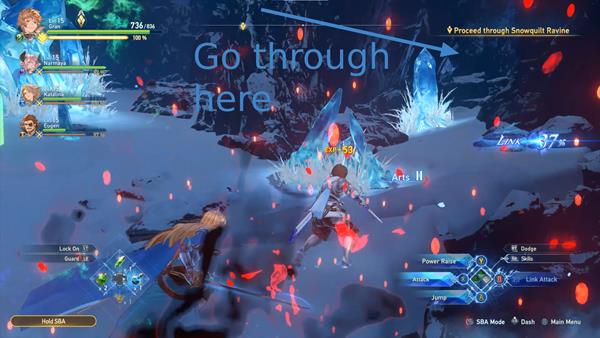
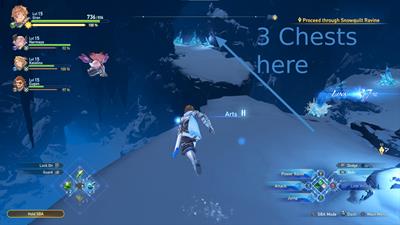
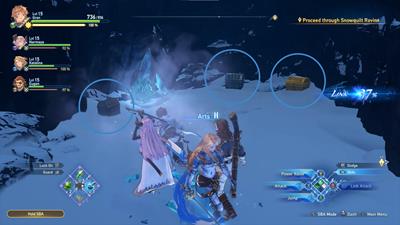
After opening the last chest, some Frosty Bones will spawn in the area. After clearing the enemies, head back and drop down. You can pick up some Ice Spire, Frosted Flower, and Snow Pillows around this area. Before you proceed in going up the slope, there's a Shrouded Chest on the right side. This chest contains Health II, some rupies, and 3 MSP.
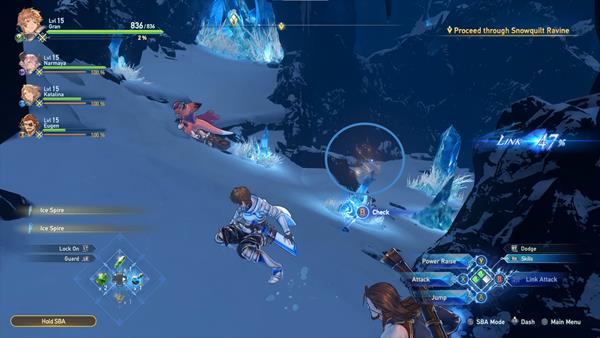
Now continue by heading up the slope. Break the third wall of ice to proceed, you will also receive an Ice Spire, a Frosted Flower, and an Eternal Snowflake for breaking this wall of ice. As you reach the quest marker, you'll have to defeat 2 Cyaegha enemies waiting for you in the area. After clearing the enemies, pick up the loot along the way to receive Snow Pillow x2. Break the ice chunks you encounter along the way for additional loot. Once you make it to the top, you'll find another frozen chest near the exit. Break the ice and open the chest to receive Fortitude Shard x7, some rupies, and 1 MSP.
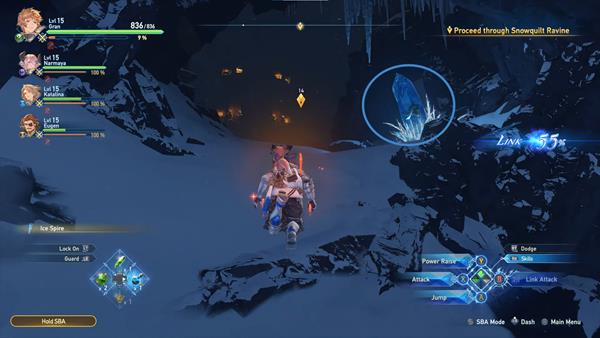
Now exit the area and before you head to the monastery, turn left and pick up the Frosted Flower loot. Just further ahead is a Slime enemy. Defeating this Slime will reward you substantial rupies as well as 1 MSP. Down the destroyed bridge nearby, there's a Snow Pillow loot on the edge, be wary as you get close to the edge, as 2 Cyaegha enemies will appear.
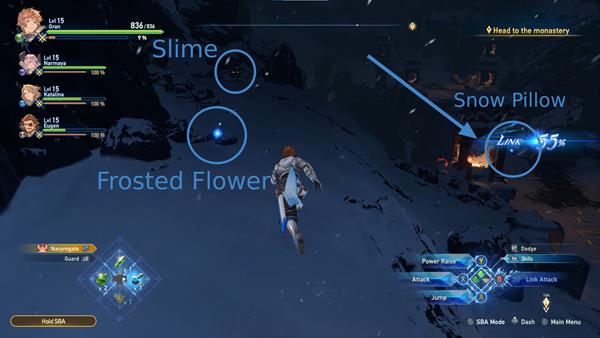
After defeating the enemies, go to the edge of the cliff, you'll find a chest that contains Water Shard x3 and some rupies. Adjacent to that chest is a loot you can pick up, it will reward you with an Ice Spire and 1 MSP.
Once you've checked out all the available loot in the area, follow the quest marker, cross the bridge, and enter the monastery. Once inside, interact with the giant door in front of you, this will summon a horde of Cyaegha enemies in the area. You will have to fight off a horde of them to proceed.
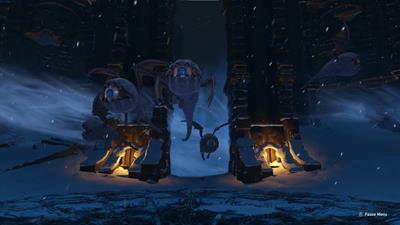
As you're fighting off against a horde of Cyaegha, multiple seals of magic will surround the area and take out all of the remaining enemies. A short cutscene will then trigger. The person who helped you introduces herself as Historiath, the overseer of Melosse Monastery. It's also revealed that she was the acquaintance Rolan was talking about. After the short dialogue, wait for Historiath to finish incanting to open the sealed door in front of you. Once she's done, go through the door and use the Hallowed Ground in the area to recover HP and other consumables, and to prepare for what comes next.
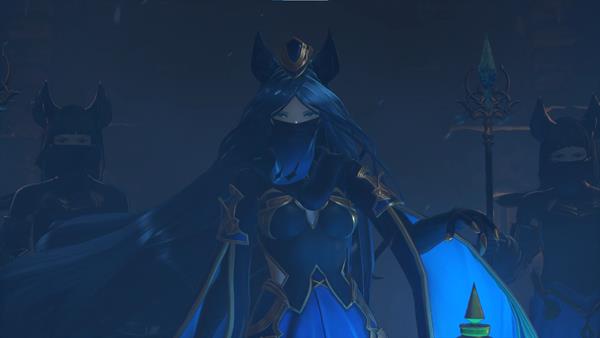
Head to Tredame Sanctum
Now head up the stairs and take the narrow path on the left, pick up a Snow Pillow loot along the way and follow the path until you see a Gold Chest. Open it to receive Health II, some rupies, and 3 MSP.
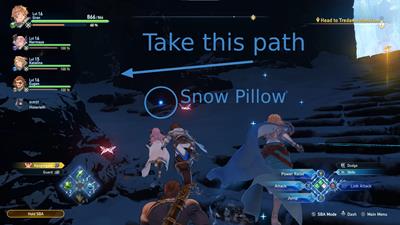
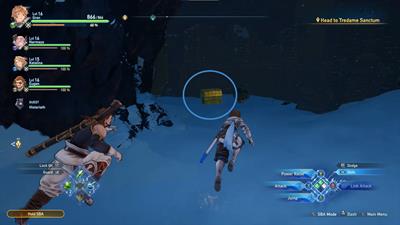
Head back and go up the stairs to exit the area and follow Historiath. Make sure to break some of the ice chunks you encounter along the way for some extra loot. Continue following Historiath and you'll reach your destination. The door ahead seems to be sealed, Historiath will incant another spell to open the door. Suddenly, a horde of enemies will appear. You are tasked with protecting Historiath from the enemies until she finishes incanting. You'll have to survive while protecting Historiath from the enemies until the timer runs out. Once Historiath finishes her spell, all enemies in the area will be defeated.
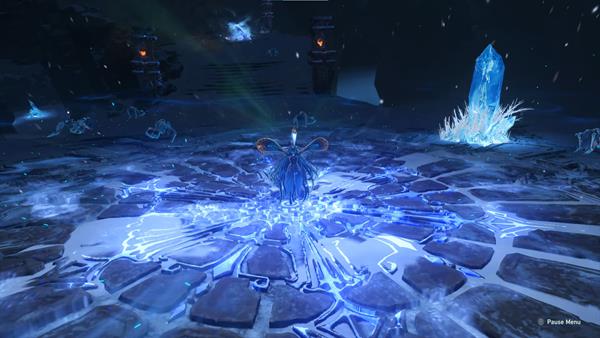
Before you go through the door, take the path on the right and you'll find a chest in the corner. Open it to receive Glitterstone (S), some rupies, and 1 MSP. Within the same area, there's a loot in the corner protected by three Frosty Bones. Defeat the enemies and pick up the loot to receive a Frosted Flower and 1 MSP.
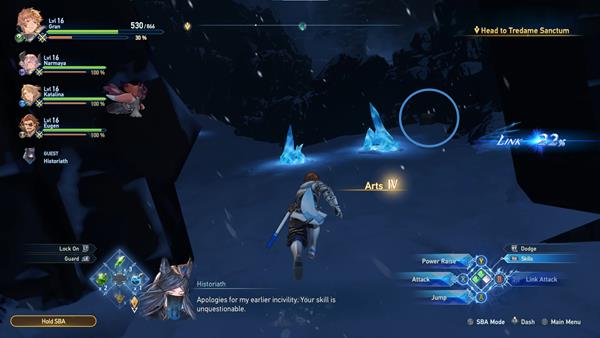
Head back to where Historiath is, you'll find an Omen Stone on the left side of the area. You can also pick up a Snow Pillow on the left side of the entrance of the door. Now go through the door and on the right side is a Snow Pillow loot you can pick up.
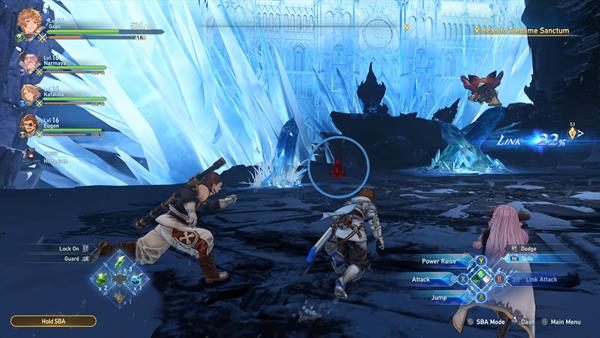
Turn to the direction of the main quest, before you proceed, climb the ledge on the right, and at the top, you'll find another Wee Pincer.
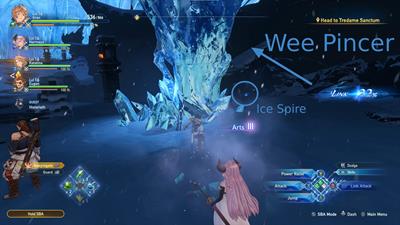
Go back on track and cross the bridge. Check the cliff on the leftmost side to pick up Frosted Flower x2. From there, you'll spot a chest trapped in ice near the entrance to the sanctum. Break the ice and open the chest to receive Water Shard x2, some rupies, and 1 MSP.
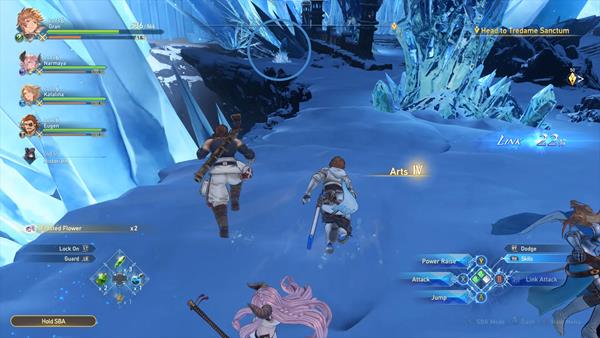
Now explore the right side of the area, you'll find two more chests there, along with an Ice Spire and Snow Pillow loot. After collecting all the loot in the area, follow the quest marker so Historiath can start incanting and open the door for the sanctum. Once Historiath starts chanting her spell, a boss called Scarmiglione will appear.
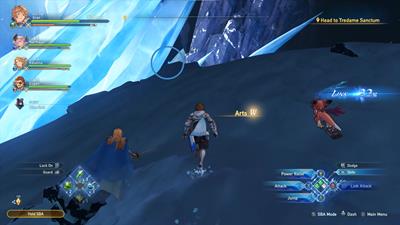
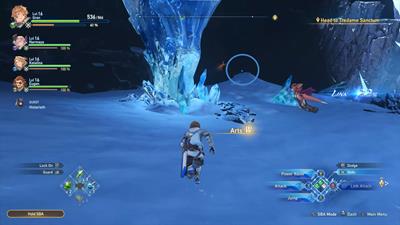
Boss Fight: Scarmiglione
For this boss fight, your main objective is to protect Historiath as she completes a spell to open the door to the sanctum. You can either wait until the timer runs out or defeat the boss to proceed. But it is recommended you focus on taking out the boss since it has the ability to summon enemies in the area which can overpower you if you're not careful. The battle with Scarmiglione begins at a distance, requiring you to approach him on the bridge. Expect him to summon additional enemies, so clear them out while keeping an eye on Scarmiglione and its Mode bar. Lead him off the bridge to have more space and reduce the risk of being caught in his linear attacks. Scarmiglione's attacks are telegraphed with a slow wind-up. Pay attention to his arm movements and watch for floor markings indicating larger ranged attacks. Dodge or move to the side when he raises his weapon for melee strikes. Seize the brief pause after his attacks to deal significant damage. Some members can focus on Scarmiglione, playing aggressively and dodging when necessary, while others clear nearby mobs.
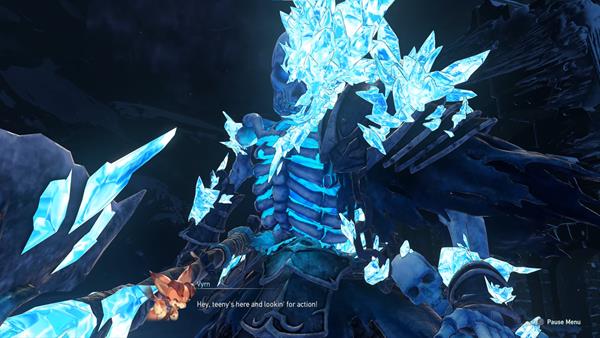
As Scarmiglione fills his Mode bar, he enters overdrive with powerful AoE combos. Attack aggressively to deplete the Mode Bar, but watch out for floor markings to avoid major damage. Wait for these attacks to finish, then rush in to deplete the Mode Bar, causing him to enter Break. Save Skybound Arts for a final blow, using them in succession. Repeat the pattern of dodging, attacking, and clearing mobs. Utilize Link attacks for Link Time and unleash powerful attacks. If he enters overdrive again, Break it quickly to consume a significant portion of his HP and clear the fight. Use Skybound Arts and Chain Burst for maximum damage. Once successful, proceed through the door of seclusion.
Reaching the Altar
After going through the door, check the left side of the room to find a chest that contains Fortitude Crystal (S) x2 and some rupies. A fourth Hallowed Ground is also within the room, use it when necessary. Before going upstairs, check the area ahead, you'll immediately see a chest on the left side. Open it to receive Glaciate Resistance I, some rupies, and 2 MSP. In the same area, you'll need to destroy the wall of ice on the right side and you'll find a Gold Chest that contains Fortitude Crystal (S) x3, and a Flame Rapier. Now go upstairs and check the fountain, you can pick up the Sequestration's Verse document.
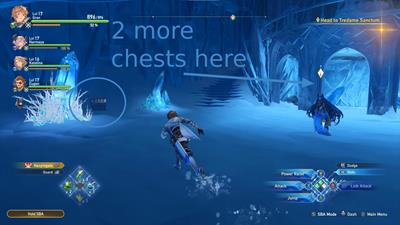
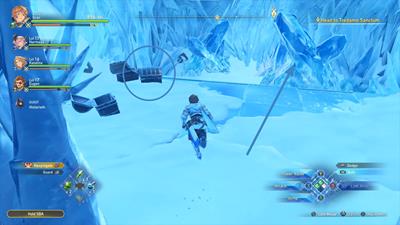
Now follow Historiath and wait for her to open the door, then go inside the altar. You'll find Lyria on the other side of the room, but something seems off.
Boss Fight: Id and Managarmr
Once you approach Lyria, a cutscene will trigger. As your party goes near hear, Vyrn will eventually end up hitting a barrier, preventing anyone from getting close to Lyria. Lyria then tries to attack the group but Historiath uses her ability to defend The Captain. She retaliates with a counter-attack but Id swoops in and defends Lyria. After the cutscene, you'll have to face off against Id again. Just like in Chapter 3, this will be another predetermined boss fight where you'll end up losing in the end. You will also see the same set of maneuvers and attacks from chapter 3.
Start by placing a target on Id. He will begin with his basic set of attacks including his dash and Charged Sword Strike attack. Start strong by advancing and playing offensively to start and deal as much damage before he progresses to his larger attacks. Keep to his back and circle around him to keep to his back for the highest chance of avoiding his attacks. If he lifts himself in the air, stay clear of the area just below him since he will make a hard AoE landing. Progress through the fight enough and eventually, a cutscene will interrupt and progress into Managarmr's Boss fight.
Managarmr starts off with a horn storm stomp, unleashing a ground-breaking ice wave. Players can capitalize on the opportunity to attack him from the side during the recovery period after the move. In the middle of the arena, he executes Glacial Desolation, covering almost the entire space with a frozen storm. Players can evade by hiding behind ice blocks or moving to the arena's edge. His Death's Threshold attack involves sending ice missiles, requiring players to destroy them. When Managarmr targets a large ice block, players can attack him while he's vulnerable.
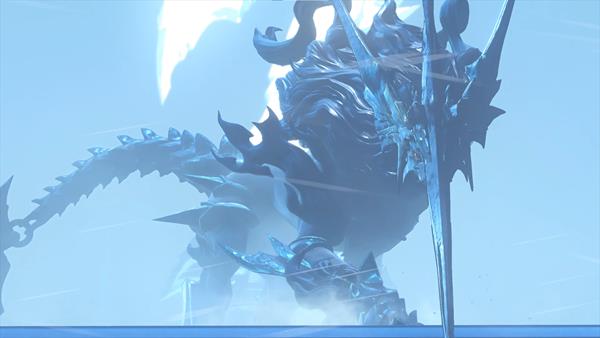
During Overdrive Mode, Managarmr performs an attack called Silver Wolf Surge, a swift arena-crossing move with red and white indicators. Players must dodge quickly to avoid subsequent attacks. Death's Threshold combines ice missiles and Silver Wolf Surge. During a cornered Frost Blast, players can hide behind an ice burg, wait for it to pass, and then attack. Phantom Ice Spots make Managarmr temporarily invisible, leaving white spots that, when triggered, freeze players. Avoiding these spots is crucial to prevent freezing, damage, or attacks. Once you defeat Managarmr, you'll receive Standard Refinium, Fortitude Crystal (S) x3, Champion Merit x2, Health II, and 10 MSP.
Route to Seedhollow
Once you're aboard the ship, check the area for loot before speaking to Rackam and departing to Seedhollow. You can pick up 2 Rafale Coins and a Prism Chip in the area.
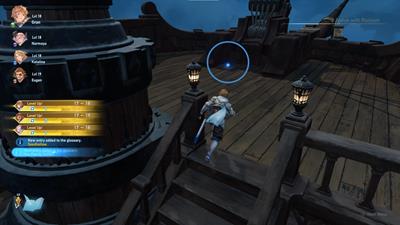
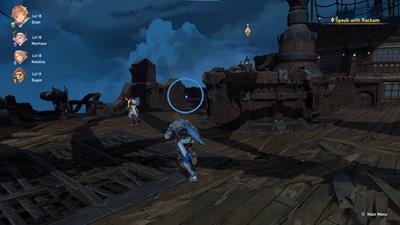
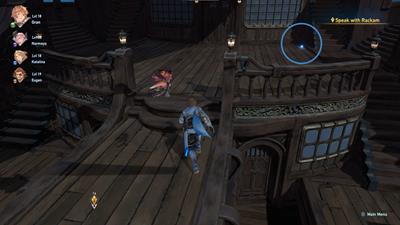
After picking up all the loot you can find, speak to Rackam to depart and this concludes Chapter 5 and officially begins Chapter 6: In Search of Hope.
Chapter 5: Shadows in the Snowscape Quest Notes and Tips
Notes, Tips, and Other Trivia for Chapter 5: Shadows in the Snowscape quest in Granblue Fantasy Relink go here.
Chapter 6: In Search of Hope is a Main Quest in Granblue Fantasy Relink. This quest showcases the adventure that the Captain and his crew embark on, to retrieve the Catalyst which will be used to free Lyria. Main Quests in Granblue Fantasy Relink are primarily tied to the story or main campaign of the game which requires a player to complete it to progress story-related events, unlock more game features, discover new locations, and more. This page covers guides, quest objectives, and a complete walkthrough for the "Chapter 6: In Search of Hope" main quest in Granblue Fantasy Relink.
General Information
- Previous: Chapter 5: Shadows in the Snowscape
- Next: Chapter 7: Warning Signs
- Bosses: Rock Golem, Gerasene, Griffin, Maglielle, and Excavallion
- Location: Seedhollow and Dahli Relicbelt
Quest NPCs
- Zathba's Henchmen
- Verbose Man
- Sassy Lassie
- Bon Vivant
- Zathba
Quest Bosses
Quest Enemies
All Items & Rewards
Weapons
Sigils
- Sandtomb Resistance II
- Health II
- Burn Resistance II
- Stun Power II
- Quick Cooldown III
- Aegis II
- Tyranny III
Treasure
- Rafale Coin
- Fortitude Shard
- Fire Shard
- Red-hot Cactus
- Desert Ash
- Fornax Stone
- Earth Shard
- Fortitude Crystal (S)
- Wind Shard
- Glitterstone (L)
Key Items & Other
- n/a
Enemy Drops
Quest Rewards
Chapter 6: In Search of Hope Quest Information
Chapter 6: In Search of Hope Quest Description
This quest shows how the captain and the crew will retrieve the Catalyst in alliance with the Zathba Family to save Lyria.
Chapter 6: In Search of Hope Quest All Chests Locations
- From the starting point of Dahli Relicbelt, just head straight past the first Hallowed Ground and just before the the Arch with the Wee Pincer on top, you'll find a Wooden Chest in the middle of the desert.
- From the first chest we mentioned, look and head left. You'll see two walls of rocks almost colliding enough to make a tunnel. Go through that and you'll find a silver chest near a cliff containing Sandtomb Resistance II, Rupies, and 3 MSP.
- Head straight towards an arch, and you will find a Goblin Tanker guarding a wooden chest beside a pillar. This contains Fortitude Crystal (S), Rupies, and 1 MSP
- Upon entering the temple-like hall, you'll immediately see a wooden chest to the left containing an Earth Shard and 105 Rupies.
- A golden chest can be found on a platform when you jump on the broken walls, which contains Fortitude Crystal (S) and 875 Rupies.
- When you jump down from the platform of the golden chest that you opened, you'll find two blue orbs that contain Red-hot Cactus and one earth shard. You'll also find a wooden chest near the two, containing a Fortitude Crystal and a Rose Crystal Knife.
- Once the ground crumbles and a sliding sequence starts, make sure to stay on the upper path while sliding until you reach a platform the temporarily stops your sliding. You'll find a silver chest here containing Regen II, Rupies, and 3 MSP.
- A Silver Chest can be found on the right side of the stairwell you see after the sliding sequence. This silver chest contains Health II, Rupies, and 3 MSP
- From the entrance of Ruined City Valion, turn left onto the open desert until you see a single Wooden Chest. This chest contains a Rafale Coin, Rupies, and 1 MSP.
- Under the tall structures on the left, you'll see a smaller structure that can be walked on. follow it to its tallest point and the edge will have a golden chest containing Fortitude Crystal (M), Rupies, and 5 MSP.
- Right under the second tallest structure on the left side of Ruined City Vallion is a silver chest containing Fast Learner II, Rupies, and 3 MSP
- A wooden chest can be found just across from the chest under the 2nd wall structure. Run towards the cliff and you'll see the chest beside an Omen Stone. This will contain Glitterstone (S) and Rupies
- A wooden chest can be found past the tall structures on the left in the middle of the open desert. This will contain an Eart Shard, Rupies, and 1 MSP.
- A wooden chest can be found on the left side of the Fortified Sanctum hugging the rock walls on the left. This chest will contain a Prism Chip, Rupies, and 1 MSP
- At the Fortified Sanctum area, a silver chest can be found on top of a temple front on the left side of the area. This silver chest will contain Hea;the II, Rupies, and 3 MSP.
- Also in the left side of the Fortified Sanctum is a Golden chest containing Attack Power II, Rupies, and 5 MSP. This chest is on top of 2 Pillars attached together on the left side of the Fortified Sanctum near the seal that you need to lift guarded by the Gerasene boss.
- On the right side of the Fortified Sanctum is another Wooden Chest that is hugging the rock walls. This chest will contain Glitterstone (L), Rupies, and 3 MSP.
- On the upper right side of the Ruined City Vallion is a chest beside a waterfall. This chest will contain Fortified Crystal (S), Rupies, and 1 MSP.
- On the upper right side of the Ruined City Vallion is a waterfall with a small secret cave when you go through it, you'll find a silver chest containing Fortitude Crystal (S), Rupies, and 3 MSP inside.
- On the upper right side of the Ruined City Vallion is a waterfall with a small secret cave when you go through it, you'll find a Golden Chest containing Aegis II, Rupies, and 5 MSP.
- From the 2 chests that you find in the waterfall, turn left and just keep hugging the rock wall until you reach a wooden chest containing a Prism Chip, Rupies, and 1 MSP.
- A silver chest can be found on the right side of Ruined City Vallion just beside the seal here that you need to lift that's guarded by a Griffin boss. This chest contains a Fortitude Crystal (S) and Rupies.
- A wooden chest containing Rupies can be found just in front of the seal guarded by a Griffin once you go down the short stairwell. Another Wooden chest can be found just across it containing a Prism Chip and Rupies.
- A wooden chest can be found on the left side of the area where you lift the seal on the central ruins.
- On the uppermost left side of the area is one of the waypoints that you need to go to lift the seal of the central ruins. Near that area are collapsed structures that can be climbed, and on the top of them, you'll find a golden chest containing a Fortitude Crystal and 864 Rupies.
CHESTS IN SEEDHOLLOW
-
Head farther up the stairs and enter the Central Plaza of Seedhollow. Turn right, and just past the Blacksmith area, you'll find a small alley next to a set of staircases containing a silver chest.
-
Turn left again, and you'll find yourself in a circular area that has cats and a silver chest that gives you a Prism Chip and 105 rupies.
-
After retrieving the crewmate card, you'll find a wooden chest slightly to the left, hidden among other things.
Chapter 6: In Search of Hope Quest All Shrouded Treasure Locations
-
You can also find a Shrouded Treasure near the collected chests, rewarding you with a Quick Cooldown III Sigil and 2010 Rupies.
-
The next Shrouded Treasure can be found near the waypoint where you need to lift the seal.
-
Proceed toward the waypoint where you need to lift the seal, and as you approach, you'll discover a shrouded treasure behind a block, dropping 2070 Rupies and a Tyranny III Sigil.
Chapter 6: In Search of Hope Quest All Omen Stone Locations
- An Omen Stone can be found to the left side of the Ruined City Vallion past the tall broken-down structures on top of a mini cliff or rock cliff. It is beside a slime enemy that you can engage.
- An Omen Stone can be located behind the seal that needs to be lifted guarded by the Griffin
Chapter 6: In Search of Hope Quest All Wee Pincer Locations
- From the starting point of Chapter 6, just go to your right and you can find the first Wee Pincer hiding at the stump of a knocked-over tree.
- Near the starting point of chapter 6, before turning right towards the 2 Goblin Stormers inside a cave, head straight where you'll encounter Sand Wolves until you see an archway that you can climb by the side. The top of that archway is where you will find the second Wee Pincer.
- Once you're inside the ruins, there's going to be some Stones you can jump up on to the left-hand side. Between the blue orb and a Golden chest, you'll find a Wee Pincer just before the ground shakes, triggering a long slide that leads to the gate of the Central Ruins.
- From the entrance gate of Ruined City Vallion, it's going to be on the first broken Stone building that you find in the desert. Go down the stairs and slightly move to the left where you will see a small arch-shaped building that you can climb and find the fourth Wee Pincer.
- Now, looking towards the center of the map, go left from here and the fifth Wee Pincer is on a rock as you approach the Western Keystone that has The Rock Golem boss. One of the key things to look out for to find this Wee Pincer is the very tall broken-down structures on the left when you enter Ruined City Vallion. The rock that we mentioned earlier is just in front of those structures.
- From the starting point of Ruined City Vallion, make your way straight towards the other side of the area. The other side has a very tall structure with a circular architectural design on top. This area is called the Fortified Sanctum. Just keep heading straight and once you get past the central ruins, stop for a moment and head upper right. While slowly moving forward, keep an eye out for a broken-down structure that looks like a roof with two pillars that are cut in a slanting way. When you see that structure, you'll see a different broken pillar in front of it. the sixth Wee Pincer should be on the top of that broken pillar. The area is near the eastern keystone.
- The seventh Wee Pincer is over by the northern Keystone. What you can do is, once you're in front of the Northern Keystone, go left and just hug the far wall. The seventh Wee pincer should be tucked in a hole between the walls that you are hugging.
- At Ruined City Vallion, head to the left side of the Central Ruins (The large circular platform in the middle of the area), just opposite of the Hallowed Ground in Ruined City Vallion. Once you're on the left side, you'll notice a lot of broken-down structures in this part. Look for the 4 pillars that form a rectangular-shaped structure that does not look destroyed and you'll see a broken wall behind those pillars. The eighth Wee Pincer is just behind those walls under the rubble.
- The last Wee Pincer can be found on the right side of Ruined City Vallion on the second level of a cliff near the Griffin Boss. Head to the tallest part of the cliff then look down from it to the right, and you'll see the second level where you can drop down on and retrieve the last Wee Pincer.
Chapter 6: In Search of Hope Quest All Slimes
- Near the starting point, before turning right towards the 2 Goblin Stormers inside a cave, head straight near an arch structure and there, you can find a slime to engage.
- At the Ruined City Vallion, turn left from the gate entrance and head towards the tall broken-down structures. Upon approaching the structures, you can find a slime by the rubbles on the ground.
- A slime can be found to the left side of the Ruined City Vallion past the tall broken-down structures on top of a mini cliff or rock cliff. It is beside an Omen Stone.
- At Ruined City Vallion, a slime can be found on the right side of Ruined City Vallion below a mini canyon near one of the speed boosters.
Chapter 6: In Search of Hope Quest All Archives
- You can find an archive entitled Outlaws Monthly just below Zathba on his ship by the stairs.
- Just after you slide down toward the City Ruins gate, you can find an archive entitled Faded Stone Plaque to the right of the gate.
Chapter 6: In Search of Hope Quest Objectives
- Head to the Family Zathba's base
- Help Zathba's underlings
- Gather intel on the dangerous "something"
- Speak with the verbose man
- Speak with the sassy lassie
- Speak with the bon vivant
- Head to the Alley
- Help Zathba's Underlings
- Eavesdrop on the pair of soldiers
- Eavesdrop on the trio of soldiers
- Eavesdrop on the gatekeeper
- Report your findings
- head to the bar.
- Get ready and head to the dock
- Speak with Zathba
- Search for the Catalyst Stone
- Lift the seal on the central ruins.
- Inspect the chest in the Central Ruins
- Defeat the Sword Veil Fellowship
- Defeat Maglielle
- Defeat Excavallion
GBF Relink Full Chapter 6: In Search of Hope Walkthrough
At Seedhollow
Upon arriving at Seedhollow, Port Camellia, to the left on a bookstall, you'll discover a purple orb that provides a new entry for the archives named 'White Paper on Public Transport.' Additionally, you can find another purple orb to the left in the hallway after climbing the first set of stairs on a table, named "Fashion Magazine Clipping."
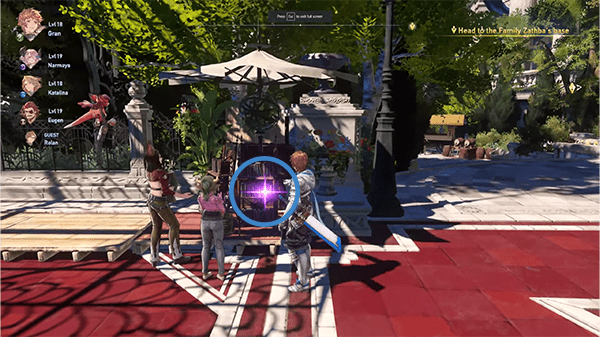
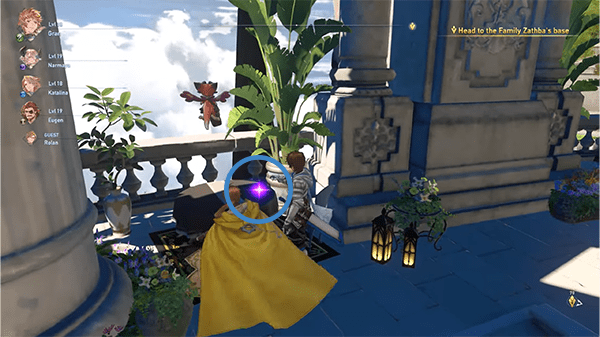
Afterward, proceed farther up the stairs and enter the Central Plaza of Seedhollow. Turn right, and just past the Blacksmith area, you'll find a small alley next to a set of staircases containing a silver chest. Also, right near the chest, exit the alley and turn left to discover a purple orb that contains the Cat Watcher's Digest.
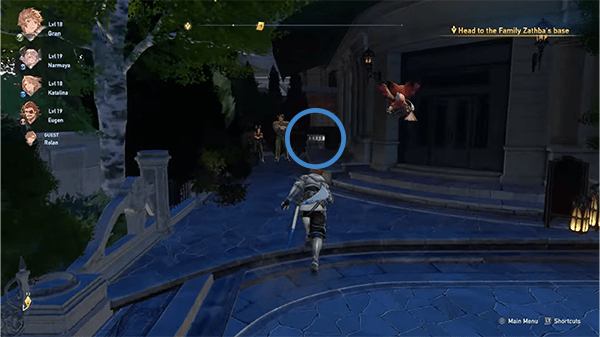
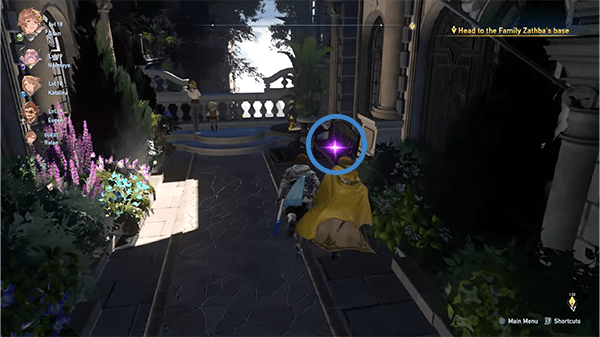
Now, after collecting the chests and orbs, make your way to the waypoint, which is Zathba's base. A cutscene will unfold between two individuals complaining about too much work, and Rolan will inquire if they work for Zathba. Zathba's henchmen will be surprised to see Rolan and express gratitude, thanking him for looking out for their boss. Rolan will counter that it's the opposite since Zathba was the one who gave him intel on Avia. Afterward, Zathba's henchmen will mention that the family is fully booked at the moment and will ask Rolan to come back later if he wants to speak with Zathba. Rolan will then clarify that if the workload lessens, Zathba will have a free schedule. The henchmen will agree, and Rolan will ask Gran to lend them a hand.
The henchmen will then request Gran to check on a buddy of theirs in the market. Before heading over to the market, go up the stairs from your current location and turn right. You'll immediately see a Blue Orb that gives you a Rafale Coin. Turn left again, and you'll find yourself in a circular area that has cats and a silver chest that provides you with a Prism Chip and 105 rupees. Upon exiting the hideout area of Zathba, turn left and head straight down towards the Market, but look to your left from time to time so you can spot a wooden chest containing an Earth Shard and 77 rupees.
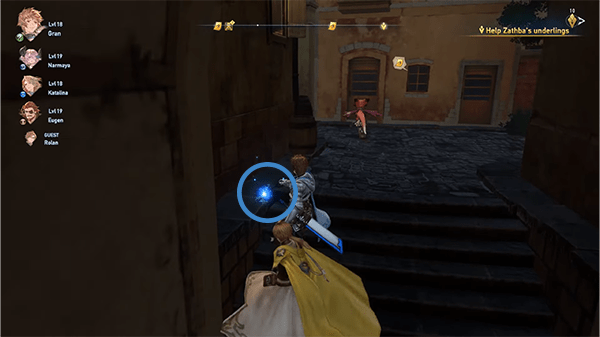
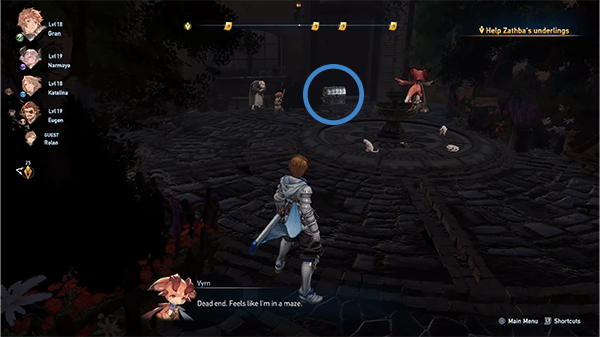
Now, head over to the market inside the Blacksmith's store, and you'll encounter another one of Zathba's henchmen. He'll mention that something was lost, and he needs help recovering it. He left the details with an alliance representative, so head to the alliance rep for the details. Just follow the waypoint and speak with the second alliance representative. The alliance rep will write down the description of the people you can speak with about the dangerous item.
First, speak with the sassy lassie who is just to the left of the Alliance stall near the stairs of the port. She'll clarify that Zathba's people have you looking for a dangerous thing. She'll tell you to check in places with shade and to be careful in case something jumps at you. Now, follow the next nearest waypoint and speak with Bon Vivant. He'll say, "Raise your eyes to the blue! That which you seek may come from above." This probably means that it may come from above; even Io is confused by what Bon Vivant said. Lastly, follow the waypoint to the Verbose Man. He'll tell you that you can find it in an alley.
Now, since you have collected all the available information, make your way to the alley. You'll spot a cat on top of a wall in the shade, which is probably the dangerous thing that people were talking about. You'll automatically be teleported back to the location of the small Zathba Henchman, and he will be relieved that it is over, and the owner of the cat is also relieved. Vyrn will question why he is afraid of cats, and the henchman will share that he was scratched by one when he was a kid.
Afterward, head to the next Zathba Henchman, and he will ask you to eavesdrop on some castle guards to know the status of manpower they have. The waypoint indicated in the area will automatically be a hiding spot for Gran to eavesdrop on the guards, so follow the nearest one, which is the trio of soldiers, and listen in. You'll find out from the trio that the reason why the Corridor of Peace is named that is to honor an Astral who once saved the Skydwellers. It's not relevant information, so make your way to the pair. You'll find out that the threat level for Skydom has been raised. If reinforcements keep being sent to Tempeal and other islands, the castle defenses will run thin. You'll also find out that the Church of Avia has been popping up everywhere. You'll conclude that the people of Seedhollow might get edgy if the information about castle defenses running thin leaks. Lastly, head to the gatekeeper. You'll find the gatekeeper talking to himself about something he saw. A Harvin was wearing white robes that matched an intel report. That uniform is doled out to one of the deadliest groups in Avia. Obviously, the Silver Wolf Corps is also nothing to sneeze at, but this group uses strange techniques. The gatekeeper will regret not arresting the Harvin and will worry if they have infiltrated the city already. You'll conclude that Avia might have infiltrated Seedhollow already.
Upon completing those objectives, head back to the Zathba Henchman and report your findings. He'll conclude that they might have to offer resources to bolster the castle's defenses. The Henchman will then tell you that Zathba might be free now, so head to the bar where you first tried to meet Zathba. A cutscene will play out, showing Rolan entering the bar and meeting a huge fellow who seems to be Zathba. Rolan will then try to ask Zathba for help but will immediately be cut off by Zathba stating that they aren't a charity and selling information is how they don't starve. He'll then begin to say that the juicier the intel is, the higher the price. He will then ask Gran if he gets what Zathba means. Zathba will then assume that Gran and his crew can't afford the info, so he will propose something else. Zathba will mention not to pass on a deal without knowing the full details. He will then begin to say that they have already looked into the mind sealer around your friend's neck. He'll mention as well that the catalyst stone that'll cancel the magic sleeps in some ruins on Dahli Island. Katalina will be surprised and will ask if Zathba is certain. Eugen will then assume that Zathba gave the info since he will ask for something in return. Zathba will be impressed by Eugen's attitude on cutting to the chase and will proceed to say that they only have to break the seal on the ruins. Zathba seeks the treasures within.
After the conversation with Zathba, get ready and head to the dock. When you get near the port, Sierokarte will call you out and give you a crewmate card as a thank you from Zathba. After retrieving the crewmate card, you'll find a wooden chest slightly to the left, hidden within other things.
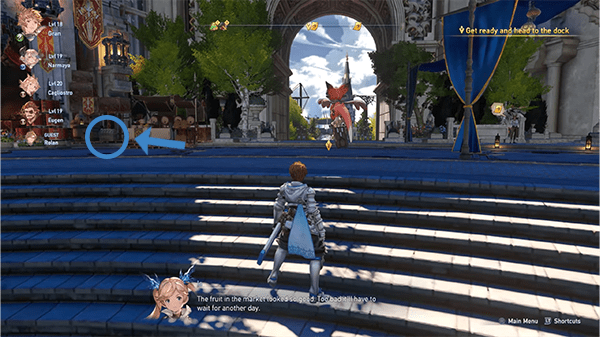
Now, head over to Zathba by the port and agree to go on the mission. Before you head out, Rolan will suddenly say that he will look for the red ship and that he will not join your voyage. He will ask Zathba to take care of you and the others and will also hand him a Transceiver.
Route to Dahli Island
Afterward, you will be teleported onto the Zathba Ship. You will find a purple orb just beside you that contains 'Outlaws Monthly.' Additionally, you can retrieve two blue orbs at each end of the ship, each containing a Rafale Coin and a Fortitude Shard.
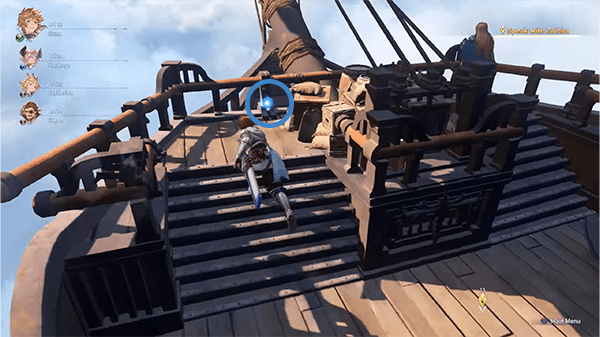
Now, speak with Zathba and proceed to your next objective. A cutscene will play out, showing Lilith speaking about the stars awaiting and emphasizing that you shouldn't keep them waiting.
The cutscene will then shift to Id waking up from a dream next to Lyria. Lyria will ask if he is alright, and Id will mention that he is okay. He will then ask if Lyria is okay too. Lyria will question why he would ask that of her. Then suddenly, Lyria will mention that she found another God.
Dahli Island
The scene switches to Gran and his crewmates arriving at Dahli Island. When you have control over Gran, immediately look back and retrieve a blue orb containing an Earth Shard. To the left is another Blue orb containing Desert Ash.
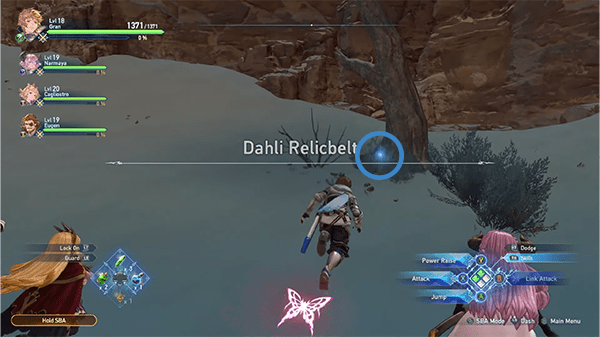
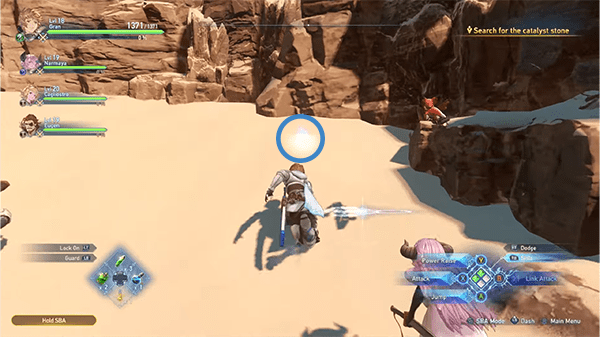
Upon moving up the desert, you'll find 2 blue orbs containing a Fire Shard and Red-hot Cactus. Along with a Hallowed Ground for you to replenish items or save progress.
Move up the rocks near your current position, and you'll find 2 Goblin Stormers resting. Defeat them and collect the blue orb near them that contains Desert Ash.
Afterward, head up more, and you'll find your way into the ruins to your right. Before you enter, head straight towards an arch, and you will find a Goblin Tanker guarding a wooden chest and 3 blue orbs containing 2 Desert Ash and a Fornax Stone.
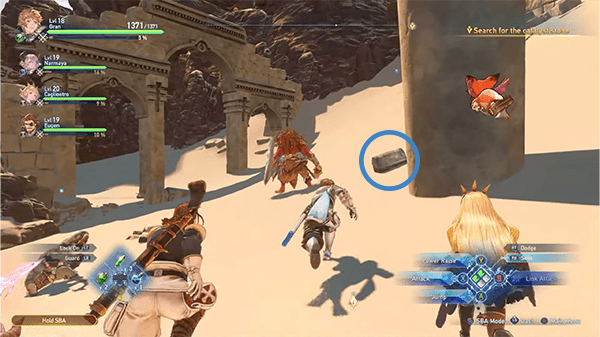
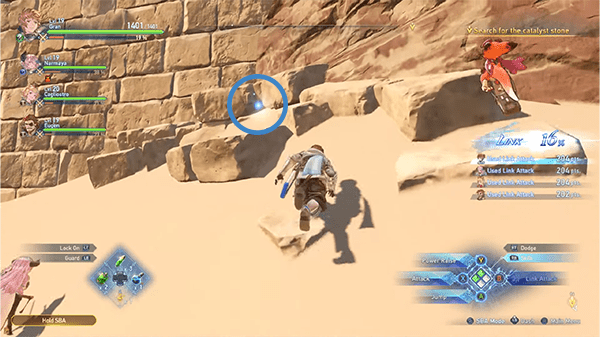
Head further into the path until you reach a cliff with a wooden chest and an orb containing an Earth Shard, 214 Rupies, and a Sandtomb Resistance II Sigil.
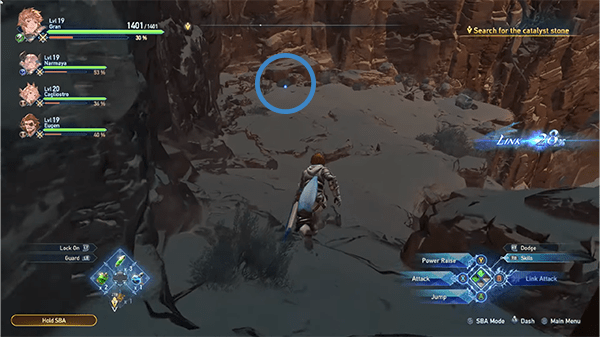
Head back to the entrance of the ruins, but be prepared to be ambushed by Sand Wolves and make your way inside. Upon entering the ruins, you'll immediately see a wooden chest to the left containing an Earth Shard and 105 Rupies.
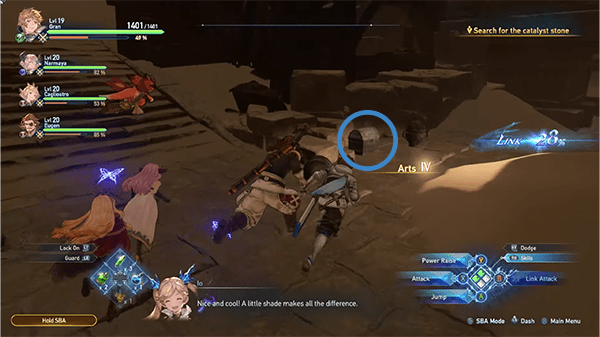
You can also get another blue orb when you move to the left by some broken-down walls and a golden chest when you jump on the broken walls, which contains a Fortitude Crystal (S) and 875 Rupies. There is also a Wee Pincer located just between the orb and the Golden chest
Lastly, when you jump down from the platform of the golden chest that you opened, you'll find two blue orbs that contain Red-hot Cactus and one Earth Shard. You'll also find a wooden chest near the two containing a Fortitude Crystal and a Rose Crystal Knife.
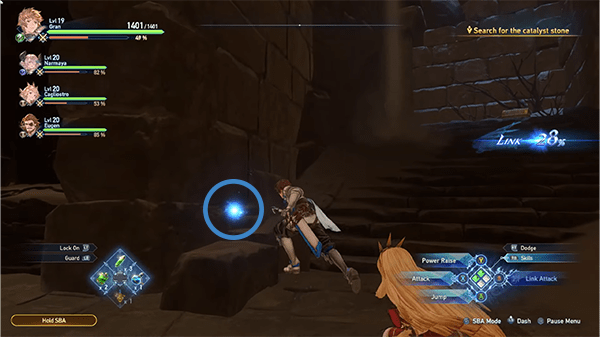
Afterward, move up the path, and you'll suddenly feel the ground shaking, and before you know it, the ground has already collapsed, and you'll be sliding down. There will be a few Blue Orbs that you can retrieve while sliding, so make sure to stay aware of where you're sliding. Once you reach the ground, you'll find a staircase just up front. You can retrieve another Blue Orb on the left side that gives you a wind shard. On the right side is a silver chest that will contain a Fire Shard, Health II Sigil, and 223 Rupies. After looting the chest, head up the stairs and stand on the circular platform to activate the ruins.
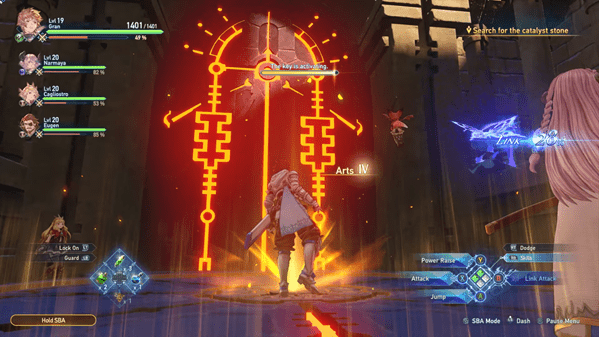
Once the doors open, you'll finally see the big platform that you need to open. Beneath it will be the contraption that Gran's crew is looking for.
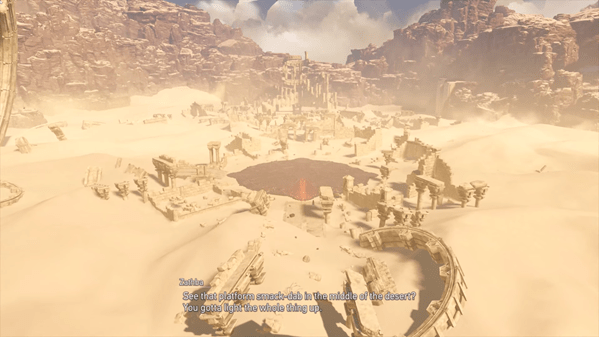
When you're free to move, go down the stairs and make your way towards the platform. You'll find a purple orb to your right. To the leftmost part of the area is a blue orb as well. Use the Green Peculiar wind magic that's circular to make your travels faster. You'll also find an easy-to-find chest in this part. Do take note that there will be sand wolves all around the area, so be prepared for some battle. On the uppermost left side of the area is one of the waypoints that you need to go to lift the seal of the central ruins. Near that area are collapsed structures that can be climbed, and on the top of them, you'll find a golden chest containing a Fortitude Crystal and 864 Rupies.
Boss Fight: Rock Golem
Proceed to the waypoint and stand on the small platform to activate the key. This will take a bit of time to complete, and while waiting, a boss fight will commence between you and a Rock Golem. For this boss, it's important to utilize your agility since the Rock Golem moves slowly. While attacking, make sure to stay within the platform to further progress by activating the key. Once you defeat the Golem, it will drop Golem Finger, x3 Fortitude Crystal, and a Burn Resistance II Sigil.
Activating another part of the Platform
Next, start activating the key again, and once you finish, you'll see half of the central ruins platform has lightened up. You will automatically be teleported back to the entrance of the area, and from here on, make your way towards the upper left of the area to lift the seal of the central ruins once again. But first, head towards the central ruin platform and collect the wooden chests around the area. The chests in this area contain most of the same items from the previous chests except for one that contains a sigil named Stun Power II.
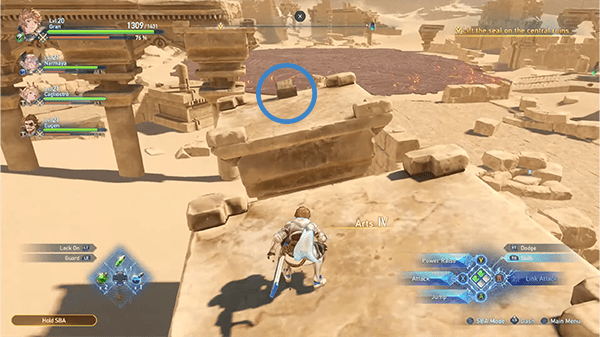
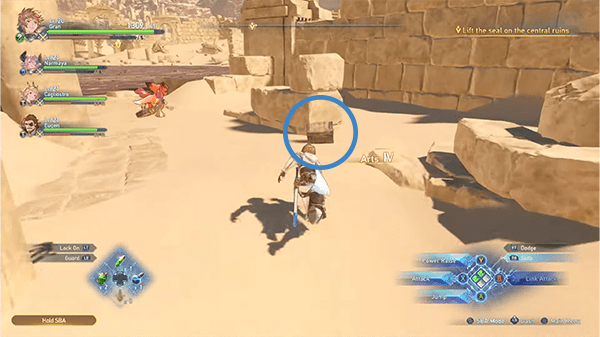
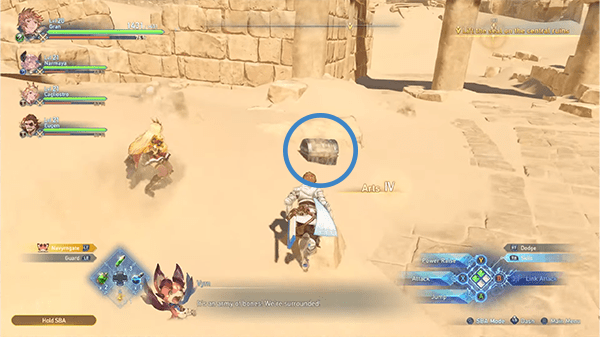
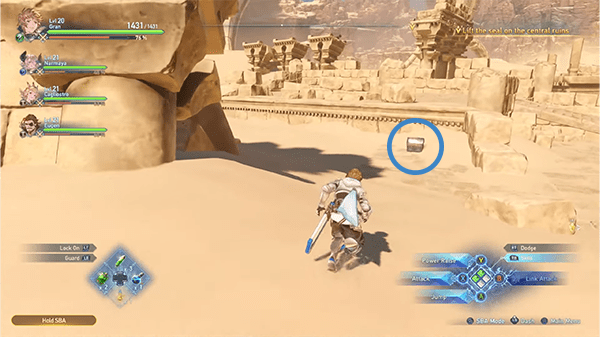
Also, make sure to save progress at the Hallowed Ground near the platform.
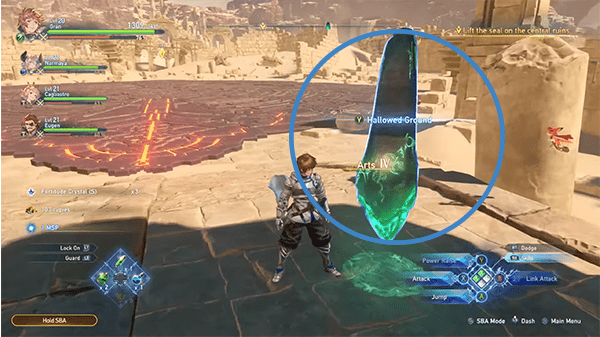
You can also find a Shrouded Treasure near the chests that you have collected. This will reward you with a Quick Cooldown III Sigil and 2010 Rupies. The next Shrouded Treasure can also be found near the waypoint where you need to lift the seal.
Boss: Gerasene
Afterward, you can proceed towards the waypoint and begin activating the key for the Central Ruins. Another boss, Gerasene, will appear. Gerasene is a large skeleton with slightly slow mobility. You can use your speed against this foe as well. Upon defeating Gerasene, it will drop a Purgatory Bone, Dark Shard, and Fortitude Crystal. Once Gerasene is defeated, proceed to the center of the seal and wait for the key to activate.
Activating the last part of the Platform
After activating the key, only a partial part of the Central Ruins will be activated. This means there is another seal that needs to be lifted. Head to the waypoint on the right side of the area. First, go to the upper-right area to collect a silver chest containing Glitterstone (L). You can also find two chests, one golden and one silver, hidden behind a waterfall that contains Aegis II Sigil.
Proceed toward the waypoint where you need to lift the seal. As you approach, you'll discover a shrouded treasure behind a block, dropping 2070 Rupies and Tyranny III Sigil.
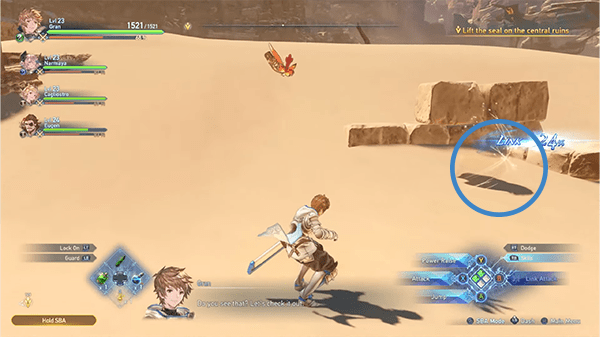
Finally, locate an Omen Stone just behind the seal you need to lift. Complete the Omen Stone challenge, then proceed to the waypoint where you will encounter the Griffin Boss.
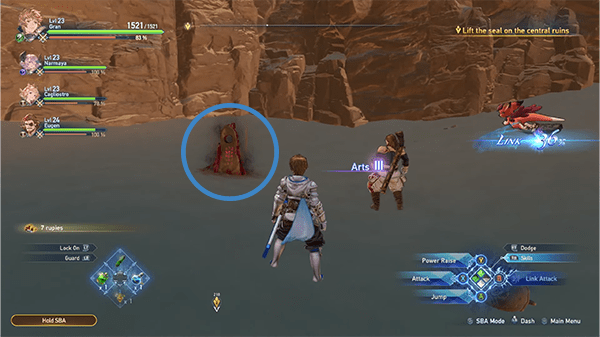
Boss: Griffin
The Griffin Boss is a large bird that predominantly stays in the air. Make use of your ranged attacks here and launch an all-out assault whenever the Griffin is knocked down. Once defeated, the Griffin will drop a Griffin Feather, Wind Shard, Fortitude Crystal, and a Glittercrystal. After defeating the Griffin Boss, proceed with activating the key.
Retrieving the Chest in Central Ruins
After activating the key and lifting the seal to the central ruins, a cutscene will play out, showcasing the chest that appears in the middle of the platform. Zathba will instruct you to retrieve it, and you'll also need to check if the Catalyst is there. Once you regain control, head over to the waypoint in the center of the Central Ruins. Don't forget to replenish items and save your game at the Hallowed Ground.
Now, a cutscene will play out when you approach the chest. This scene showcases the Avia arriving, with their general stating that they cannot allow Gran and his crew to retrieve the chest and the Catalyst. The masked leader will then unmask herself and introduce herself as Maglielle. She will summon her allies and commence an attack against your crew.
First, clear out the enemies, and afterward, a boss battle will commence.
Boss: Maglielle
Maglielle will most of the time be protected by multiple swords and a barrier. Although she still takes damage from attacks, these will only cause minimal harm due to her barrier. Using ranged attacks would be a good strategy to battle her. Once her health reaches zero, a cutscene will immediately show her lying on the ground. The chest will then lower down from above, and Vyrn will collect the Catalyst from it. Just as the crew members are celebrating their success, Maglielle regains consciousness and summons her swords towards Gran. Rosetta will block the attack with her powers, and the other Sword Veil Fellowship members will throw their swords at the chest, causing it to explode. The other members will then grab Maglielle and retreat.
The cutscene will then show the ground rumbling, and Rolan will warn them to get out but will then be cut off. The Central Ruins will start floating, so Gran and the others will make a jump. As they observe what is happening, they are shocked to see that the Central Ruins platform has turned into a colossal-sized being, signaling another boss fight. The colossal-sized being will then aim at Zathba's ship but will be intercepted by Rolan's ship. The Colossal being is named Excavallion.
Boss: Excavallion
Excavallion is a colossal boss that moves very slowly, but its sheer size makes it challenging to dodge its attacks. Rolan and Zabtha will provide air support for you during this boss battle. To cause damage, you'll need to destroy the talus Reactors located on each of its feet. Eventually, Excavallion will summon an attack on Zabtha's ship that will hit, causing the ship to take damage but not go down. The ship will then launch a cannon down to the ground, which Gran can use as a weapon against Excavallion.
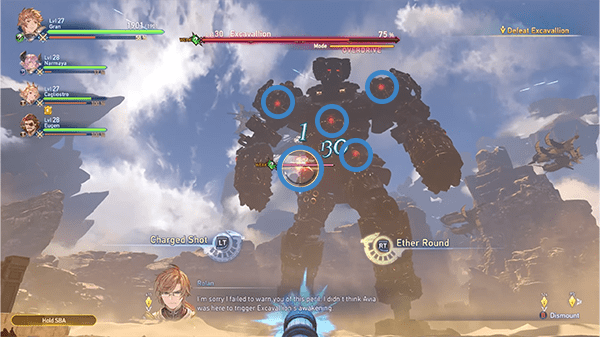
At 50% damage, Excavallion will be knocked down to its knees, exposing its weak spot on its back. Despite attempts to fire on its back, Excavallion will protect itself using a Sand Barrier. Gran and his crew won't have a choice but to run toward its back. Once Excavallion is defeated, this will mark the end of this quest.
Chapter 6: In Search of Hope Quest Notes and Tips
Notes, Tips, and Other Trivia for the Chapter 6: In Search of Hope quest in Granblue Fantasy Relink go here.
Chapter 7: Warning Signs is a Main Quest in Granblue Fantasy Relink. Players are tasked to free Lyria from Vulkan Bolla, the primal beast of dread. Unexpectedly, Id calls out for a temporary alliance to save Lyria from the primal beast. Main Quests in Granblue Fantasy Relink are primarily tied to the story or main campaign of the game which requires a player to complete it to progress story-related events, unlock more game features, discover new locations, and more. This page covers guides, quest objectives, and a complete walkthrough for the "Chapter 7: Warning Signs" main quest in Granblue Fantasy Relink.
General Information
- Previous: Chapter 6: In Search of Hope
- Next: Chapter 8: Relink
- Bosses: Vulkan Bolla, Lilith
- Location: The Phondam Isles, Frightflame Altar
Quest NPCs
Quest Bosses
Quest Enemies
All Items & Rewards
Weapons
Sigils
Treasure
- Magma Worm
- Fortitude Crystal (S)
- Fire Shard
- Champion Merit
- Salamander Egg
- Prism Chip
- Fortitude Crystal (M)
- Rafale Coin
- Fortitude Shard
Key Items & Other
- Partially Scorched Memo
- Surveillance Report: Phondam
- Wee Pincer
Enemy Drops
- Rupies
- Rafale Coin
Quest Rewards
- Prism Chip x1
- Fortitude Crystal (M) x1
- Fire Shard x1
- 10 MSP
Chapter 7: Warning Signs Quest Information
Chapter 7: Warning Signs Quest Description
After obtaining the catalyst to free Lyria from the mind sealer, the crew tracks Avia to Phondam and finds Lyria imprisoned in a crystal atop Vulkan Bolla, the primal beast of dread. The crew and Id join forces and pursue the primal to save Lyria.
Chapter 7: Warning Signs Quest All Chests Locations
- From the starting point, continue heading north, you'll see a Gold Chest on the other side of the area. You'll have to jump over the rocks and avoid falling down the volcano. Opening this chest will reward you Fortitude Crystal (S) x10 and Colossus Cane Omega.
- From the Silverslime, head back to the main route, and along the way, you'll find a chest that contains Fire Shard x3, some rupies, and 1 MSP.
- A silver chest can be found near the first Hallowed Ground you encounter. This chest contains Fortitude Crystal (S) x5, some rupies, and 3 MSP.
- During your second chase on the Vulkan Bolla, you'll find a silver chest along the way, keep an eye out on the right side while you're chasing the beast. The chest contains Burn Resistance II and some rupies.
- Another chest can be found during the second chase on the Vulkan Bolla. Keep an eye out on the left side while you're chasing the beast. This chest contains Fire Shard x2, 102 rupies, and 1 MSP.
- A silver chest can be found near the second Hallowed Ground you encounter. This chest contains Fortitude Crystal (S) x5, some rupies, and 3 MSP.
- A chest can be found during your third chase on the Vulkan Bolla. Keep an eye out on the right side while you chase the beast. This chest contains Fire Shard x3 and some rupies.
Chapter 7: Warning Signs Quest All Shrouded Treasure Locations
- There's a shrouded chest located near the Silverslime in the first area of the quest. Completing the task will reward you with Champion Merit, some rupies, and 5 MSP.
Chapter 7: Warning Signs Quest All Omen Stone Locations
- There are no Omen Stones for this quest.
Chapter 7: Warning Signs Quest All Wee Pincer Locations
There is a total of 3 Wee Pincers in this chapter.
- A Wee Pincer can be found near the first Gold Chest, on one of the platforms you'll have to jump across to reach the other side to open the Gold Chest.
- Once the first chase with the Vulkan Bolla begins, drop down and turn around, you can pick up a Wee Pincer on the ground behind you.
- During the second chase, stick to the left side of the path, you'll eventually spot a separated ground on the left side, jump across to make it on the platform, and pick up the Wee Pincer on the ground. The indicator would be a silver chest beside a wall of rock that will serve as a cover for the magma wave. The chest contains Fire Shard x2, some rupies, and 1 MSP.
Chapter 7: Warning Signs Quest All Slimes
- Once you reach The Phondam Isles, head straight and stick to the left side, you'll find a Goldslime hiding in the corner.
- After opening the first Gold Chest, turn around and jump over the rock to make it across the other side, you'll find a Silverslime in the corner.
Chapter 7: Warning Signs Quest All Archives
- From the ship, before you speak to Rackam to depart, you can pick up the Surveillance Report: Phondam archive on the ship.
- Once you reach The Phondam Isles, continue following the path ahead and you'll spot a purple loot at the edge of a cliff, pick it up to obtain the Partially Scorched Memo archive.
Chapter 7: Warning Signs Quest Objectives
- Head to Frightflame Altar
- Chase the primal beast that abducted Lyria
- Defeat Vulkan Bolla
- Defeat Lilith
- Speak with Rolan
- Fight off Avia's forces
- Speak with Rackam
GBF Relink Full Chapter 7: Warning Signs Walkthrough
Reach the Frightflame Altar
Upon starting the quest, turn around and you can pick up a Magma Worm loot. Along the way, you can pick up the Partially Scorched Memo document, you'll see a purple loot on the edge as you progress forward.
Now go back to the previous platform, and nearby you'll see a Gold Chest, you'll have to jump over two platforms. You can also pick up a Wee Pincer on the first platform you'll jump on to. Once you make it safely to where the Gold Chest is, open it to receive Fortitude Crystal (S) x10 and the Colossus Cane Omega. Turn around and jump over the platform on the right, on the left side you can slay a Silverslime to obtain additional loot and rupies.
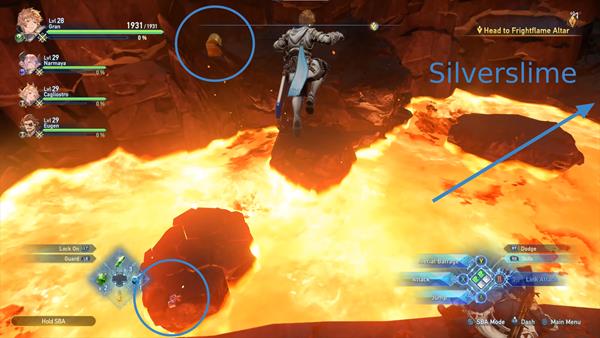
Just across the Silverslime is another chest, open it to obtain Fire Shard x3 and some rupies.
Continue following the main path and you'll spot a Shrouded Chest in the area. This chest contains Champion Merit, some rupies, and 5 MSP.
As you progress, you'll find the first Hallowed Ground for this quest. Next to it is a Silver Chest that contains Fortitude Crystal (S) x5, some rupies, and 3 MSP. Make sure to use the Hallowed Ground when necessary. Now head up the stairs to reach the altar. Upon reaching the area, a short cutscene will occur. You'll find Id in the area, along with the Vulkan Bolla. But this time, it seems like Id is fighting the beast to save Lyria.
First Chase
After the short cutscene, continue by following the primal beast. Keep an eye out for loot and chests in the area, but be careful, if you're slow the ground will sink into the magma and if you get caught you'll have to start over from the altar. Along the way, you can pick up a Salamander Egg. Keep an eye out on the left side of the area as you progress through the chase. Continue following the quest marker and you'll reach an area where you can finally engage with the Vulkan Bolla.
Boss Fight: Vulkan Bolla (1st Phase)
While fighting the Vulkan Bolla, it's important to note that two additional phases follow the initial one. To initiate the second chase, you must inflict substantial damage.
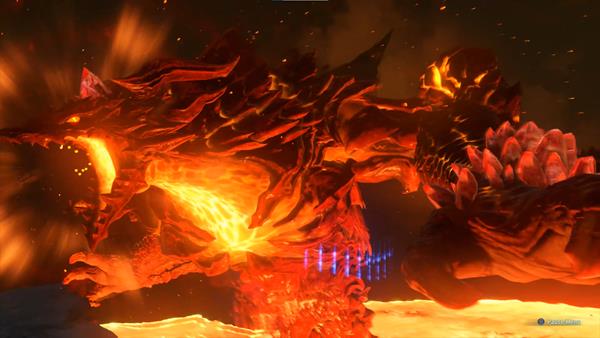
Id will temporarily ally with you during this encounter. Vulkan Bolla inflicts Fire damage and is susceptible to Water. Once its HP drops to 90%, the second chase will begin.
Second Chase
During the second chase, continue following the quest marker and avoid falling down the lava. This time, the Vulkan Bolla will start creating a magma wave, you'll need to hide behind cover to avoid Burn damage. Red indicators will be flashed on the ground signaling when the magma wave will occur. Along the way, you will spot a silver chest. keep an eye out on the right side as you chase the beast. This chest contains Burn Resistance II and some rupies.
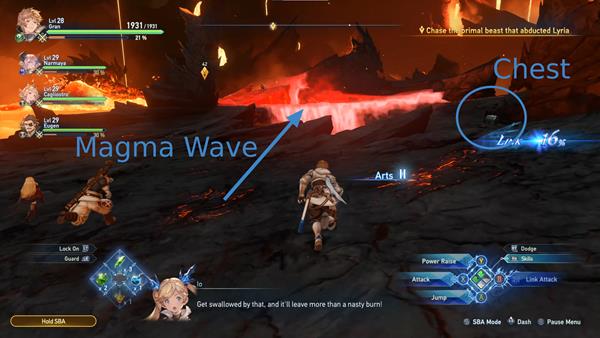
There's also a loot along the way, picking it up will reward you with Salamander Egg x2. This one will also be on the right side, but you'll have to take a glance behind you to spot it. Continue following the quest marker and anticipate when the magma wave will occur. You'll spot another chest on the left side as you chase the beast. This chest contains Fire Shard x2, some rupies, and 1 MSP.
Once you safely make it to the next area, the second phase of the boss fight will begin.
Boss Fight: Vulkan Bolla (2nd Phase)
During the second phase, the Vulkan Bolla will retain the same moves it had during the first phase, but this time with additional moves. One of the moves is called Link Charge, during this state, everyone from your party will deal little to no damage with regular attacks against the boss.
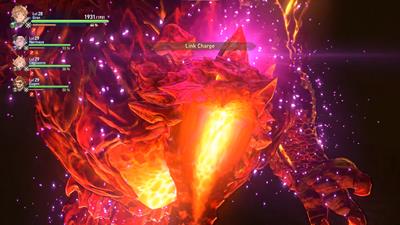
You don't have to do much during this phase, just wait for Vyrn to jump in and release the barrier. A short cutscene will trigger and the third chase begins.
Third Chase
Go through the wall that the Vulkan Bolla smashed, on the left side you find a Hallowed Ground, and a silver chest just next to it. Open the chest to receive Fortitude Crystal (S) x5, some rupies, and 3 MSP. Make sure to use the Hallowed Ground to heal everyone from your crew and replenish your recoverable items before you proceed. Before you jump down and begin the third phase of the boss battle, stick to the right side to find a chest. Open it to receive Fire Shard x3 and some rupies.
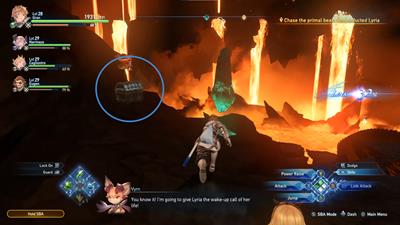
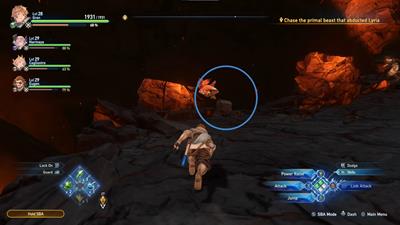
Once you jump down a short cutscene will occur and start the third and final phase of this boss fight.
Boss Fight: Vulkan Bolla (3rd Phase)
This phase is where the real boss fight begins. The Vulkan Bolla will constantly traverse through the molten lava, unleashing magma balls across the area. Avoid the red circles to evade burns. Focus your attacks on the crystals embedded in its arms for increased damage.
After a few seconds, it performs the Link Charge again; target the crystals, and when Vyrn intervenes, capitalize on the opportunity to deal significant damage. Upon entering Overdrive Mode, Vulkan Bolla executes "Odium," backing away to create a massive magma wave. Seek a safe area to evade damage, persistently attacking the crystals for substantial damage and stagger the boss.
The Vulkan Bolla will also execute the move called Auxilium where it begins summoning a giant ball of fire in the middle of the arena. You will have to attack the body parts connected to the mana emitting the ball of fire. You will have to do this within the time limit to succeed.
After successfully stopping the Auxilium, it will perform another Link Charge. A brief cutscene ensues, where Vyrn attempts to remove the barrier, but Vulkan Bolla retaliates. Id intervenes, slamming the boss's head to the ground, allowing Vyrn to exploit the opening and once again remove the barrier. Consistently deal damage by attacking the crystals and capitalize on Link Attacks and use your Skybound Arts to deal significant damage. After defeating the Vulkan Bolla, you'll receive Prism Chip, Fortitude Crystal (M), Fire Shard, and 10 MSP.
Boss Fight: Lilith
After defeating the Vulkan Bolla, Lyria is freed from the catalyst and Vyrn breaks the collar around her next to truly set her free. Lilith appears in the area and attacks the crew, all while instructing Id to retrieve Lyria. The boss fight begins shortly after. Do note that this is a predetermined boss fight, meaning you will lose this battle no matter what.
When you face defeat, Lilith will imprison you instead of killing you, as she suggests that Lyria wouldn't approve of it. When she escapes, Rolan arrives at the scene and somehow destroys the barriers, setting the crew free. The crew then returns to the ship with Rolan.
Returning to Seedhollow
Upon arriving on the ship, speak to Rolan. He will reveal the truth about himself and Lilith, that they're both Astrals. As well as Lilith's plan to open a gate using Angra Mainyu's power, a power that would result in the destruction of Zegargrande. Before they could finish discussing, a group of enemies suddenly ambushed the ship. Fight off Avia's forces to proceed.
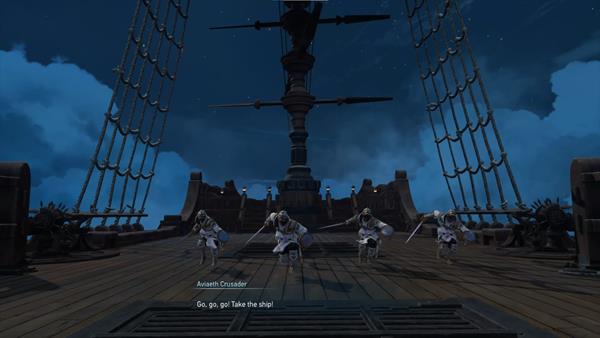
After clearing the enemies, a short dialogue with the crew will occur. After the dialogue, speak to Rackam to finish the quest. The crew ultimately decides to accept Rolan as an ally and plans to head back to Seedhollow with the objective of stopping Avia's plans. after a short cutscene, Chapter 8: Relink officially begins.
Chapter 7: Warning Signs Quest Notes and Tips
Notes, Tips, and Other Trivia for the Chapter 7: Warning Signs quest in Granblue Fantasy Relink go here.
Chapter 8: Relink is a Main Quest in Granblue Fantasy Relink. This quest shows how THe captain and his crew will storm the castle and make their way to Lilith who has Lyria captive. Main Quests in Granblue Fantasy Relink are primarily tied to the story or main campaign of the game which requires a player to complete it to progress story-related events, unlock more game features, discover new locations, and more. This page covers guides, quest objectives, and a complete walkthrough for the "Chapter 8: Relink" main quest in Granblue Fantasy Relink.
General Information
- Previous: Chapter 7: Warning Signs
- Next: Chapter 9: Opposing Wills
- Bosses: Gallanza, Maglielle, Angra Mainyu, Id (Boss), Tayu'itar
- Location: Seedhollow Castle
Quest NPCs
Quest Bosses
Quest Enemies
All Items & Rewards
Weapons
Sigils
Treasure
- Busted Manikin
- Fortitude Crystal (S)
- Aviaeth Prayer Book
- Light Shard
- Patalena Glass
- Fortitude Crystal (M)
Key Items & Other
- n/a
Enemy Drops
Quest Rewards
- Fortitude Crystal (M)
- Fortitude Crystal (S)
- Prism Chip
- Dark Shard
- Quality Refinium
- Fortitude Crystal
- Combo Finisher II
Chapter 8: Relink Quest Information
Chapter 8: Relink Quest Description
The Captain and his crew have arrived in Seehollow to rescue Lyria from the Avia Forces.
Chapter 8: Relink Quest All Chests Locations
- Upon entering the corridors which contain the injured soldiers of Seedhollow, immediately turn left and you'll find a Silver chest that contains x5 Fortitude Cryst (S) and Rupies.
- You can find a silver chest just beside the first hallowed ground inside the castle containing a light shard and Rupies.
- You can find a Golden chest just in front of the first hallowed ground inside the castle containing a Matchlock weapon and Fortitude Crystal (M).
- After defeating Reaper Avalan and his squad, the right stairwell has a wooden chest containing Fortitude Crystal (S) and Rupies.
- After defeating Gallanza and Maglielle, head straight and you'll easily see a silver chest containing Uplift III Sigil and Rupies.
Chapter 8: Relink Quest All Shrouded Treasure Locations
- List down all Shrouded Treasure Chests with locations/guides.
Chapter 8: Relink Quest All Omen Stone Locations
- At the Corridor of Peace in Seedhollow Castle, after tayu'itar demolishes the wall to your right and ambushes you, defeat him first and you can find an Omen Stone at the top right corner of the open area that you fought the boss in.
Chapter 8: Relink Quest All Wee Pincer Locations
- At the Corridor of Peace in Seedhollow Castle, head straight towards the 2 Seedhollow soldiers that are on attack stance and turn left towards a row of chairs. The first Wee Pincer should be under the chairs.
- At the Corridor of Peace in Seedhollow Castle, after you get past the Seedhollow soldiers, keep heading straight until you open a door that goes outdoors. There's a stairwell going down but look right first and you'll see a balcony with the second Wee Pincer on the ground.
- At the Corridor of Peace in Seedhollow Castle, when you go down the stairwell heading straight towards another section of the castle, make your way inside through the doors and turn at the first left you see. You'll find the third Wee Pincer beside a rubble.
- At the Corridor of Peace in Seedhollow Castle, you can find the fourth Wee Pincer after beating the boss Tayu'itar and using its mech body to destroy the other Tayu'Itar enemies and Avia Battleships. You can retrieve the Wee Pincer at the top right corner of the open area where you fought the boss at. There's also an Omen Stone beside the crab.
- At the Corridor of Peace in Seedhollow Castle, a Wee Pincer can be located in the fountain where Rolan activates the secret passage that goes to the altar of Angra Mainyu. The fountain is just in the middle of the room where Rolan shows the secret passage.
Chapter 1: The Western Frontier Quest All Slimes
- A slime can be found just before the first Hallowed Ground you encounter.
- A slime can be located past the first Hallowed and and the hall way with two staircases to the right and left.
- A slime can be located at the entrance of the area that you spawn in after defeating Maglielle and Gallanza.
- From the entrance that you spawn in after defeating Maglielle and Gallanza, head down the stair well until you find a rubble. A slime can be located beside the rubble.
Chapter 1: The Western Frontier Quest All Archives
- Head down the stairwell, and while moving towards the castle, you'll find an archive to the left that gives you "Order for Emergency."
- Once you finish checking your weapons and other items, head to the next waypoint, which is to talk with Zathba. Beside him is another Archive that contains the "Memo from Zathba."
- To the right, adjacent to some soldiers in the corridor of the castle, locate a archive containing the "Urgent Massive"
- Continue straight until you locate a archive containing "493rd Seedhollow GA notes" and hallowed ground for saving progress or replenishing items.
Chapter 8: Relink Quest Objectives
- Get ready to storm Seedhollow Castle
- Head to the depths of the castle
- Fight off Avia's Forces
- Head to the depths of the castle
- Fight off Avia's Forces
- Head to the depths of the castle
- Defeat the Tayu'itar
- Neutralize the enemy ships
- Head to the depths of the castle
- Fight off the Generals
- Head to the depths of the castle
- Head to Hollowhaze Altar
- Defeat Id
- Go through the interdimensional gate
- Defeat Angra Mainyu
- Defy Angra Mainyu
- Destroy Angra Mainyu
GBF Relink Full Chapter 8: Relink Walkthrough
Castle Grounds
The quest begins with a cutscene wherein Gran and his crew have already arrived back in Seedhollow. The soldiers of Seedhollow and Zathba's family are in a panic due to the Avia. Upon regaining control of Gran, you'll need to prepare to storm Seedhollow Castle. Head down the stairwell, and while moving towards the castle, you'll find a purple orb to the left that gives you "Order for Emergency." Your first waypoint leads you to Sierokarte, who is very glad that all of you are safe. You can express your gratitude for her assistance. Sierokarte will inform you that the castle is under attack by the Church of Avia, and it has forced each of the city's wards to declare temporary lockdowns. After conversing with Sierokarte, you'll receive another Crewmate Card.
Once you finish checking your weapons and other items, head to the next waypoint, which is to talk with Zathba. Beside him is another purple orb that contains the "Memo from Zathba." After retrieving that, converse with Zathba, and he will be surprised that you're back so soon. He'll acknowledge how you helped him in the past, so he will provide you with intel free of charge. He'll mention that his people are surveying the damage around the city. His reports suggest that Avia is not focused on taking out the commercial district and is only focused on one area, which is the castle. Zathba will mention that Avia has over 5,000 men and has manned and unmanned boats. He'll also mention that the Sword Veil and the Silver Wolf Corps are acting in concert. Zathba will seem distressed and mention that he would like to jump in and fight, but his priority is the well-being of the city first. He'll ask you to give the leader a good one for him.
Inside the Castle
After conversing with Zathba, proceed to the next waypoint, which leads to the doors of the castle, and prepare to storm it. Upon entering, a cutscene will unfold, revealing the struggling soldiers of Seedhollow inside. Upon regaining control of your character, promptly look to the left to retrieve a blue orb containing a Busted Manikin. Subsequently, proceed straight into the corridors, housing the injured soldiers of Seedhollow. To the left, you'll find a Silver chest containing x5 Fortitude Crystal (S) and 108 Rupies. To the right, adjacent to some soldiers in the corridor, locate a purple orb containing the "Urgent Massive" and a blue orb with an Aviaeth Prayer Book. As you approach the doors to the next area, glance to the right to find another blue orb with another Aviaeth Prayer Book.
Upon passing through the doors, you'll immediately engage in battle with Aviaeth Soldiers blocking your path. The first group comprises Aviaeth Saber, Aviaeth Lancer, and Aviaeth Archer. This encounter will unfold in two waves, so once victorious, proceed forward into the depths of the castle. Ascend the stairs, encountering debris that Rolan will destroy to grant you access. Navigate through the corridors, following the waypoint. Avia battle ships will attempt to attack you from above. Upon reaching a broken-down stairwell, descend and collect another blue orb containing Patalena Glass. Follow the waypoint once more.
Continue straight until you locate a purple orb containing "493rd Seedhollow GA notes" and a hallowed ground for saving progress or replenishing items. Adjacent to these is a silver and gold chest, containing a light shard, Matchlock, and Fortitude Crystal (M).
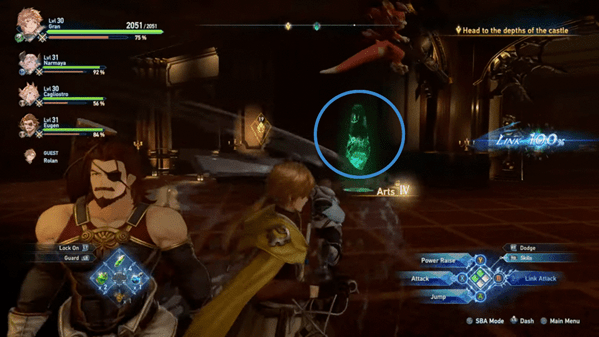
Follow the waypoint once more until you reach a hallway containing new enemies led by their captain, Reaper Alavan. Reaper Alavan will seal the door leading to the next area, necessitating the defeat of the defending enemies to progress further. After vanquishing the enemies, refrain from advancing immediately. Instead, ascend the stairwells on your right and left. The left stairwell harbors a blue orb containing a busted manikin, while the right stairwell conceals a wooden chest with a Fortitude Crystal (S) and 118 Rupies.
Subsequently, proceed to the doors again and follow the waypoint. Traverse through the corridors, encountering another group of Aviaeth Lancers blocking your path. Eliminate them and press on. Upon reaching another door, you'll enter a spacious hall. As you move forward, an enemy will unexpectedly burst through the walls on the right. This adversary is known as Tayu'itar, serving as a boss in this quest.
Boss: Tayu'itar
The Tayu'itar stands as an impressive Aviaeth mechanized arsenal, designed as a heavily armored assault vehicle capable of traversing various terrains on its multiple legs. Armed with an extensive arsenal, it possesses the capability to decimate an entire enemy battalion with its formidable firepower. Upon defeating this boss, it will drop Mythril Wheel, Light Shard, Fortitude Crystal (S), and Glittercrystal.
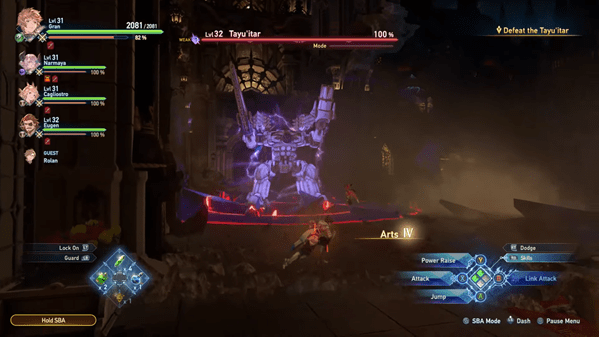
Playing as Tayu'itar
After defeating the boss, a cutscene will play, revealing two more Tayu'itar on their way to engage in battle. Rolan will then leap onto the defeated one from earlier and summon a spell to take control of it. You will now assume the role of the Tayu'itar to confront the other two. Additionally, you'll need to combat the enemy ships hovering in the area. To destroy the hovering ship, target the four glowing cores. Each core can be disabled after defeating two mechs. Once all cores are destroyed, the ship will fall, and you'll revert back to The Captain. For a detailed strategy on defeating Tayu'itar, refer to the Bosses section.
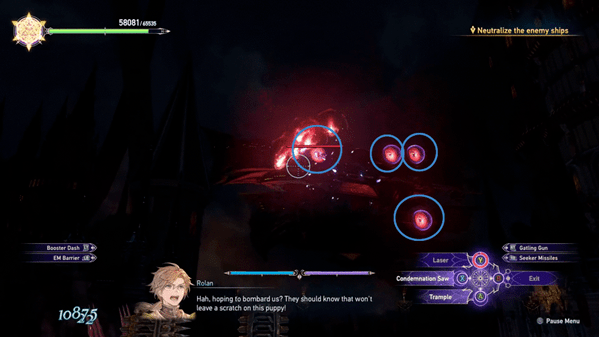
Now, proceed towards the castle depths again and follow the waypoint. Rolan will demolish the debris blocking the stairwell, so wait for him. Afterward, ascend the stairs, and you'll discover the second Hollow Ground in the middle of the staircase. Once done, continue straight toward the waypoint and enter through the doors. This will initiate a cutscene featuring Gallanza and Maglielle eating together, anticipating the arrival of the Captain and his crew. This, in turn, will trigger another boss battle, this time against both of them simultaneously.
Boss: Gallanza and Maglielle
Gallanza and Maglielle join forces against you and your crew. Maglielle, one of Avia's three generals, holds the position of commander of the secretive Sword Veil Fellowship. Renowned as an avid collector of weapons, Maglielle leverages her magical prowess to control her arsenal with elegance and grace. Gallanza, another of Avia's three generals, serves as the commander of the formidable Silver Wolf Corps. Armed with a massive halberd, Gallanza instills fear in his adversaries by infusing the element of earth into his attacks, delivering powerful and wide-reaching area-of-effect assaults. For a detailed strategy on defeating Gallanza and Maglielle, refer to the Bosses section.
After defeating the two generals, a cutscene unfolds with Gallanza expressing no regrets. Maglielle's Sword Veil Fellowship attempts to defend her, but Maglielle approaches the crew, pleading to spare her family, members of the Sword Veil Fellowship. Gallanza interrupts, urging the Captain to take him instead. Vyrn informs the generals that the crew simply wants to proceed and assures that as long as they don't impede, no further conflict will arise. The crew then moves forward while Gallanza and Maglielle express regret for failing Lady Lilith.
Head to the depths of the Castle
After the cutscene, you'll regain control of The Captain. Make your way through the castle and follow the waypoint. Before following the waypoint, head straight, and you'll easily spot a silver chest containing Uplift III Sigil and 235 Rupies. Now, proceed to the waypoint until you reach a circular room glowing green. On the left side, on a desk, you'll find a purple orb containing "Memoir of Patrolman". Move to the center, where Rolan will summon a spell, revealing a hidden stairwell on the ground. Go through the stairwell and follow the path. Another Hallowed Ground will be located before the door in this area.
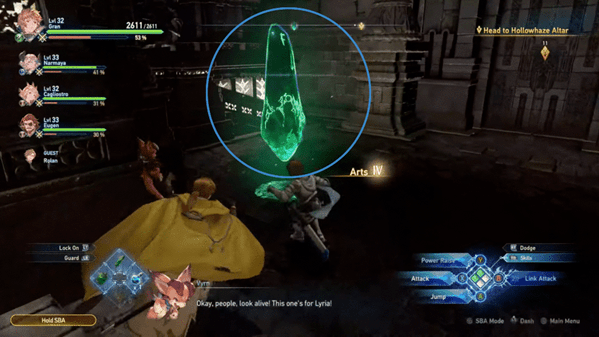
Once you enter the doors, a cutscene will unfold, showing Lilith and Id casting a spell on Lyria. Id appears concerned, and suddenly, The Captain's crew arrives on the scene. Lilith is taken aback, not expecting to see them again. Katalina confronts Lilith, insisting that Lyria is returning with them. Lilith signals to Id to prepare for battle. Vyrn questions Id about his broken promise to protect Lyria, leaving him stammering. Lilith resumes her spell, and Lyria pleads for help. Rolan then charges towards Lilith, launching an attack. Lilith defends herself using her staff and expresses surprise, saying, "It can't be... Astraeus?" Rolan refers to Lilith as the Director and proceeds to stab her. Despite Id's concern for Lilith, she reassures him not to worry and to focus on The Captain.
Rolan then declares that he has been waiting for Lilith's return to open a gate and destroy Angra Mainyu. He attacks, chasing Lilith through a portal. The spell grabs Lyria and brings her into the portal as well, leaving Id alone with you and your crew.
Boss: Id
In this boss fight against Id, his level will be hidden, making it challenging to gauge the difficulty. Id, one of the three generals of Avia, distinguishes himself as a formidable swordsman dedicated to carrying out his duties unquestioningly to fulfill Lilith's will. Despite his strength against the element of Dark, Id exhibits notable resilience, devoid of weaknesses to other elemental forces. For a detailed strategy on defeating Id, refer to the Bosses section.
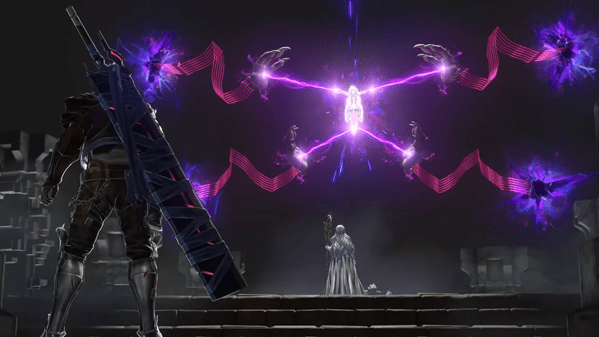
Throughout this fight, there will be cutscenes in between, depicting various attacks that The Captain will execute against Id. At 50% health, Id undergoes a transformation into a demonic being, significantly amplifying the potency of his attacks. Once Id is defeated, he drops Quality Refinium, Fortitude Crystal, and a Combo Finisher II Sigil. However, the cutscene following his defeat shows Id declaring that he is not done yet. He proceeds to revert to his human form and kneels on the ground. This moment signifies the opportunity to head through the interdimensional gate.
Upon passing through the gate, a cutscene unfolds with The Captain finding Lyria lying on the ground. Lyria expresses gratitude for being rescued. Suddenly, turbulence occurs, revealing Rolan and Lilith engaged in an intense battle. The battle pauses with Rolan held by Lilith's spell, and Lilith proceeds to cast Angra Mainyu. A colossal being emerges from a portal, and Rolan vanishes, presumed by everyone to have been killed. The crew is shocked, and everyone prepares for battle against Angra Mainyu.
Boss: Angra Mainyu
Angra Mainyu, a primal beast that distorts space itself, proves to be an overpowering foe that easily subdues Rolan. For a detailed strategy on defeating Angra Mainyu, refer to the Bosses section.
Initially, you won't be able to defeat Angra Mainyu, as the battle gets interrupted by a cutscene where it captures Lyria. Id catches up to the battle and witnesses Lyria being drained by Angra Mainyu and Lilith. The Captain tries to intervene but is easily trampled by Angra Mainyu's arms. Lyria, however, believes it isn't over and expresses faith in The Captain's ability to save them all. Lyria vanishes due to Angra Mainyu, prompting The Captain to scream. Lilith instructs Angra Mainyu to take The Captain's life, but Id intervenes to save The Captain.
Lilith questions Id, who explains that he wanted to protect Lyria, so why do this? Lilith asks Id to calm himself, stating that his duty as her guardian is no longer needed. Lilith attacks Id using Angra Mainyu, overwhelming and capturing him. Id tells The Captain to focus on his link, leading to The Captain concentrating and gaining strength, slashing away Angra Mainyu's arms.
The battle with Angra Mainyu resumes. At 50% health, a cutscene shows The Captain thrusting the sword on Angra Mainyu's head. Things get blurry, revealing Lyria trapped by purple vines, and The Captain is also ensnared. While reaching for Lyria's hand, her hand glows blue, dispelling the vines. They hold hands, and Angra Mainyu's head appears, consuming them.
The next scene shows The Captain and Lyria opening their eyes, still holding hands. They shout "Bahamut," summoning a red and black dragon to combat Angra Mainyu.
You now play as Proto Bahamut, making it faster to damage Angra Mainyu. At 10% health, a cutscene shows Bahamut summoning a final attack, requiring button presses to defeat Angra Mainyu, signaling its defeat.
The subsequent scene depicts The Captain, the crew, and Lyria rising from the ground. Rolan appears, stating that The Captain and Lyria restored everything back to normal. Lilith attacks Rolan from behind, revealing her plan to open the gate to the Astral realm. Rolan warns that this would destroy the world. Lilith proceeds to open a portal to the Pillars of Vayoi, where she plans to build a bridge to the Astral Realm. The crew is then teleported back to the castle, without Rolan, marking the end of this quest.
Chapter 8: Relink Quest Notes and Tips
Notes, Tips, and Other Trivia for the Chapter 8: Relink quest in Granblue Fantasy Relink go here.
Chapter 9: Opposing Wills is a Main Quest in Granblue Fantasy Relink. Players are tasked to put a stop to Lilith's schemes, along with Rolan, and many former foes join forces with your party as they try to stop Lilith once and for all. Main Quests in Granblue Fantasy Relink are primarily tied to the story or main campaign of the game which requires a player to complete it to progress story-related events, unlock more game features, discover new locations, and more. This page covers guides, quest objectives, and a complete walkthrough for the "Chapter 9: Opposing Wills" main quest in Granblue Fantasy Relink.
General Information
- Previous: Chapter 8: Relink
- Next: Final Chapter: Id
- Bosses: Furycane Nihilla, Managarmr Nihilla, Vulkan Bolla Nihilla, Angra Mainyu
- Location: Seedhollow / Seedhollow Airspace / Echo Chamber of Deluded Research / Path of Salvation's Wake / Passage to False Hopes / Lobby of the Stars
Quest NPCs
- Vyrn
- Lyria
- Zathba
- Historiath
- Sierokarte
- Rosetta
- Rackam
- Eugen
- Io
- Id
- Katalina
- Airship Engineer
- Gallanza
- Maglielle
Quest Bosses
Quest Enemies
All Items & Rewards
Weapons
- n/a
Sigils
- Exploiter II
- Blight Resistance III
- Garrison II
- Attack Power III
- Attack Power IV
- Health III
- Critical Hit Rate II
- Critical Hit Rate III
- Aegis III
Treasure
- Fortitude Shard
- Fortitude Crystal (S)
- Dark Liquid
- Dark Shard
- Champion Merit
- Disast Ore
- Welkin Reflection
- Rafale Coin
- Fortitude Crystal (M)
- Prism Chip
- Glittercrystal
Key Items & Other
- Rolan's Notes 8
- Corrupted Letter
- Eroded Stone Monument
Enemy Drops
- Prism Chip
- Welkin Reflection
- Rupies
Quest Rewards
- Prism Chip x7
- Fortitude Crystal (M) x15
- Glittercrystal x2
- Blight Resistance III x1
- Health III x1
- Attack Power III x1
- Critical Hit Rate III x1
- Critical Damage III x1
- 50 MSP
Chapter 9: Opposing Wills Quest Information
Chapter 9: Opposing Wills Quest Description
Losing her only means of reaching the Astral Realm, Lilith sacrifices Zegargrande's primal beasts to raise the Pillar of Vayoi, an island of twisted energy. Now that the crew has rescued Lyria, they head to Vayoi to stop Lilith once and for all.
Chapter 9: Opposing Wills Quest All Chests Locations
- From the second Dark Liquid loot, jump across to reach the other side, and you'll find a chest behind a rock that contains Dark Shard x4, some rupies, and 2 MSP.
- After collecting the Corrupted Letter, continue following the main path, keep an eye out on the left side as you progress, you'll find a chest that contains Dark Shard x4, and some rupies.
- After exiting the wormhole, continue following the main path, on the right side, you'll come across a chest on a different platform. Jump across the platform and open the chest to obtain an Exploiter II, some rupies, and 3 MSP.
- After finding the first Hallowed Ground, you'll also find a chest nearby, it contains Rafale Coin x2 and some rupies.
- From the first Hallowed Ground, continue following the main path. You'll find a chest on the left side as you make your way to the quest marker. This chest contains Fortitude Crystal (M), some rupies, and 3 MSP.
- After defeating the boss Furycane Nihilla, you'll find an Omen Stone at the center of the area. Once you complete the challenge, you'll be rewarded with a chest that contains Attack Power IV and some rupies.
- There's a chest near the second Hallowed Ground you encounter, it'll be after you defeat Furycane Nihilla. The chest contains Fortitude Crystal (S) x5 and some rupies.
- From the second Hallowed Ground, continue following the main path, you'll encounter a silver chest on the left side that contains Fortitude Crystal (S) x10, some rupies, and 3 MSP.
- From the second Hallowed Ground, continue following the main path, you'll find a chest near a slanted pillar that contains Garrison II and some rupies.
- Before you go through the path you just cleared, check the area on the left, you'll find a Gold Chest that contains Attack Power III, some rupies, and 7 MSP.
- After following the main path, you'll spot a silver chest on the left side, This chest contains Fortitude Crystal (S) x10, some rupies, and 3 MSP.
- After defeating Managarmr Nihilla, follow the path ahead, and on the right side, you'll find a gold chest that contains Fortitude Crystal (M) x3, some rupies, and 7 MSP.
- From the first gold chest you encounter after defeating Managarmr Nihilla, continue following the quest marker, take the path on the left and you'll find another gold chest. This one contains Fortitude Crystal (M) x3, some rupies, and 7 MSP.
- From the second gold chest you encounter after defeating Managarmr Nihilla, you'll spot an Omen Stone on the left side. Completing the challenge will reward you with a gold chest that contains Aegis III, some rupies, and 25 MSP.
- From the third Hallowed Ground, follow the quest marker, and on the left side of the path you'll find a chest that contains Fortitude Crystal (S) x6 and some rupies.
- After defeating Vulkan Bolla Nihilla, make your way to the next quest marker. Once you reach a safe ground, you'll find a chest on the right side. This chest contains Prism Chip x4 and some rupies.
- From the fourth Hallowed Ground, follow the quest marker and along the way, you'll spot a silver chest on the right. This chest contains Critical Hit Rate II, some rupies, and 3 MSP.
Chapter 9: Opposing Wills Quest All Shrouded Treasure Locations
- From the second Dark Liquid loot, jump across to reach the other side, on the left side you'll spot a Shrouded Chest. This chest contains a Champion Merit, some rupies, and 7 MSP.
- From the second Hallowed Ground, continue heading up the slope and before you continue going toward the quest marker, take the path on the right, you'll spot a shrouded chest on the left side of the area. This chest contains Enmity III, some rupies, and 7 MSP.
Chapter 9: Opposing Wills Quest All Omen Stone Locations
- An omen stone can be found within the area of the Furycane Nihilla boss fight.
- You'll find another omen stone near the third Hallowed Ground you encounter.
Chapter 9: Opposing Wills Quest All Wee Pincer Locations
There is a total of 6 Wee Pincers in this chapter.
- Once you depart the ship and arrive at the Echo Chamber of Deluded Research, go straight and look to the left side, you'll see a dilapidated house. Jump up and walk over to the edge of the structure, you can pick up the first Wee Pincer here.
- From the second Hallowed Ground, continue following the main path. Once you get past the silver chest on the left side, (This chest contains Fortitude Crystal (S) x10, some rupies, and 3 MSP) take a turn on the left and you'll find the second Wee Pincer in the corner.
- After slaying Managarmr Nihilla, exit through the main path ahead. As you progress, you'll find a gold chest on the right side, and just a little further ahead is a Welkin Reflection loot beside a Wee Pincer.
- From the third Hallowed Ground, continue following the quest marker until you reach the next area. For this section, purple liquid will start dripping from all directions and you'll need to run quickly to not get swallowed by it. Take the path on the left and you can pick up a Wee Pincer along the way.
- After defeating Vulkan Bolla Nihilla, just turn around after the cutscene and you'll find a Wee Pincer on the ground.
- After defeating Vulkan Bolla Nihlla, follow the quest marker and once you reach a safe ground, continue going up the slope. On the right side, you'll find a Wee Pincer.
Chapter 9: Opposing Wills Quest All Slimes
- From the first shrouded chest, go in the opposite direction, and at the edge, you'll spot a Slime.
- Before heading to the area where you'll fight the Managarmr Nihilla boss, check the area on the right side, run toward the edge of the cliff and you'll spot a Silverslime.
- After defeating Vulkan Bolla Nihilla, make your way to the next area, jump across the rock platforms and once you reach the slope, check the left side and you'll spot a Goldslime.
Chapter 9: Opposing Wills Quest All Archives
- Once you depart the ship and arrive at the Echo Chamber of Deluded Research, continue heading straight and you'll eventually spot a purple loot ahead. Pick it up to obtain the Corrupted Letter archive.
- From the second Hallowed Ground, continue following the main path. You'll eventually spot a purple loot beside a pillar on your way, pick it up to obtain the Eroded Stone Monument archive.
Chapter 9: Opposing Wills Quest Objectives
- Speak to Zathba
- Get ready and head to the dock
- Speak with Rackam
- Head to the top of the pillar
- Defeat Furycane Nihilla
- Defeat Managarmr Nihilla
- Defeat Vulkan Bolla Nihilla
- Defeat Angra Mainyu
- Thwart Lilith's plans
GBF Relink Full Chapter 9: Opposing Wills Walkthrough
Depart from Seedhollow
Once the quest starts, go down the stairs and follow the quest marker, you'll find Zathba in the area. Speak to him to initiate a conversation. After discussing the plan with Zathba and Historiath, make the necessary preparations like upgrading Weapons, assembling your party, and equipping Sigils before you make your way to the quest marker.
Once you're ready, head to the dock and speak to the Airship Engineer to board the ship and depart from Seedhollow. Now that you're on the ship, check the area for some loot before you speak to Rackam, you can pick up Fortitude Shard x3 and Fortitude Crystal (S). Now speak to Rackam and receive Rolan's Notes 8, interact with him once more to officially depart Seedhollow Airspace and head to the next area.
Reach the top of the pillar
Once you reach the next area, turn around and you'll see a loot at the edge of the cliff. Pick it up to obtain a Dark Liquid. Continue following the path ahead and pick up another Dark Liquid along the way, you won't miss it. From the second Dark Liquid loot, jump across to reach the other side, you'll find a chest behind a giant rock, and nearby is a Shrouded Chest. The chest behind the rock contains Dark Shard x4, some rupies, and 2 MSP.
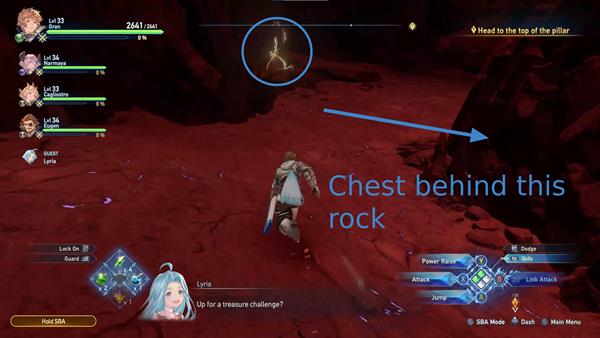
Continue following the quest marker, you'll see a purple loot along the way. Pick it up to obtain the Corrupted Letter document. Make your way up the slope ahead and on the left side is a chest that contains Dark Shard x4, and some rupies.
Now continue following the quest marker, you'll encounter two Keepers and a Watcher on your way. To progress further, you'll need to eliminate the Watcher blocking your path. First, you'll need to defeat the two Keepers in the area, then enter the Wormhole and transport to a different dimension, from here you can attack the Watcher and open up the path ahead, but you'll need to exit the Wormhole you just went through to send you back to your original dimension.
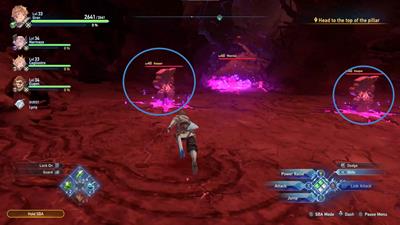
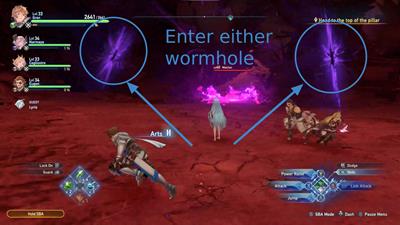
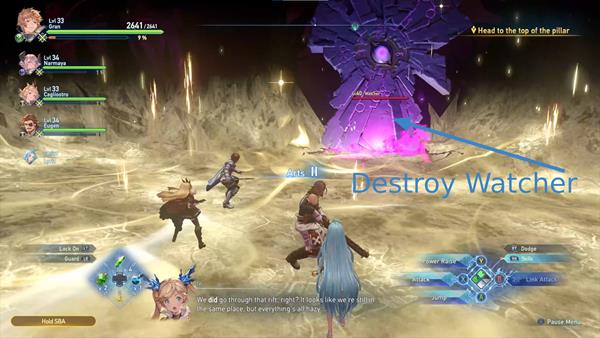
After you exit the wormhole, continue following the path ahead. Keep an eye out for some loot, you can pick up a Welkin Reflection along the way. There's also a Welkin Reflection x2 loot near a chest you'll encounter as you progress. The chest contains an Exploiter II, some rupies, and 3 MSP.
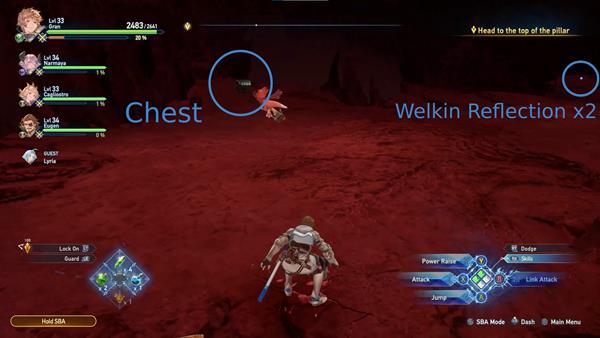
Now follow the quest marker and once you reach the area, you'll encounter Ominous Form enemies and a Watcher blocking your path. Keepers will also appear in the area. Just like before, enter the wormhole and destroy the Watcher from the other dimension, then return to the original dimension to progress further. Once you reach the quest marker, you'll find a Hallowed Ground, and next to it is a chest that contains Rafale Coin x2, and some rupies. Make sure to use the Hallowed Ground to recover some HP if needed. Once you go through the arch past the Hallowed Ground, there's no going back. Continue following the path and you'll spot a chest on the left side of the area, at the top of some rubble. This chest contains Fortitude Crystal (M), some rupies, and 3 MSP.
As you progress further and reach the next quest marker, you'll face off against the boss Furycane Nihilla.
Boss Fight: Furycane Nihilla
This boss exhibits similar attacks to when you first encountered them as Furycane during Chapter 3, but this time, additional moves are introduced.
One of which is the move called Arrow Gale, where the boss charges and spins around the arena, indicated by a distinctive purple glow on the ground. Players can easily spot these marks and dodge them accordingly. Once it enters Overdrive Mode, it'll unleash the move called Void Ripper, where it slams its sword and creates twisters that cascade across the arena. Be wary about where it swings its sword and avoid the twisters. Another attack it performs is Soulless Storm, where it slams the ground, triggering an explosion marked by a red ring. The next ring will shrink from the edge of the arena so you will need to head back closer to Furycane Nihilla, at that point, you can attack it from there. Furycane Nihilla also performs an attack called Last Tempest, where it sends out several twisters to overwhelm you and your party. You would need to exercise caution with the amount of twisters it sends out and strategically plan the timing of your dodges. Finally, it performs the move called Sword Swings, signaled by four purple sparks around the boss. Dodge its swings by moving out of its trajectory to avoid getting damaged. Once you defeat Furycane Nihilla, you'll be rewarded with Prism Chip, Fortitude Crystal (M) x3, Glittercrystal, Blight Resistance III, and 10 MSP. After the boss fight, Id will temporarily join your party, you will be given the option whether to include him in your team or not. Before you exit the area, you can find an omen stone in the middle of the boss fight area.
Path of Salvation's Wake
Now exit the area and continue following the main path. Up ahead is the second Hallowed Ground, you'll find a chest nearby, open it to receive Fortitude Crystal (S) x5 and soem rupies. Continue following the main path and instead of heading toward the direction of the quest marker, take the path on the right, you'll find a shrouded chest along the way. This chest contains Enmity III, some rupies, and 7 MSP. Just across the shrouded chest, there's a silver chest that contains Fortitude Crystal (S) x10, some rupies, and 3 MSP.
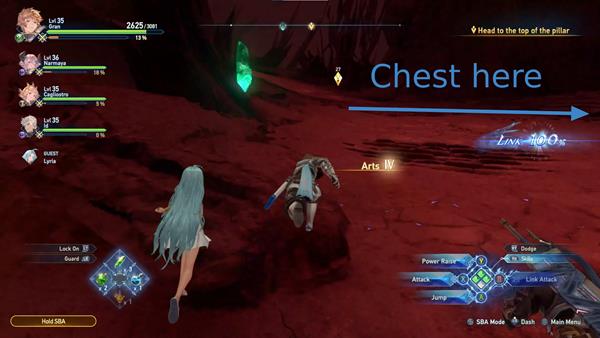
Check the area for other loot, you can also pick up a Disast Ore, Welkin Reflection x2, and 1 MSP nearby. Follow the quest marker and you'll find a chest near a slanted pillar, this chest contains Garrison II and some rupies. On the left side of the area, you'll see a purple loot, pick it up to obtain the Eroded Stone Monument document.
As you progress forward, you'll encounter more Ominous Form enemies, as well as Keepers and a Watcher blocking your path. Just like before, defeat the enemies in the area and repeat the same process as what you did before when you first encountered a Watcher blocking your path. Before you go through the path you just cleared, check the area on the left, you'll find a Gold Chest that contains Attack Power III, some rupies, and 7 MSP. Do note that once you go through this area, several Ominous Form enemies will also spawn. Head back and follow the main path, along the way you'll spot a silver chest on the left side. This chest contains Fortitude Crystal (S) x10, some rupies, and 3 MSP. Continue following the path until you reach an area that triggers a short cutscene. Be prepared for a boss battle.
Boss Battle: Managarmr Nihilla
Managarmr Nihilla shares the same moveset with the Managarmr boss you encountered during Chapter 5, but once it enters Overdrive Mode, it will introduce a move called Frozen Stomps. In this move, Managarmr Nihilla slowly stomps around the arena, leaving circles on the ground that pop and freeze players if stepped on. Since it performs this attack quite slow, players will be able to catch up to him and attack him from the side while also dodging the white indicators.
Another move resembling Managarmr's Silver Wolf Surge involves sending out ice missiles, requiring players to dodge and break them, with streaks on the ground indicating potential freezing if lingered upon, and these streaks are indicated in red and white. Finally, Cryogenic Sphere mirrors his Glacial Desolation from his Managarmr form, where he positions himself in the center of the arena, unleashing a frozen storm covering almost its entirety. You will need to either reach the edge of the arena or hide behind smaller ice burgs. After defeating the boss, you'll be rewarded with Prism Chip, Fortitude Crystal (M) x3, Health III, and 10 MSP.
Passage to False Hopes
After defeating the boss, follow the main path ahead. On the right side, you'll find a gold chest, open it to receive Fortitude Crystal (M) x3, some rupies, and 7 MSP. Just a little further ahead from this chest is a Welkin Reflection loot and a Wee Pincer near each other.
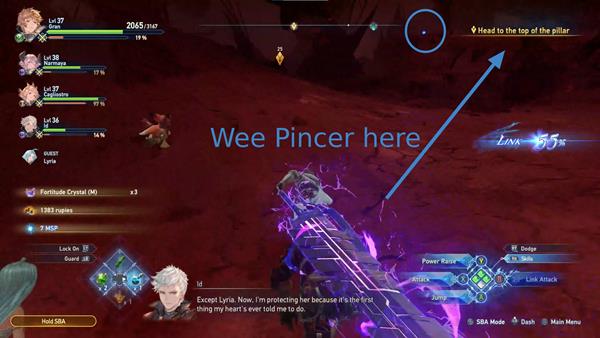
Continue following the quest marker, take the path on the left side and you'll find a gold chest that contains Fortitude Crystal (M) x3, some rupies, and 7 MSP. Beside this chest is a Welkin Reflection loot. On the other side near the edge of the cliff, you can pick up 1 MSP. As you progress further, you'll encounter your third Hallowed Ground for this quest, near it is another omen stone. Interact with the Hallowed Ground to recover HP and prepare for the next boss battle. Once ready, progress forward and check the left side of the path to find a chest. This chest contains Fortitude Crystal (S) x6 and some rupies. Once you reach the next area, purple liquid will start dripping from all directions of the area. Jump down and take the path on the left, you can pick up another Wee Pincer along the way.
Once you reach the end of the path, a short cutscene will trigger, and the next boss fight begins.
Boss Fight: Vulkan Bolla Nihilla
Maglielle will aid you during this boss fight. Vulkan Bolla Nihilla will retain most of its moves as the Vulkan Bolla when you first fought it in Chapter 7, but this time, it'll deal blight instead of burn damage. Once it enters Overdrive Mode, keep an eye out for a move called Void Eruption, this is a move where the boss gracefully traverses the area, splashing and spreading blight in specific regions marked by a pulsating wave. Additionally, puddles will rain down during the execution of this attack.
Be wary of the move called Dark Rising, this one is reminiscent of its Auxilium counterpart in its base form. Here, the boss summons a massive ball of fire in the arena's center. To succeed, players must target the body parts connected to the mana emitting the fireball within a specified time limit. Also watch out for a move called Furious Onslaught, where the boss aggressively slams its hands recklessly into different parts of the arena. Successfully defeating Vulkan Bolla Nihilla will reward you with Prism Chip, Fortitude Crystal (M) x3, Glittercrystal, Attack Power III, and 10 MSP.
Reach the Lobby of the Stars
Now make your way to the next quest marker. Once you safely reach the other side, you'll find a chest on the right side that contains Prism Chip x4 and some rupies. On the left side, you can slay a Goldslime for additional loot.
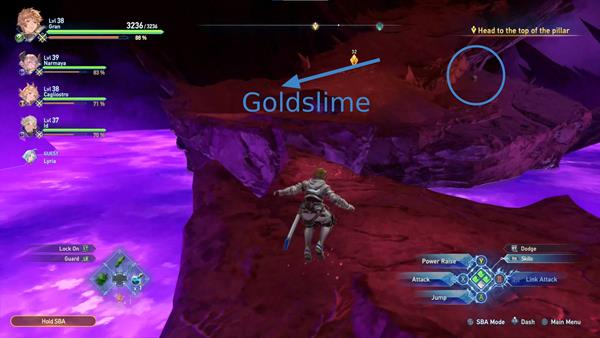
As you head up, you'll spot a Wee Pincer on the right side, you can jump across the platform to reach the area and pick it up.
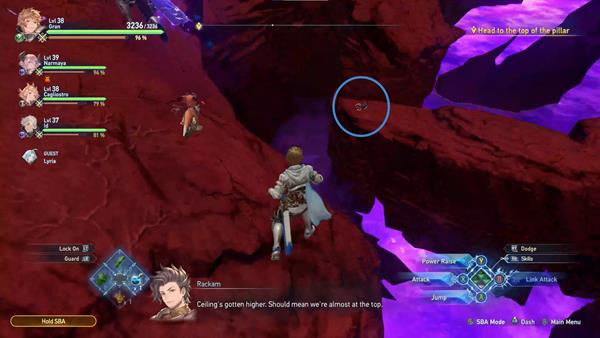
Continue following the main path, you'll eventually reach the Lobby of the Stars, and you'll also find your fourth Hallowed Ground for this quest. Continue following the quest marker, along the way you'll find a silver chest on the right side of the path. This chest contains Critical Hit Rate II, some rupies, and 3 MSP.
Boss Fight: Angra Mainyu
Once you reach the top of the pillar, a short cutscene will occur, afterward, you'll face off against the Angra Mainyu boss.
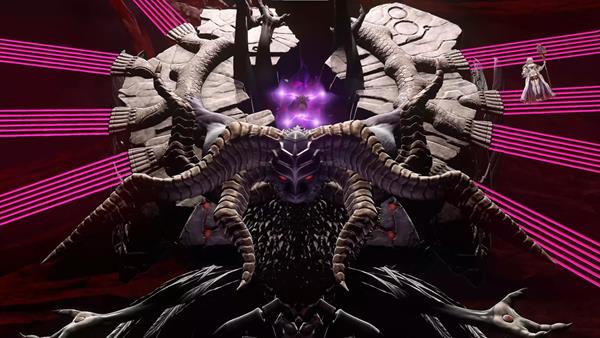
During the first phase of the fight, you'll have to dodge the laser projectiles that come out of the shadows floating in the air. You cannot physically damage the boss from here, and instead, you'll need to destroy a couple of Keepers that will spawn in the area. With this, you'll be able to use the wormhole to warp into a different dimension and take out the two Daevas as well as the shadows that shoot out the projectiles. After a while, you'll be transported to the original dimension, while the boss is staggered, dealing significant damage while it's vulnerable. Once it recovers, step away to avoid blight damage. Once it enters into Overdrive Mode, watch out for the move called Prelude where it stretches out multiple hands and launches beaming projectiles in all directions. For the move called Last Judgement, swiftly eliminate at least three hands in the area within the time limit to completely avoid the impending attack. Successfully doing so will stagger the boss momentarily, giving you and your party an opportunity to land a devastating attack. After defeating the first phase of the boss, you'll receive a Prism Chip and a Critical Hit Rate III.
During the second phase, Lilith and Angra Mainyu will fuse together. It'll start off with an attack where it summons multiple Ominous Form enemies in the area. Be wary of the shadow that's covering the ground. Do not step onto it to avoid getting damaged. After a while, Io will call out to everyone to get inside Rolan's barrier. Once you reach the barrier, a short cutscene will trigger. More mobs of enemies gather and tries to overwhelm Rolan's barrier, but just before it breaks apart. A blast of light hits the enemies and disintegrates away. When the crew looks up, they're surprised Zathba brought a cavalry. After the short cutscene, the boss battle continues. The boss then summons multiple Watchers in the area. Then immediately followed up by multiple different attacks at the same time. Just like before, enter a wormhole to deal physical damage to the boss. Once you stagger the boss, deal as much damage as you can. Once it enters into Overdrive Mode, it'll immediately perform a shriek that pushes away everyone in the area. The move Prelude will be executed again shortly after. Last Judgement will follow up immediately. When it does the move called Salvation, make sure to hide behind a Watcher to avoid the beams of projectile. After successfully defeating the second phase of the boss, you'll be rewarded with Prism Chip x3, Fortitude Crystal (M) x6, Critical Damage III, and 20 MSP. A cutscene will occur where Lyria absorbs the power of Angra Mainyu. With Lilith appearing defeated, Id approaches her, urging a realization of their misdeeds. For a moment, Lilith embraces Id, but then she suddenly releases the seal on his neck, summoning Bahamut.
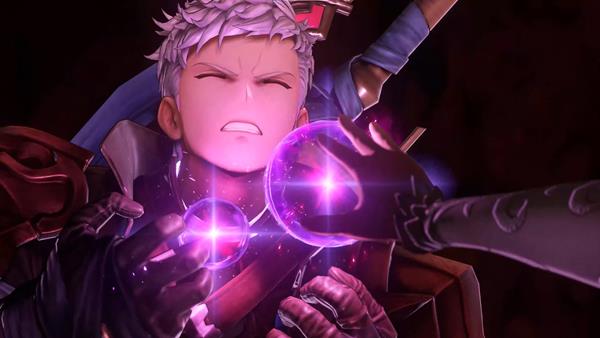
Id undergoes a dramatic transformation, transforming into a massive dragon, before ultimately killing her own mother before he soars into the sky and escapes. This concludes Chapter 9 and officially begins the Final Chapter: Id.
Chapter 9: Opposing Wills Quest Notes and Tips
Notes, Tips, and Other Trivia for Chapter 9: Opposing Wills quest in Granblue Fantasy Relink go here.
Final Chapter: Id is a Main Quest in Granblue Fantasy Relink. This is the final chapter of Granblue Fantasy Relink where it shows The Captain and his crew attempting to rescue Id. Main Quests in Granblue Fantasy Relink are primarily tied to the story or main campaign of the game which requires a player to complete it to progress story-related events, unlock more game features, discover new locations, and more. This page covers guides, quest objectives, and a complete walkthrough for the "Final Chapter: Id" main quest in Granblue Fantasy Relink.
General Information
- Previous: Chapter 9: Opposing Wills
- Next: Chapter 0: Skybound Heart
- Bosses: Bahamut Versa, Id (Boss)
- Location: The Forgotten Sky
Quest NPCs
- n/a
Quest Bosses
Quest Enemies
- n/a
All Items & Rewards
Weapons
- n/a
Sigils
- n/a
Treasure
- n/a
Key Items & Other
- n/a
Enemy Drops
- n/a
Quest Rewards
Final Chapter: Id Quest Information
Final Chapter: Id Quest Description
This quest shows The Captain and his crew making their way to rescue Id.
Final Chapter: Id Quest All Chests Locations
- There are no chests in this chapter.
Final Chapter: Id Quest All Shrouded Treasure Locations
- There are no Shrouded Treasure in this chapter.
Final Chapter: Id Quest All Omen Stone Locations
- There are no Omen Stones in this chapter.
Final Chapter: Id Quest All Wee Pincer Locations
- There are no Wee Pincers in this chapter.
Final Chapter: Id Quest Objectives
- Speak with Rackam.
- Defeat Bahamut Versa
- Prevent Bahamut Versa's reemergence
GBF Relink Full Final Chapter: Id Walkthrough
The Forgotten Sky
The final chapter begins with the entire crew discussing Id's transformation into Bahamut. When the decision is made to rescue Id, the cutscene ends, allowing you to roam the Grandcypher. At the front and back of the ship, you can find blue orbs containing Fortitude shards. Afterwards, head to Rackam and retrieve the purple orb behind him, containing the "Letter from Zathba." Talk to Rackam to proceed with your next objective.
Upon deciding to depart for your objective, a cutscene shows the Grandcypher approaching the dragon that Id has transformed into. The dragon attempts to shoot purple energy balls at the ship, prompting Rolan and the crew to collaborate on creating a spell to hold Id. Rolan struggles, and Id somehow withstands the binding. Rolan tells The Captain that the rest is up to them, initiating a boss battle between The Captain and Bahamut Versa.
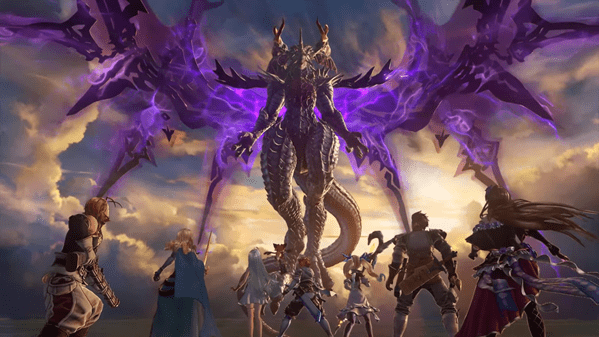
Boss: Bahamut Versa and Id
Bahamut Versa is depicted as destruction incarnate, a doppelganger to one-half of the god of all creation. Sensing a buildup of Astral power, Bahamut Versa traveled from another dimension to the Sky Realm. Lilith sealed it inside Id to be unleashed again when the occasion suited her.
During the battle with Bahamut Versa, when its health reaches 75%, it stores considerable energy, prompting you to gather around Lyria for protection. Despite Bahamut Versa unleashing a powerful attack, Lyria manages to withstand it and summons her own Bahamut to counter-attack, reducing Bahamut Versa's health to 50%. After some time, Bahamut Versa releases a corrupted Id, depleting its health to 20% while summoning another boss, which is Id.
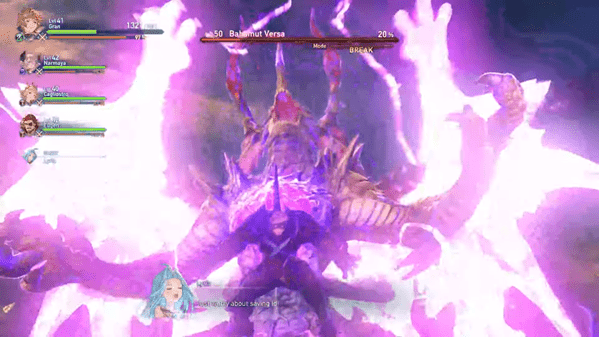
Lyria takes charge of dealing with Bahamut Versa, allowing you to focus your attention on Id. When Id's health reaches 0%, it regenerates back to 100%, gaining power from Bahamut Versa, showcasing Versa's attempt to take full control of Id's body. Once Id reaches 20% health again, a sequence unfolds between him and Versa. It becomes apparent that Id is resisting giving Versa full control, reverting back to human form but still under partial influence.
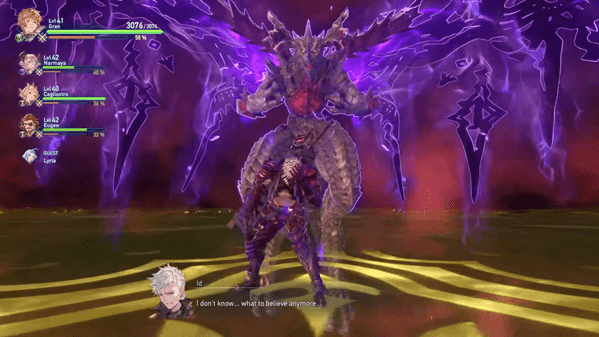
Your task is to destroy the three crystals surrounding Id. After destroying the crystals, Id regains consciousness and attacks Versa. Id becomes your ally, and it's time for a full-on attack against Versa.
Ending
After defeating Bahamut Versa, a cutscene unfolds with Lyria and The Captain holding hands and being struck by Versa. Id steps in to protect them, and they summon Bahamut to unleash an attack on Versa, pushing it back into an Interdimensional Gate and marking the victory of the crew. You regain control of The Captain, but Versa reemerges. The original Bahamut tries to prevent it, and you need to run towards them to trigger a cutscene.
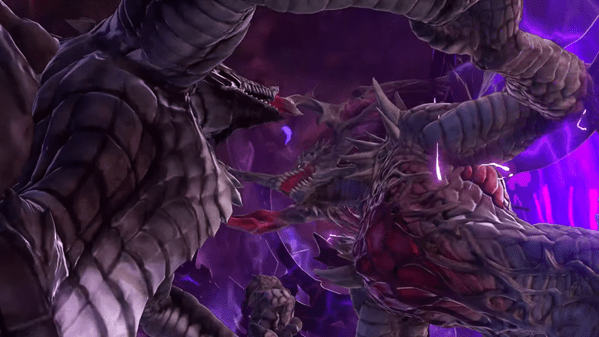
In the cutscene, The Captain and Id unleash an attack on Bahamut Versa, pushing it back. However, Bahamut Versa grabs The Captain and Id into the Interdimensional gate. The cutscene shows Id and The Captain accepting their fate, but Rolan appears to retrieve them. Id hesitates, but The Captain grabs his hand. Rolan pushes them back into the real world but remains behind in the dimension, with parting words: "Don't worry, I'll be back soon."
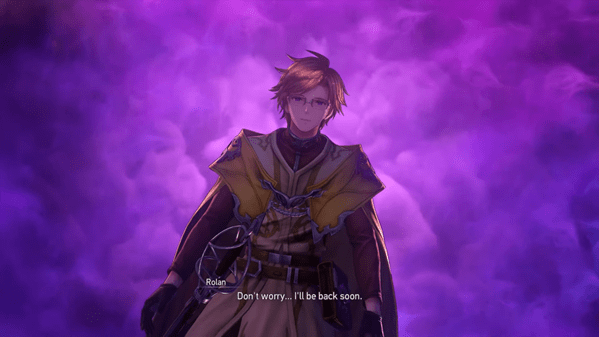
The next scene depicts The Captain waking up to the crew, and they are all relieved. They realize what happened to Rolan but are surprised to hear his voice through the Transceiver. Rolan mentions that his time is almost up, and the line will be cut soon. He explains that he cannot open another gate and assures them not to worry, as he always manages to get himself out. He promises to make it and instructs them to check on the people of Folca.
Afterward, the line cuts off, and Id expresses his need to atone for his sins. The crew reassures him, understanding that deep inside, Id was fighting for the skies. Id hesitates to be forgiven easily, but everyone reassures him again. The Captain offers his hand as a gesture, and Lyria makes Id and The Captain shake hands. The rest of the crew sets sail towards Folca. Lyria and The Captain have a moment together, where Lyria expresses gratitude for what The Captain has done. They promise each other that when they find Rolan, they will give him the thanks he deserves. This marks the end of the game.
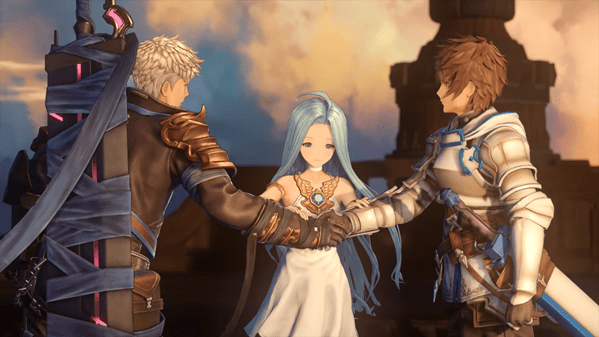
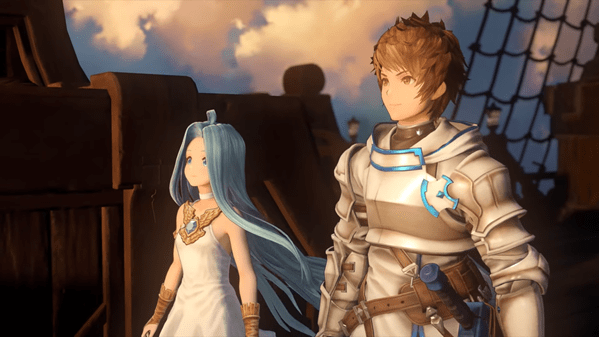
Final Chapter: Id Quest Notes and Tips
Notes, Tips, and Other Trivia for the Final Chapter: Id quest in Granblue Fantasy Relink go here.
Chapter 0: Skybound Heart is a Main Quest in Granblue Fantasy Relink. Id, The Captain, and the crew will embark on a journey to rescue Rolan.. Main Quests in Granblue Fantasy Relink are primarily tied to the story or main campaign of the game which requires a player to complete it to progress story-related events, unlock more game features, discover new locations, and more. This page covers guides, quest objectives, and a complete walkthrough for the "Chapter 0: Skybound Heart" main quest in Granblue Fantasy Relink.
General Information
- Previous: Final Chapter: Id
- Next: New Game Plus
- Bosses: Bahamut Versa Omega
- Location: The Forgotten Sky
Quest NPCs
Quest Bosses
Quest Enemies
- N/A
All Items & Rewards
Weapons
- N/A
Sigils
- N/A
Treasure
- N/A
Key Items & Other
- N/A
Enemy Drops
- N/A
Quest Rewards
- Veteran Skyfarer Status
- Zegagrande Legend Status
Chapter 0: Skybound Heart Quest Information
Chapter 0: Skybound Heart Quest Description
This post-game chapter showcases how Id and The Captain's crew will rescue Rolan.
Chapter 0: Skybound Heart Quest All Chests Locations
- After accepting the Caring Man's quest to retrieve the stolen goods, you'll immediately be spawned into Skywyrm Valley. Upon spawning, immediately turn left to see a Golden Chest on a cliff containing Aegis III, Rupies, and 7 MSP
- From the starting point of Skywyrm Valley, just head straight and then go through the cave. Just keep following the path until you are outside of the cave again on the left side. You'll eventually reach a cliff that's next to a separate land where you can jump on. A wooden chest will be located here containing Fortitude Crystal (S) and Rupies. One way to know that this is the chest is if after you open it, 2 dragon enemies will fly out to attack you.
- Just after you retrieve the wooden chest earlier, head down from that cliff and enter the cave next to it. You'll immediately see another wooden chest to the right.
- From the cave, just keep following the wooden path until you see another path that you can turn right to. Keep heading straight until you reach a dead end, This is where you'll find a silver chest containing a Fortitude Crystal (M), Rupies, and 3 MSP
- Now, head back to the main path before you turn right and continue following the wooden path. Eventually, you'll reach one of the stolen goods areas. Once you reach that area, just past the stolen goods is a wooden platform by the cliff. A Wooden Chest can be found here containing a Wind Shard and Rupies.
- From the entrance of the first stolen goods, turn right and follow the wooden path going up. You'll eventually reach a silver chest containing Flawed prism, rupies, and 3 MSP
- Now, the next chest can be found at the Pillar of Vayoi. Just keep following the oath that leads to the top of the pillar until the quest marker is 103 meters away. Once you reach that point, turn right and you'll see a chest by the cliff of this area.
- Now, just continue moving upward until you reach the second Wee Pincer of this area. A silver chest can be seen behind it just across, on a cliff.
Chapter 0: Skybound Heart Quest All Shrouded Treasure Locations
- A Shrouded treasure can be found near the first stolen goods in Skywyrm valley.
Chapter 0: Skybound Heart Quest All Omen Stone Locations
- List down all Omen Stomes with locations/guides.
Chapter 0: Skybound Heart Quest All Wee Pincer Locations
- The first Wee Pincer can be located during the first mission you take as Id. Once you've progressed a bit in that first mission, specifically before the second cart of supplies, you'll see a wooden pathway going to the right that leads to a single Goblin stormer. The crab will be hiding on the right side of this pathway just behind a pillar.
- Right after you collect the first Wee Pincer, you can find the second Wee Pincer upon seeing the second cart that you need to retrieve, It's just on the left upon entering that area beside a bunch of breakable boxes and barrels.
- The third Wee Pincer can be found at one of the quests that you need to complete in the Pillar of Vayoi. The Wee Pincer can immediately be seen on the right upon spawning in the Pillar of Vayoi. It's just hanging out on a slanted rock on the right.
- The last Wee Pincer can be found at the Pillar of Vayoi quest as well. It's on a ledge near the rock wall as you move further up toward the pillar.
Chapter 0: Skybound Heart Quest Objectives
- Speak with Id
- Speak with the Caring Man.
- Finish the missions Rolan Started
- Head to the Dock
- Speak with Id
- Settle the score with Bahamut versa
GBF Relink Full Chapter 0: Skybound Heart Walkthrough
At Folca
The Skybound Heart ending occurs after completing the quests that follow the main ending. Upon returning to Folca, Vyrn inquires about the next steps. Id suggests locating Rolan's house, prompting Katalina to recall that Rolan lived inside a church. Following the dialogue, the game notifies you that you can now Fast Travel between town services. Subsequently, you follow Id to the church and engage in conversation with him. He mentions his efforts to devise a plan to rescue Rolan. Rackam commends Id for contributing to Rolan's rescue, and Id expresses a debt to Rolan. After some time, The Caring Man appears and expresses excitement upon hearing about Rolan. You have the option to inform The Caring Man that Rolan is currently far away. The Caring Man expresses relief at Rolan's safety but reveals the void left by Rolan's absence and the unfinished tasks awaiting completion. Id volunteers to fill Rolan's role, but The Caring Man hesitates, citing trust in Rolan and Id's unfamiliarity. The Captain and the crew decide to assist, emphasizing their familiarity compared to Id. The Caring Man agrees, instructing you to meet him at the Quest counter for further details. A notification follows, indicating that Id has joined your party.
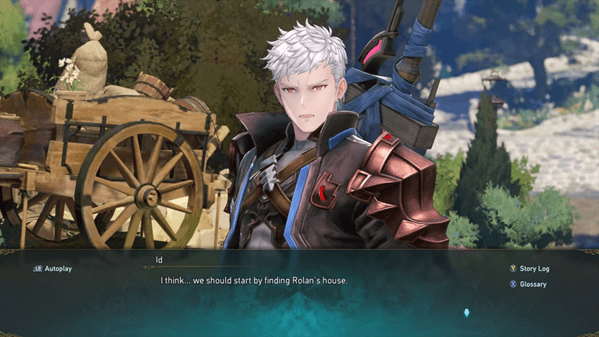
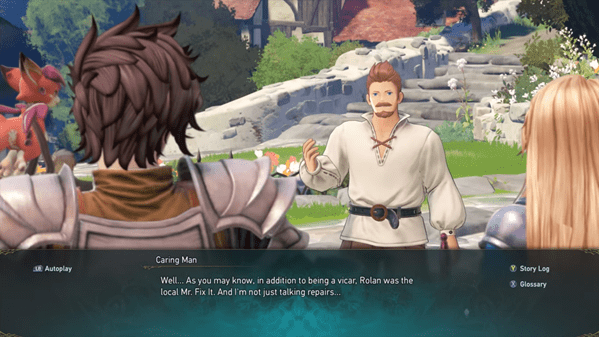
Follow the waypoint to the Caring Man, who will inform you that a group of Goblins has stolen goods requiring retrieval. The subsequent quests will necessitate playing as Id. Upon completion, the Caring Man expresses gratitude for a job well done. You have the option to suggest that he should be thanking Id. In response, the Caring Man apologizes for doubting Id and encourages him to continue serving the city. Subsequently, the crew retrieves Rolan's journal and is surprised by its detailed content. Recognizing the need to run errands and collect Rolan's belongings for more clues on saving him, the group sets out on the task. The game then introduces a new grade, promoting you from Novice Skyfarer to Veteran Skyfarer. This unlocks new difficulties for online participation, including Hard, Very Hard, and Extreme. Afterward, your next objective is to finish the 8 missions that Rolan started within Folca.
Saving Rolan and Boss Fight: Bahamut Versa Omega
After collecting Rolan's journal pages and completing the 8 quests that Rolan started, Id gathers everyone to devise a plan for Rolan's rescue. Following a discussion with Id, head to the dock, where you'll be transported to the Grandcypher. Here, speaking with Id prompts the option to go and save Rolan. A cutscene unfolds, depicting Id using his dragon powers to locate and open an interdimensional gate. Lyria summons Bahamut to assist in the process. The Captain and the crew enter the gate, embarking on a mission to rescue Rolan. The subsequent scene shows them exploring the dimension and eventually encountering Bahamut Versa Omega once again.
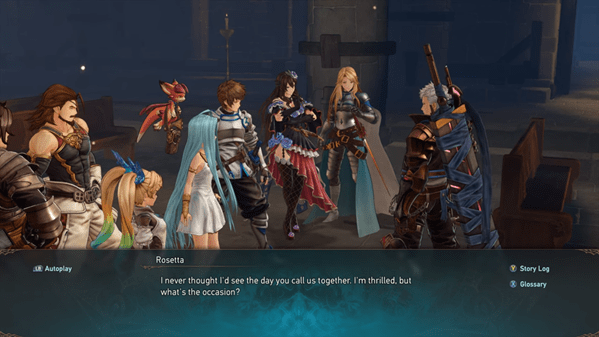
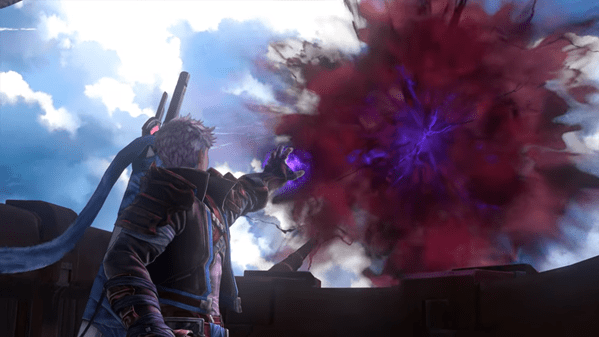
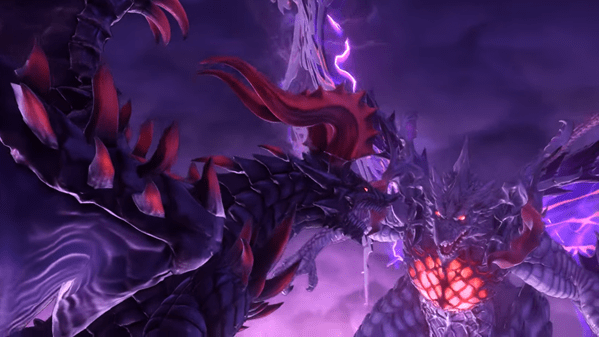
As Proto Bahamut, you engage in combat against Versa Omega. As Versa Omega's health dwindles, a cutscene unfolds, revealing the boss charging a massive attack. Suddenly, Rolan intervenes, utilizing his magic to shield you from harm. Rolan declares that it's time to defeat Versa once and for all, seeking assistance from everyone. The boss fight resumes, with Rolan temporarily chaining up Versa. However, as Versa's health decreases further, it breaks free, requiring you to resume the combat.
Ending
At around 15% health, a cutscene plays, showcasing Id attempting a final hit on Versa. Lyria and the Captain join in, summoning an attack from Proto Bahamut. This collective effort causes Bahamut Versa Omega to vanish. After the boss is defeated, the next scene depicts everyone attempting to escape the dimension successfully. Joyful to have escaped, Rolan expresses gratitude to everyone, personally thanking Id. A fist bump between Id and Rolan ensues, bringing happiness to the group. The subsequent scene shows everyone rejoicing over Rolan's return, transitioning to being back at Folca. In the background, Rolan expresses gratitude to The Captain and the crew for their efforts.
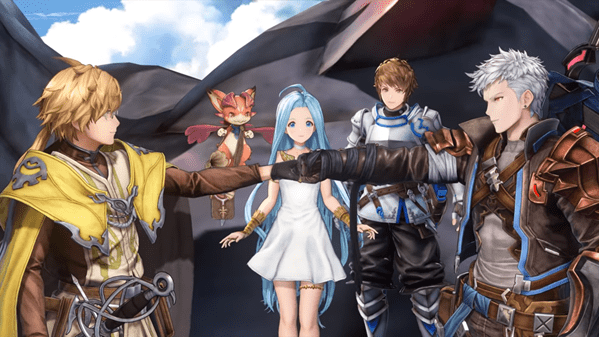
This marks the end of Chapter Zero, accompanied by a promotion to Zegagrande Legend and unlocking Maniac and Proud difficulties.
Chapter 0: Skybound Heart Quest Notes and Tips
Notes, Tips, and Other Trivia for the Chapter 0: Skybound Heart quest in Granblue Fantasy Relink go here.

