Chapter 8: Relink is a Main Quest in Granblue Fantasy Relink. This quest shows how THe captain and his crew will storm the castle and make their way to Lilith who has Lyria captive. Main Quests in Granblue Fantasy Relink are primarily tied to the story or main campaign of the game which requires a player to complete it to progress story-related events, unlock more game features, discover new locations, and more. This page covers guides, quest objectives, and a complete walkthrough for the "Chapter 8: Relink" main quest in Granblue Fantasy Relink.
General Information
- Previous: Chapter 7: Warning Signs
- Next: Chapter 9: Opposing Wills
- Bosses: Gallanza, Maglielle, Angra Mainyu, Id (Boss), Tayu'itar
- Location: Seedhollow Castle
Quest NPCs
Quest Bosses
Quest Enemies
All Items & Rewards
Weapons
Sigils
Treasure
- Busted Manikin
- Fortitude Crystal (S)
- Aviaeth Prayer Book
- Light Shard
- Patalena Glass
- Fortitude Crystal (M)
Key Items & Other
- n/a
Enemy Drops
Quest Rewards
- Fortitude Crystal (M)
- Fortitude Crystal (S)
- Prism Chip
- Dark Shard
- Quality Refinium
- Fortitude Crystal
- Combo Finisher II
Chapter 8: Relink Quest Information
Chapter 8: Relink Quest Description
The Captain and his crew have arrived in Seehollow to rescue Lyria from the Avia Forces.
Chapter 8: Relink Quest All Chests Locations
- Upon entering the corridors which contain the injured soldiers of Seedhollow, immediately turn left and you'll find a Silver chest that contains x5 Fortitude Cryst (S) and Rupies.
- You can find a silver chest just beside the first hallowed ground inside the castle containing a light shard and Rupies.
- You can find a Golden chest just in front of the first hallowed ground inside the castle containing a Matchlock weapon and Fortitude Crystal (M).
- After defeating Reaper Avalan and his squad, the right stairwell has a wooden chest containing Fortitude Crystal (S) and Rupies.
- After defeating Gallanza and Maglielle, head straight and you'll easily see a silver chest containing Uplift III Sigil and Rupies.
Chapter 8: Relink Quest All Shrouded Treasure Locations
- List down all Shrouded Treasure Chests with locations/guides.
Chapter 8: Relink Quest All Omen Stone Locations
- At the Corridor of Peace in Seedhollow Castle, after tayu'itar demolishes the wall to your right and ambushes you, defeat him first and you can find an Omen Stone at the top right corner of the open area that you fought the boss in.
Chapter 8: Relink Quest All Wee Pincer Locations
- At the Corridor of Peace in Seedhollow Castle, head straight towards the 2 Seedhollow soldiers that are on attack stance and turn left towards a row of chairs. The first Wee Pincer should be under the chairs.
- At the Corridor of Peace in Seedhollow Castle, after you get past the Seedhollow soldiers, keep heading straight until you open a door that goes outdoors. There's a stairwell going down but look right first and you'll see a balcony with the second Wee Pincer on the ground.
- At the Corridor of Peace in Seedhollow Castle, when you go down the stairwell heading straight towards another section of the castle, make your way inside through the doors and turn at the first left you see. You'll find the third Wee Pincer beside a rubble.
- At the Corridor of Peace in Seedhollow Castle, you can find the fourth Wee Pincer after beating the boss Tayu'itar and using its mech body to destroy the other Tayu'Itar enemies and Avia Battleships. You can retrieve the Wee Pincer at the top right corner of the open area where you fought the boss at. There's also an Omen Stone beside the crab.
- At the Corridor of Peace in Seedhollow Castle, a Wee Pincer can be located in the fountain where Rolan activates the secret passage that goes to the altar of Angra Mainyu. The fountain is just in the middle of the room where Rolan shows the secret passage.
Chapter 1: The Western Frontier Quest All Slimes
- A slime can be found just before the first Hallowed Ground you encounter.
- A slime can be located past the first Hallowed and and the hall way with two staircases to the right and left.
- A slime can be located at the entrance of the area that you spawn in after defeating Maglielle and Gallanza.
- From the entrance that you spawn in after defeating Maglielle and Gallanza, head down the stair well until you find a rubble. A slime can be located beside the rubble.
Chapter 1: The Western Frontier Quest All Archives
- Head down the stairwell, and while moving towards the castle, you'll find an archive to the left that gives you "Order for Emergency."
- Once you finish checking your weapons and other items, head to the next waypoint, which is to talk with Zathba. Beside him is another Archive that contains the "Memo from Zathba."
- To the right, adjacent to some soldiers in the corridor of the castle, locate a archive containing the "Urgent Massive"
- Continue straight until you locate a archive containing "493rd Seedhollow GA notes" and hallowed ground for saving progress or replenishing items.
Chapter 8: Relink Quest Objectives
- Get ready to storm Seedhollow Castle
- Head to the depths of the castle
- Fight off Avia's Forces
- Head to the depths of the castle
- Fight off Avia's Forces
- Head to the depths of the castle
- Defeat the Tayu'itar
- Neutralize the enemy ships
- Head to the depths of the castle
- Fight off the Generals
- Head to the depths of the castle
- Head to Hollowhaze Altar
- Defeat Id
- Go through the interdimensional gate
- Defeat Angra Mainyu
- Defy Angra Mainyu
- Destroy Angra Mainyu
GBF Relink Full Chapter 8: Relink Walkthrough
Castle Grounds
The quest begins with a cutscene wherein Gran and his crew have already arrived back in Seedhollow. The soldiers of Seedhollow and Zathba's family are in a panic due to the Avia. Upon regaining control of Gran, you'll need to prepare to storm Seedhollow Castle. Head down the stairwell, and while moving towards the castle, you'll find a purple orb to the left that gives you "Order for Emergency." Your first waypoint leads you to Sierokarte, who is very glad that all of you are safe. You can express your gratitude for her assistance. Sierokarte will inform you that the castle is under attack by the Church of Avia, and it has forced each of the city's wards to declare temporary lockdowns. After conversing with Sierokarte, you'll receive another Crewmate Card.
Once you finish checking your weapons and other items, head to the next waypoint, which is to talk with Zathba. Beside him is another purple orb that contains the "Memo from Zathba." After retrieving that, converse with Zathba, and he will be surprised that you're back so soon. He'll acknowledge how you helped him in the past, so he will provide you with intel free of charge. He'll mention that his people are surveying the damage around the city. His reports suggest that Avia is not focused on taking out the commercial district and is only focused on one area, which is the castle. Zathba will mention that Avia has over 5,000 men and has manned and unmanned boats. He'll also mention that the Sword Veil and the Silver Wolf Corps are acting in concert. Zathba will seem distressed and mention that he would like to jump in and fight, but his priority is the well-being of the city first. He'll ask you to give the leader a good one for him.
Inside the Castle
After conversing with Zathba, proceed to the next waypoint, which leads to the doors of the castle, and prepare to storm it. Upon entering, a cutscene will unfold, revealing the struggling soldiers of Seedhollow inside. Upon regaining control of your character, promptly look to the left to retrieve a blue orb containing a Busted Manikin. Subsequently, proceed straight into the corridors, housing the injured soldiers of Seedhollow. To the left, you'll find a Silver chest containing x5 Fortitude Crystal (S) and 108 Rupies. To the right, adjacent to some soldiers in the corridor, locate a purple orb containing the "Urgent Massive" and a blue orb with an Aviaeth Prayer Book. As you approach the doors to the next area, glance to the right to find another blue orb with another Aviaeth Prayer Book.
Upon passing through the doors, you'll immediately engage in battle with Aviaeth Soldiers blocking your path. The first group comprises Aviaeth Saber, Aviaeth Lancer, and Aviaeth Archer. This encounter will unfold in two waves, so once victorious, proceed forward into the depths of the castle. Ascend the stairs, encountering debris that Rolan will destroy to grant you access. Navigate through the corridors, following the waypoint. Avia battle ships will attempt to attack you from above. Upon reaching a broken-down stairwell, descend and collect another blue orb containing Patalena Glass. Follow the waypoint once more.
Continue straight until you locate a purple orb containing "493rd Seedhollow GA notes" and a hallowed ground for saving progress or replenishing items. Adjacent to these is a silver and gold chest, containing a light shard, Matchlock, and Fortitude Crystal (M).
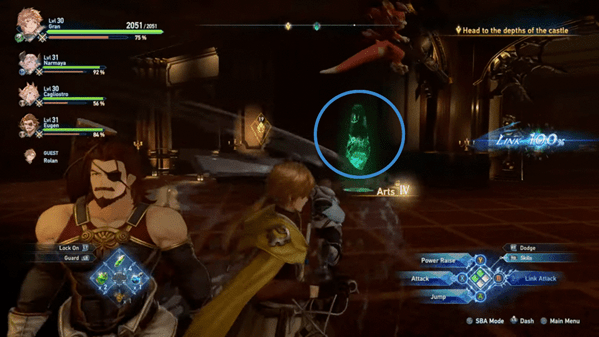
Follow the waypoint once more until you reach a hallway containing new enemies led by their captain, Reaper Alavan. Reaper Alavan will seal the door leading to the next area, necessitating the defeat of the defending enemies to progress further. After vanquishing the enemies, refrain from advancing immediately. Instead, ascend the stairwells on your right and left. The left stairwell harbors a blue orb containing a busted manikin, while the right stairwell conceals a wooden chest with a Fortitude Crystal (S) and 118 Rupies.
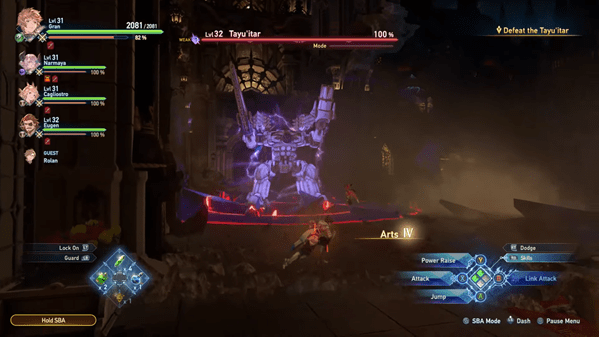
Subsequently, proceed to the doors again and follow the waypoint. Traverse through the corridors, encountering another group of Aviaeth Lancers blocking your path. Eliminate them and press on. Upon reaching another door, you'll enter a spacious hall. As you move forward, an enemy will unexpectedly burst through the walls on the right. This adversary is known as Tayu'itar, serving as a boss in this quest.
Boss: Tayu'itar
The Tayu'itar stands as an impressive Aviaeth mechanized arsenal, designed as a heavily armored assault vehicle capable of traversing various terrains on its multiple legs. Armed with an extensive arsenal, it possesses the capability to decimate an entire enemy battalion with its formidable firepower. Upon defeating this boss, it will drop Mythril Wheel, Light Shard, Fortitude Crystal (S), and Glittercrystal.
Playing as Tayu'itar
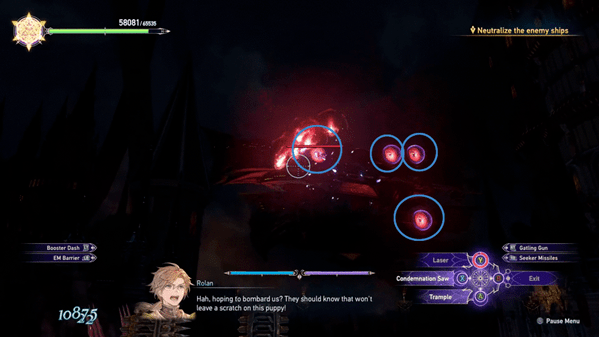
After defeating the boss, a cutscene will play, revealing two more Tayu'itar on their way to engage in battle. Rolan will then leap onto the defeated one from earlier and summon a spell to take control of it. You will now assume the role of the Tayu'itar to confront the other two. Additionally, you'll need to combat the enemy ships hovering in the area. To destroy the hovering ship, target the four glowing cores. Each core can be disabled after defeating two mechs. Once all cores are destroyed, the ship will fall, and you'll revert back to The Captain. For a detailed strategy on defeating Tayu'itar, refer to the Bosses section.
Now, proceed towards the castle depths again and follow the waypoint. Rolan will demolish the debris blocking the stairwell, so wait for him. Afterward, ascend the stairs, and you'll discover the second Hollow Ground in the middle of the staircase. Once done, continue straight toward the waypoint and enter through the doors. This will initiate a cutscene featuring Gallanza and Maglielle eating together, anticipating the arrival of the Captain and his crew. This, in turn, will trigger another boss battle, this time against both of them simultaneously.
Boss: Gallanza and Maglielle
Gallanza and Maglielle join forces against you and your crew. Maglielle, one of Avia's three generals, holds the position of commander of the secretive Sword Veil Fellowship. Renowned as an avid collector of weapons, Maglielle leverages her magical prowess to control her arsenal with elegance and grace. Gallanza, another of Avia's three generals, serves as the commander of the formidable Silver Wolf Corps. Armed with a massive halberd, Gallanza instills fear in his adversaries by infusing the element of earth into his attacks, delivering powerful and wide-reaching area-of-effect assaults. For a detailed strategy on defeating Gallanza and Maglielle, refer to the Bosses section.


After defeating the two generals, a cutscene unfolds with Gallanza expressing no regrets. Maglielle's Sword Veil Fellowship attempts to defend her, but Maglielle approaches the crew, pleading to spare her family, members of the Sword Veil Fellowship. Gallanza interrupts, urging the Captain to take him instead. Vyrn informs the generals that the crew simply wants to proceed and assures that as long as they don't impede, no further conflict will arise. The crew then moves forward while Gallanza and Maglielle express regret for failing Lady Lilith.
Head to the depths of the Castle
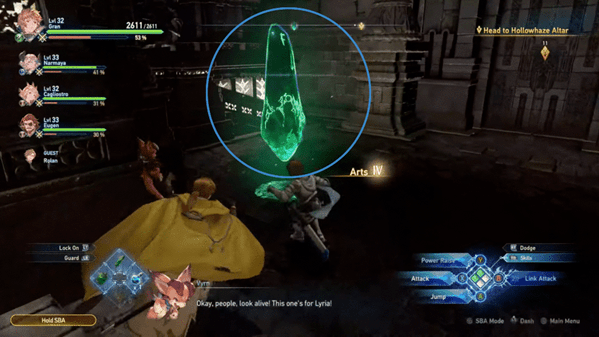
After the cutscene, you'll regain control of The Captain. Make your way through the castle and follow the waypoint. Before following the waypoint, head straight, and you'll easily spot a silver chest containing Uplift III Sigil and 235 Rupies. Now, proceed to the waypoint until you reach a circular room glowing green. On the left side, on a desk, you'll find a purple orb containing "Memoir of Patrolman". Move to the center, where Rolan will summon a spell, revealing a hidden stairwell on the ground. Go through the stairwell and follow the path. Another Hallowed Ground will be located before the door in this area.
Once you enter the doors, a cutscene will unfold, showing Lilith and Id casting a spell on Lyria. Id appears concerned, and suddenly, The Captain's crew arrives on the scene. Lilith is taken aback, not expecting to see them again. Katalina confronts Lilith, insisting that Lyria is returning with them. Lilith signals to Id to prepare for battle. Vyrn questions Id about his broken promise to protect Lyria, leaving him stammering. Lilith resumes her spell, and Lyria pleads for help. Rolan then charges towards Lilith, launching an attack. Lilith defends herself using her staff and expresses surprise, saying, "It can't be... Astraeus?" Rolan refers to Lilith as the Director and proceeds to stab her. Despite Id's concern for Lilith, she reassures him not to worry and to focus on The Captain.
Rolan then declares that he has been waiting for Lilith's return to open a gate and destroy Angra Mainyu. He attacks, chasing Lilith through a portal. The spell grabs Lyria and brings her into the portal as well, leaving Id alone with you and your crew.
Boss: Id
In this boss fight against Id, his level will be hidden, making it challenging to gauge the difficulty. Id, one of the three generals of Avia, distinguishes himself as a formidable swordsman dedicated to carrying out his duties unquestioningly to fulfill Lilith's will. Despite his strength against the element of Dark, Id exhibits notable resilience, devoid of weaknesses to other elemental forces. For a detailed strategy on defeating Id, refer to the Bosses section.
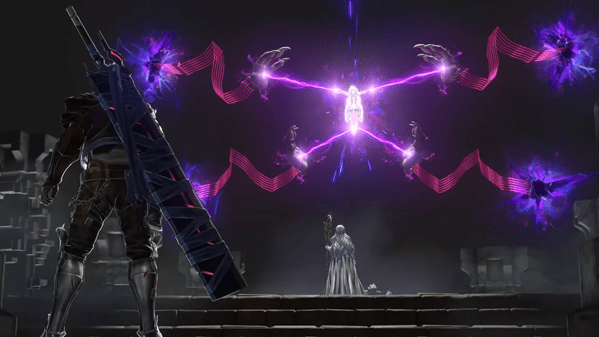
Throughout this fight, there will be cutscenes in between, depicting various attacks that The Captain will execute against Id. At 50% health, Id undergoes a transformation into a demonic being, significantly amplifying the potency of his attacks. Once Id is defeated, he drops Quality Refinium, Fortitude Crystal, and a Combo Finisher II Sigil. However, the cutscene following his defeat shows Id declaring that he is not done yet. He proceeds to revert to his human form and kneels on the ground. This moment signifies the opportunity to head through the interdimensional gate.
Upon passing through the gate, a cutscene unfolds with The Captain finding Lyria lying on the ground. Lyria expresses gratitude for being rescued. Suddenly, turbulence occurs, revealing Rolan and Lilith engaged in an intense battle. The battle pauses with Rolan held by Lilith's spell, and Lilith proceeds to cast Angra Mainyu. A colossal being emerges from a portal, and Rolan vanishes, presumed by everyone to have been killed. The crew is shocked, and everyone prepares for battle against Angra Mainyu.
Boss: Angra Mainyu
Angra Mainyu, a primal beast that distorts space itself, proves to be an overpowering foe that easily subdues Rolan. For a detailed strategy on defeating Angra Mainyu, refer to the Bosses section.
Initially, you won't be able to defeat Angra Mainyu, as the battle gets interrupted by a cutscene where it captures Lyria. Id catches up to the battle and witnesses Lyria being drained by Angra Mainyu and Lilith. The Captain tries to intervene but is easily trampled by Angra Mainyu's arms. Lyria, however, believes it isn't over and expresses faith in The Captain's ability to save them all. Lyria vanishes due to Angra Mainyu, prompting The Captain to scream. Lilith instructs Angra Mainyu to take The Captain's life, but Id intervenes to save The Captain.
Lilith questions Id, who explains that he wanted to protect Lyria, so why do this? Lilith asks Id to calm himself, stating that his duty as her guardian is no longer needed. Lilith attacks Id using Angra Mainyu, overwhelming and capturing him. Id tells The Captain to focus on his link, leading to The Captain concentrating and gaining strength, slashing away Angra Mainyu's arms.
The battle with Angra Mainyu resumes. At 50% health, a cutscene shows The Captain thrusting the sword on Angra Mainyu's head. Things get blurry, revealing Lyria trapped by purple vines, and The Captain is also ensnared. While reaching for Lyria's hand, her hand glows blue, dispelling the vines. They hold hands, and Angra Mainyu's head appears, consuming them.
The next scene shows The Captain and Lyria opening their eyes, still holding hands. They shout "Bahamut," summoning a red and black dragon to combat Angra Mainyu.
You now play as Proto Bahamut, making it faster to damage Angra Mainyu. At 10% health, a cutscene shows Bahamut summoning a final attack, requiring button presses to defeat Angra Mainyu, signaling its defeat.
The subsequent scene depicts The Captain, the crew, and Lyria rising from the ground. Rolan appears, stating that The Captain and Lyria restored everything back to normal. Lilith attacks Rolan from behind, revealing her plan to open the gate to the Astral realm. Rolan warns that this would destroy the world. Lilith proceeds to open a portal to the Pillars of Vayoi, where she plans to build a bridge to the Astral Realm. The crew is then teleported back to the castle, without Rolan, marking the end of this quest.
Chapter 8: Relink Quest Notes and Tips
Notes, Tips, and Other Trivia for the Chapter 8: Relink quest in Granblue Fantasy Relink go here.
