Chapter 9: Opposing Wills is a Main Quest in Granblue Fantasy Relink. Players are tasked to put a stop to Lilith's schemes, along with Rolan, and many former foes join forces with your party as they try to stop Lilith once and for all. Main Quests in Granblue Fantasy Relink are primarily tied to the story or main campaign of the game which requires a player to complete it to progress story-related events, unlock more game features, discover new locations, and more. This page covers guides, quest objectives, and a complete walkthrough for the "Chapter 9: Opposing Wills" main quest in Granblue Fantasy Relink.
General Information
- Previous: Chapter 8: Relink
- Next: Final Chapter: Id
- Bosses: Furycane Nihilla, Managarmr Nihilla, Vulkan Bolla Nihilla, Angra Mainyu
- Location: Seedhollow / Seedhollow Airspace / Echo Chamber of Deluded Research / Path of Salvation's Wake / Passage to False Hopes / Lobby of the Stars
Quest NPCs
- Vyrn
- Lyria
- Zathba
- Historiath
- Sierokarte
- Rosetta
- Rackam
- Eugen
- Io
- Id
- Katalina
- Airship Engineer
- Gallanza
- Maglielle
Quest Bosses
Quest Enemies
All Items & Rewards
Weapons
- n/a
Sigils
- Exploiter II
- Blight Resistance III
- Garrison II
- Attack Power III
- Attack Power IV
- Health III
- Critical Hit Rate II
- Critical Hit Rate III
- Aegis III
Treasure
- Fortitude Shard
- Fortitude Crystal (S)
- Dark Liquid
- Dark Shard
- Champion Merit
- Disast Ore
- Welkin Reflection
- Rafale Coin
- Fortitude Crystal (M)
- Prism Chip
- Glittercrystal
Key Items & Other
- Rolan's Notes 8
- Corrupted Letter
- Eroded Stone Monument
Enemy Drops
- Prism Chip
- Welkin Reflection
- Rupies
Quest Rewards
- Prism Chip x7
- Fortitude Crystal (M) x15
- Glittercrystal x2
- Blight Resistance III x1
- Health III x1
- Attack Power III x1
- Critical Hit Rate III x1
- Critical Damage III x1
- 50 MSP
Chapter 9: Opposing Wills Quest Information
Chapter 9: Opposing Wills Quest Description
Losing her only means of reaching the Astral Realm, Lilith sacrifices Zegargrande's primal beasts to raise the Pillar of Vayoi, an island of twisted energy. Now that the crew has rescued Lyria, they head to Vayoi to stop Lilith once and for all.
Chapter 9: Opposing Wills Quest All Chests Locations
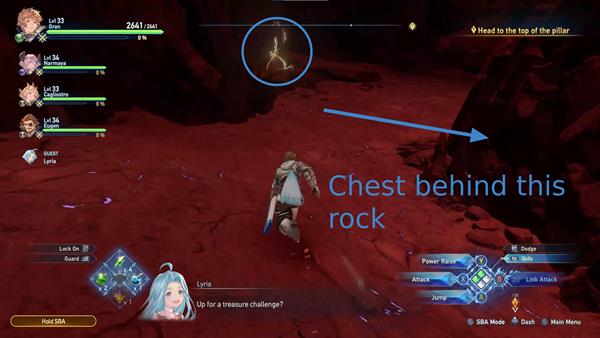
- From the second Dark Liquid loot, jump across to reach the other side, and you'll find a chest behind a rock that contains Dark Shard x4, some rupies, and 2 MSP.
- After collecting the Corrupted Letter, continue following the main path, keep an eye out on the left side as you progress, you'll find a chest that contains Dark Shard x4, and some rupies.
- After exiting the wormhole, continue following the main path, on the right side, you'll come across a chest on a different platform. Jump across the platform and open the chest to obtain an Exploiter II, some rupies, and 3 MSP.
- After finding the first Hallowed Ground, you'll also find a chest nearby, it contains Rafale Coin x2 and some rupies.
- From the first Hallowed Ground, continue following the main path. You'll find a chest on the left side as you make your way to the quest marker. This chest contains Fortitude Crystal (M), some rupies, and 3 MSP.
- After defeating the boss Furycane Nihilla, you'll find an Omen Stone at the center of the area. Once you complete the challenge, you'll be rewarded with a chest that contains Attack Power IV and some rupies.
- There's a chest near the second Hallowed Ground you encounter, it'll be after you defeat Furycane Nihilla. The chest contains Fortitude Crystal (S) x5 and some rupies.
- From the second Hallowed Ground, continue following the main path, you'll encounter a silver chest on the left side that contains Fortitude Crystal (S) x10, some rupies, and 3 MSP.
- From the second Hallowed Ground, continue following the main path, you'll find a chest near a slanted pillar that contains Garrison II and some rupies.
- Before you go through the path you just cleared, check the area on the left, you'll find a Gold Chest that contains Attack Power III, some rupies, and 7 MSP.
- After following the main path, you'll spot a silver chest on the left side, This chest contains Fortitude Crystal (S) x10, some rupies, and 3 MSP.
- After defeating Managarmr Nihilla, follow the path ahead, and on the right side, you'll find a gold chest that contains Fortitude Crystal (M) x3, some rupies, and 7 MSP.
- From the first gold chest you encounter after defeating Managarmr Nihilla, continue following the quest marker, take the path on the left and you'll find another gold chest. This one contains Fortitude Crystal (M) x3, some rupies, and 7 MSP.
- From the second gold chest you encounter after defeating Managarmr Nihilla, you'll spot an Omen Stone on the left side. Completing the challenge will reward you with a gold chest that contains Aegis III, some rupies, and 25 MSP.
- From the third Hallowed Ground, follow the quest marker, and on the left side of the path you'll find a chest that contains Fortitude Crystal (S) x6 and some rupies.
- After defeating Vulkan Bolla Nihilla, make your way to the next quest marker. Once you reach a safe ground, you'll find a chest on the right side. This chest contains Prism Chip x4 and some rupies.
- From the fourth Hallowed Ground, follow the quest marker and along the way, you'll spot a silver chest on the right. This chest contains Critical Hit Rate II, some rupies, and 3 MSP.
Chapter 9: Opposing Wills Quest All Shrouded Treasure Locations
- From the second Dark Liquid loot, jump across to reach the other side, on the left side you'll spot a Shrouded Chest. This chest contains a Champion Merit, some rupies, and 7 MSP.
- From the second Hallowed Ground, continue heading up the slope and before you continue going toward the quest marker, take the path on the right, you'll spot a shrouded chest on the left side of the area. This chest contains Enmity III, some rupies, and 7 MSP.
Chapter 9: Opposing Wills Quest All Omen Stone Locations
- An omen stone can be found within the area of the Furycane Nihilla boss fight.
- You'll find another omen stone near the third Hallowed Ground you encounter.
Chapter 9: Opposing Wills Quest All Wee Pincer Locations
There is a total of 6 Wee Pincers in this chapter.
- Once you depart the ship and arrive at the Echo Chamber of Deluded Research, go straight and look to the left side, you'll see a dilapidated house. Jump up and walk over to the edge of the structure, you can pick up the first Wee Pincer here.
- From the second Hallowed Ground, continue following the main path. Once you get past the silver chest on the left side, (This chest contains Fortitude Crystal (S) x10, some rupies, and 3 MSP) take a turn on the left and you'll find the second Wee Pincer in the corner.
- After slaying Managarmr Nihilla, exit through the main path ahead. As you progress, you'll find a gold chest on the right side, and just a little further ahead is a Welkin Reflection loot beside a Wee Pincer.
- From the third Hallowed Ground, continue following the quest marker until you reach the next area. For this section, purple liquid will start dripping from all directions and you'll need to run quickly to not get swallowed by it. Take the path on the left and you can pick up a Wee Pincer along the way.
- After defeating Vulkan Bolla Nihilla, just turn around after the cutscene and you'll find a Wee Pincer on the ground.
- After defeating Vulkan Bolla Nihlla, follow the quest marker and once you reach a safe ground, continue going up the slope. On the right side, you'll find a Wee Pincer.
Chapter 9: Opposing Wills Quest All Slimes
- From the first shrouded chest, go in the opposite direction, and at the edge, you'll spot a Slime.
- Before heading to the area where you'll fight the Managarmr Nihilla boss, check the area on the right side, run toward the edge of the cliff and you'll spot a Silverslime.
- After defeating Vulkan Bolla Nihilla, make your way to the next area, jump across the rock platforms and once you reach the slope, check the left side and you'll spot a Goldslime.
Chapter 9: Opposing Wills Quest All Archives
- Once you depart the ship and arrive at the Echo Chamber of Deluded Research, continue heading straight and you'll eventually spot a purple loot ahead. Pick it up to obtain the Corrupted Letter archive.
- From the second Hallowed Ground, continue following the main path. You'll eventually spot a purple loot beside a pillar on your way, pick it up to obtain the Eroded Stone Monument archive.
Chapter 9: Opposing Wills Quest Objectives
- Speak to Zathba
- Get ready and head to the dock
- Speak with Rackam
- Head to the top of the pillar
- Defeat Furycane Nihilla
- Defeat Managarmr Nihilla
- Defeat Vulkan Bolla Nihilla
- Defeat Angra Mainyu
- Thwart Lilith's plans
GBF Relink Full Chapter 9: Opposing Wills Walkthrough
Depart from Seedhollow
Once the quest starts, go down the stairs and follow the quest marker, you'll find Zathba in the area. Speak to him to initiate a conversation. After discussing the plan with Zathba and Historiath, make the necessary preparations like upgrading Weapons, assembling your party, and equipping Sigils before you make your way to the quest marker.
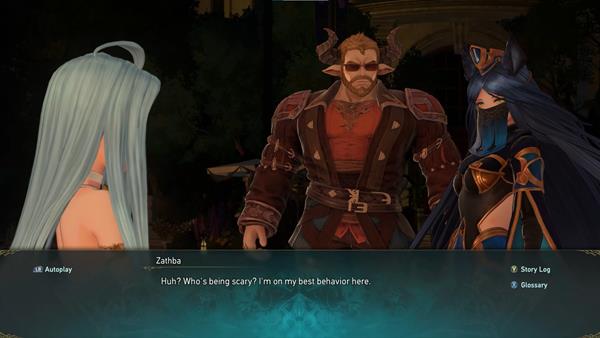
Once you're ready, head to the dock and speak to the Airship Engineer to board the ship and depart from Seedhollow. Now that you're on the ship, check the area for some loot before you speak to Rackam, you can pick up Fortitude Shard x3 and Fortitude Crystal (S). Now speak to Rackam and receive Rolan's Notes 8, interact with him once more to officially depart Seedhollow Airspace and head to the next area.
Reach the top of the pillar
Once you reach the next area, turn around and you'll see a loot at the edge of the cliff. Pick it up to obtain a Dark Liquid. Continue following the path ahead and pick up another Dark Liquid along the way, you won't miss it. From the second Dark Liquid loot, jump across to reach the other side, you'll find a chest behind a giant rock, and nearby is a Shrouded Chest. The chest behind the rock contains Dark Shard x4, some rupies, and 2 MSP.
Continue following the quest marker, you'll see a purple loot along the way. Pick it up to obtain the Corrupted Letter document. Make your way up the slope ahead and on the left side is a chest that contains Dark Shard x4, and some rupies.
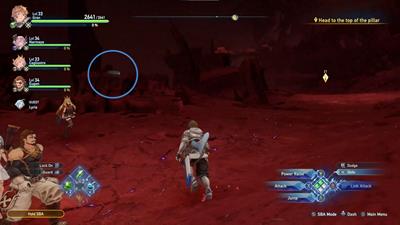
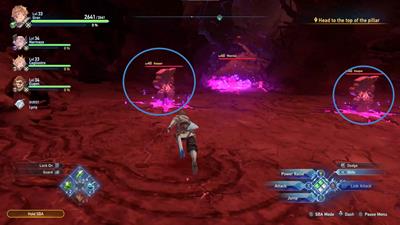
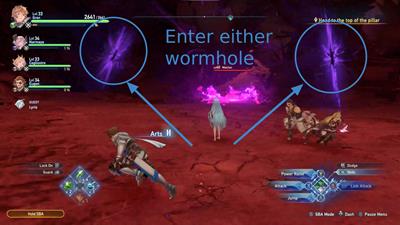
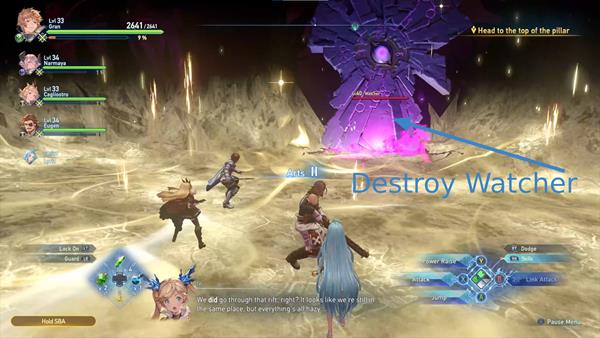
Now continue following the quest marker, you'll encounter two Keepers and a Watcher on your way. To progress further, you'll need to eliminate the Watcher blocking your path. First, you'll need to defeat the two Keepers in the area, then enter the Wormhole and transport to a different dimension, from here you can attack the Watcher and open up the path ahead, but you'll need to exit the Wormhole you just went through to send you back to your original dimension.
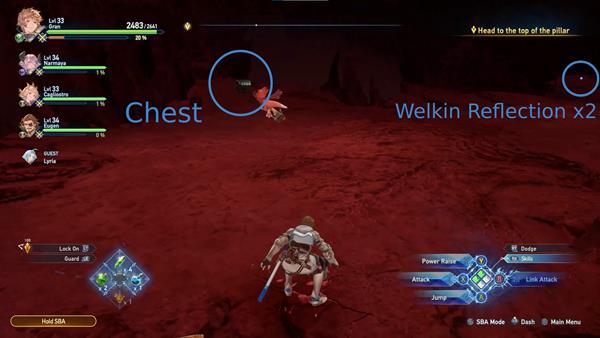
After you exit the wormhole, continue following the path ahead. Keep an eye out for some loot, you can pick up a Welkin Reflection along the way. There's also a Welkin Reflection x2 loot near a chest you'll encounter as you progress. The chest contains an Exploiter II, some rupies, and 3 MSP.
Now follow the quest marker and once you reach the area, you'll encounter Ominous Form enemies and a Watcher blocking your path. Keepers will also appear in the area. Just like before, enter the wormhole and destroy the Watcher from the other dimension, then return to the original dimension to progress further. Once you reach the quest marker, you'll find a Hallowed Ground, and next to it is a chest that contains Rafale Coin x2, and some rupies. Make sure to use the Hallowed Ground to recover some HP if needed. Once you go through the arch past the Hallowed Ground, there's no going back. Continue following the path and you'll spot a chest on the left side of the area, at the top of some rubble. This chest contains Fortitude Crystal (M), some rupies, and 3 MSP.
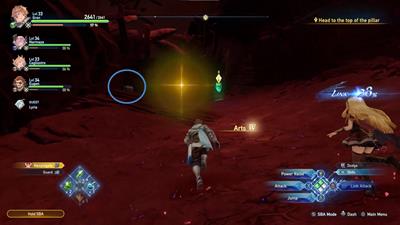
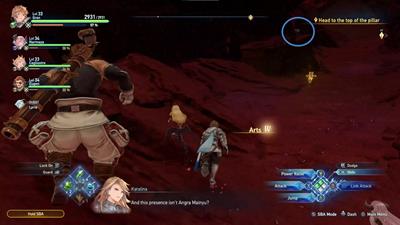
As you progress further and reach the next quest marker, you'll face off against the boss Furycane Nihilla.
Boss Fight: Furycane Nihilla
This boss exhibits similar attacks to when you first encountered them as Furycane during Chapter 3, but this time, additional moves are introduced.
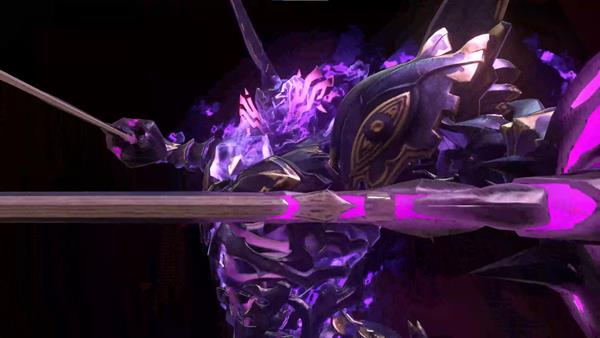
One of which is the move called Arrow Gale, where the boss charges and spins around the arena, indicated by a distinctive purple glow on the ground. Players can easily spot these marks and dodge them accordingly. Once it enters Overdrive Mode, it'll unleash the move called Void Ripper, where it slams its sword and creates twisters that cascade across the arena. Be wary about where it swings its sword and avoid the twisters. Another attack it performs is Soulless Storm, where it slams the ground, triggering an explosion marked by a red ring. The next ring will shrink from the edge of the arena so you will need to head back closer to Furycane Nihilla, at that point, you can attack it from there. Furycane Nihilla also performs an attack called Last Tempest, where it sends out several twisters to overwhelm you and your party. You would need to exercise caution with the amount of twisters it sends out and strategically plan the timing of your dodges. Finally, it performs the move called Sword Swings, signaled by four purple sparks around the boss. Dodge its swings by moving out of its trajectory to avoid getting damaged. Once you defeat Furycane Nihilla, you'll be rewarded with Prism Chip, Fortitude Crystal (M) x3, Glittercrystal, Blight Resistance III, and 10 MSP. After the boss fight, Id will temporarily join your party, you will be given the option whether to include him in your team or not. Before you exit the area, you can find an omen stone in the middle of the boss fight area.
Path of Salvation's Wake
Now exit the area and continue following the main path. Up ahead is the second Hallowed Ground, you'll find a chest nearby, open it to receive Fortitude Crystal (S) x5 and soem rupies. Continue following the main path and instead of heading toward the direction of the quest marker, take the path on the right, you'll find a shrouded chest along the way. This chest contains Enmity III, some rupies, and 7 MSP. Just across the shrouded chest, there's a silver chest that contains Fortitude Crystal (S) x10, some rupies, and 3 MSP.
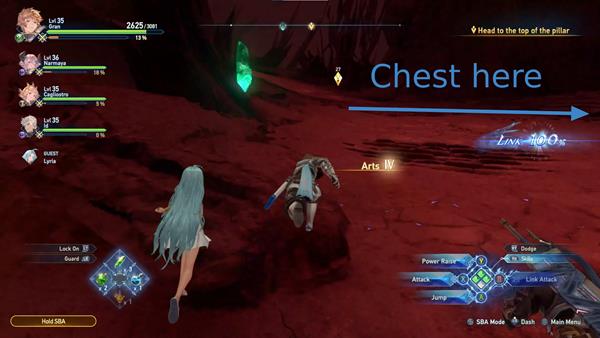
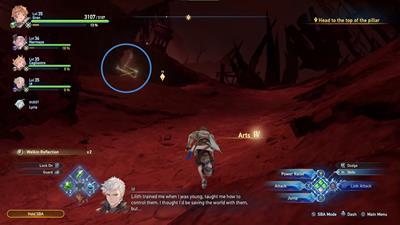
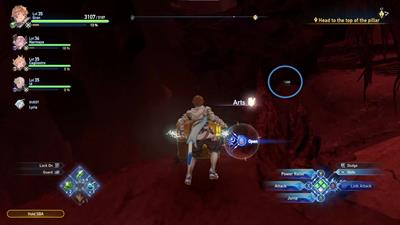
Check the area for other loot, you can also pick up a Disast Ore, Welkin Reflection x2, and 1 MSP nearby. Follow the quest marker and you'll find a chest near a slanted pillar, this chest contains Garrison II and some rupies. On the left side of the area, you'll see a purple loot, pick it up to obtain the Eroded Stone Monument document.
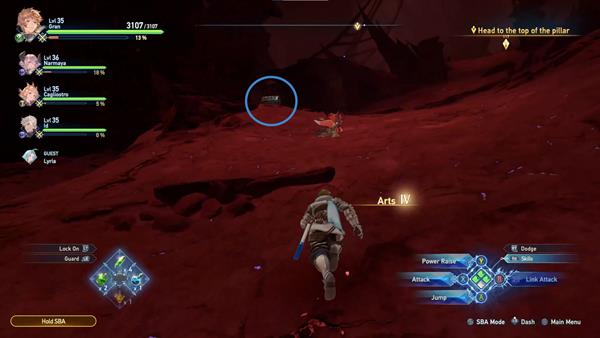
As you progress forward, you'll encounter more Ominous Form enemies, as well as Keepers and a Watcher blocking your path. Just like before, defeat the enemies in the area and repeat the same process as what you did before when you first encountered a Watcher blocking your path. Before you go through the path you just cleared, check the area on the left, you'll find a Gold Chest that contains Attack Power III, some rupies, and 7 MSP. Do note that once you go through this area, several Ominous Form enemies will also spawn. Head back and follow the main path, along the way you'll spot a silver chest on the left side. This chest contains Fortitude Crystal (S) x10, some rupies, and 3 MSP. Continue following the path until you reach an area that triggers a short cutscene. Be prepared for a boss battle.
Boss Battle: Managarmr Nihilla
Managarmr Nihilla shares the same moveset with the Managarmr boss you encountered during Chapter 5, but once it enters Overdrive Mode, it will introduce a move called Frozen Stomps. In this move, Managarmr Nihilla slowly stomps around the arena, leaving circles on the ground that pop and freeze players if stepped on. Since it performs this attack quite slow, players will be able to catch up to him and attack him from the side while also dodging the white indicators.
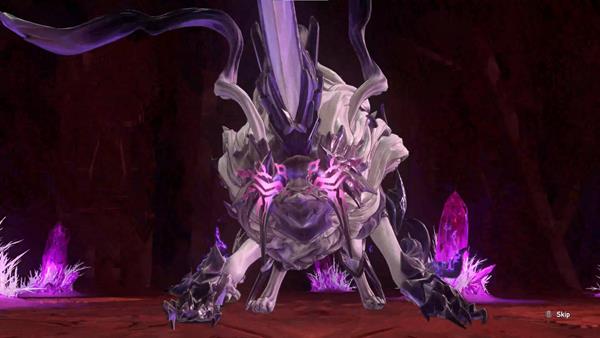
Another move resembling Managarmr's Silver Wolf Surge involves sending out ice missiles, requiring players to dodge and break them, with streaks on the ground indicating potential freezing if lingered upon, and these streaks are indicated in red and white. Finally, Cryogenic Sphere mirrors his Glacial Desolation from his Managarmr form, where he positions himself in the center of the arena, unleashing a frozen storm covering almost its entirety. You will need to either reach the edge of the arena or hide behind smaller ice burgs. After defeating the boss, you'll be rewarded with Prism Chip, Fortitude Crystal (M) x3, Health III, and 10 MSP.
Passage to False Hopes
After defeating the boss, follow the main path ahead. On the right side, you'll find a gold chest, open it to receive Fortitude Crystal (M) x3, some rupies, and 7 MSP. Just a little further ahead from this chest is a Welkin Reflection loot and a Wee Pincer near each other.
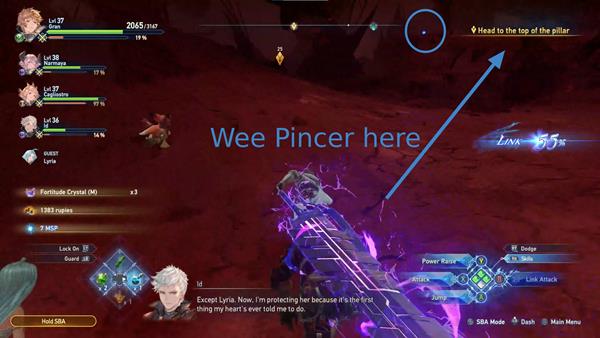
Continue following the quest marker, take the path on the left side and you'll find a gold chest that contains Fortitude Crystal (M) x3, some rupies, and 7 MSP. Beside this chest is a Welkin Reflection loot. On the other side near the edge of the cliff, you can pick up 1 MSP. As you progress further, you'll encounter your third Hallowed Ground for this quest, near it is another omen stone. Interact with the Hallowed Ground to recover HP and prepare for the next boss battle. Once ready, progress forward and check the left side of the path to find a chest. This chest contains Fortitude Crystal (S) x6 and some rupies. Once you reach the next area, purple liquid will start dripping from all directions of the area. Jump down and take the path on the left, you can pick up another Wee Pincer along the way.
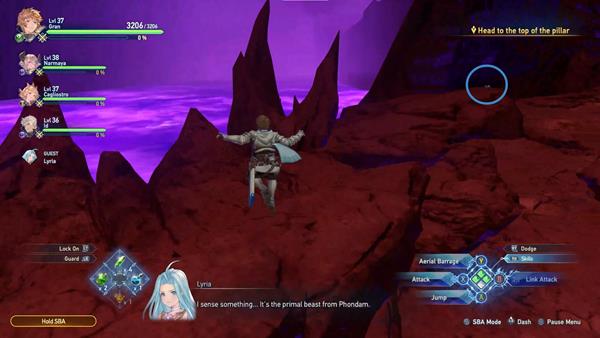
Once you reach the end of the path, a short cutscene will trigger, and the next boss fight begins.
Boss Fight: Vulkan Bolla Nihilla
Maglielle will aid you during this boss fight. Vulkan Bolla Nihilla will retain most of its moves as the Vulkan Bolla when you first fought it in Chapter 7, but this time, it'll deal blight instead of burn damage. Once it enters Overdrive Mode, keep an eye out for a move called Void Eruption, this is a move where the boss gracefully traverses the area, splashing and spreading blight in specific regions marked by a pulsating wave. Additionally, puddles will rain down during the execution of this attack.
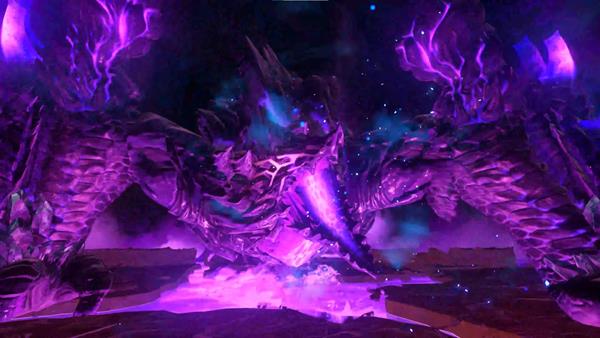
Be wary of the move called Dark Rising, this one is reminiscent of its Auxilium counterpart in its base form. Here, the boss summons a massive ball of fire in the arena's center. To succeed, players must target the body parts connected to the mana emitting the fireball within a specified time limit. Also watch out for a move called Furious Onslaught, where the boss aggressively slams its hands recklessly into different parts of the arena. Successfully defeating Vulkan Bolla Nihilla will reward you with Prism Chip, Fortitude Crystal (M) x3, Glittercrystal, Attack Power III, and 10 MSP.
Reach the Lobby of the Stars
Now make your way to the next quest marker. Once you safely reach the other side, you'll find a chest on the right side that contains Prism Chip x4 and some rupies. On the left side, you can slay a Goldslime for additional loot.
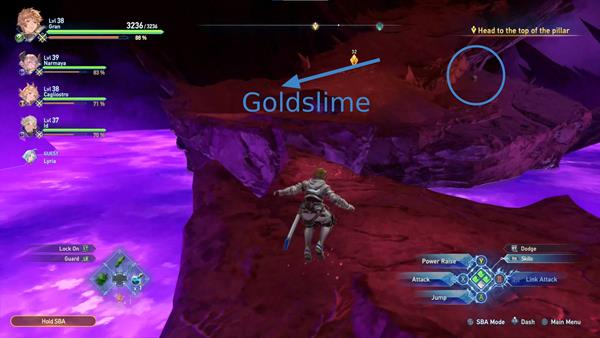
As you head up, you'll spot a Wee Pincer on the right side, you can jump across the platform to reach the area and pick it up.
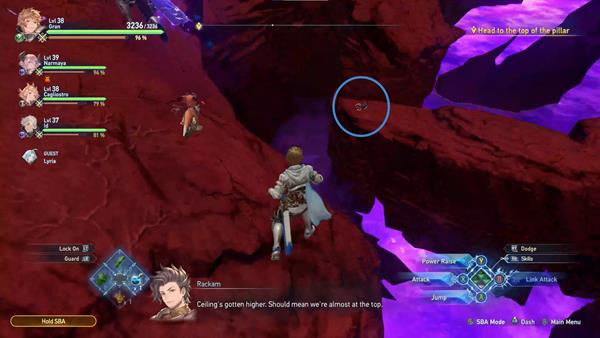
Continue following the main path, you'll eventually reach the Lobby of the Stars, and you'll also find your fourth Hallowed Ground for this quest. Continue following the quest marker, along the way you'll find a silver chest on the right side of the path. This chest contains Critical Hit Rate II, some rupies, and 3 MSP.
Boss Fight: Angra Mainyu
Once you reach the top of the pillar, a short cutscene will occur, afterward, you'll face off against the Angra Mainyu boss.
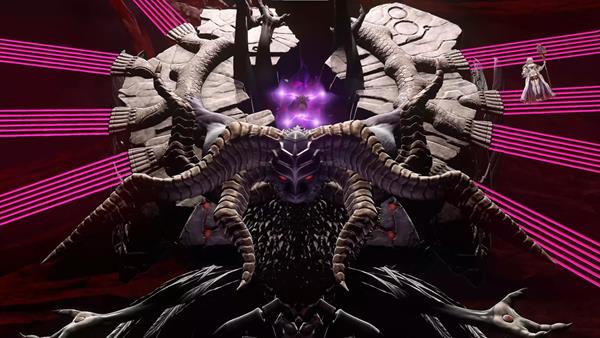
During the first phase of the fight, you'll have to dodge the laser projectiles that come out of the shadows floating in the air. You cannot physically damage the boss from here, and instead, you'll need to destroy a couple of Keepers that will spawn in the area. With this, you'll be able to use the wormhole to warp into a different dimension and take out the two Daevas as well as the shadows that shoot out the projectiles. After a while, you'll be transported to the original dimension, while the boss is staggered, dealing significant damage while it's vulnerable. Once it recovers, step away to avoid blight damage. Once it enters into Overdrive Mode, watch out for the move called Prelude where it stretches out multiple hands and launches beaming projectiles in all directions. For the move called Last Judgement, swiftly eliminate at least three hands in the area within the time limit to completely avoid the impending attack. Successfully doing so will stagger the boss momentarily, giving you and your party an opportunity to land a devastating attack. After defeating the first phase of the boss, you'll receive a Prism Chip and a Critical Hit Rate III.
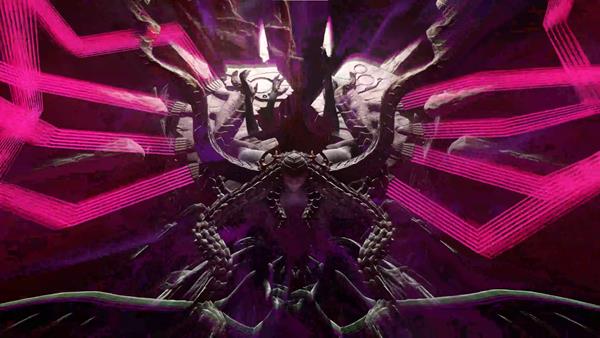
During the second phase, Lilith and Angra Mainyu will fuse together. It'll start off with an attack where it summons multiple Ominous Form enemies in the area. Be wary of the shadow that's covering the ground. Do not step onto it to avoid getting damaged. After a while, Io will call out to everyone to get inside Rolan's barrier. Once you reach the barrier, a short cutscene will trigger. More mobs of enemies gather and tries to overwhelm Rolan's barrier, but just before it breaks apart. A blast of light hits the enemies and disintegrates away. When the crew looks up, they're surprised Zathba brought a cavalry. After the short cutscene, the boss battle continues. The boss then summons multiple Watchers in the area. Then immediately followed up by multiple different attacks at the same time. Just like before, enter a wormhole to deal physical damage to the boss. Once you stagger the boss, deal as much damage as you can. Once it enters into Overdrive Mode, it'll immediately perform a shriek that pushes away everyone in the area. The move Prelude will be executed again shortly after. Last Judgement will follow up immediately. When it does the move called Salvation, make sure to hide behind a Watcher to avoid the beams of projectile. After successfully defeating the second phase of the boss, you'll be rewarded with Prism Chip x3, Fortitude Crystal (M) x6, Critical Damage III, and 20 MSP. A cutscene will occur where Lyria absorbs the power of Angra Mainyu. With Lilith appearing defeated, Id approaches her, urging a realization of their misdeeds. For a moment, Lilith embraces Id, but then she suddenly releases the seal on his neck, summoning Bahamut.
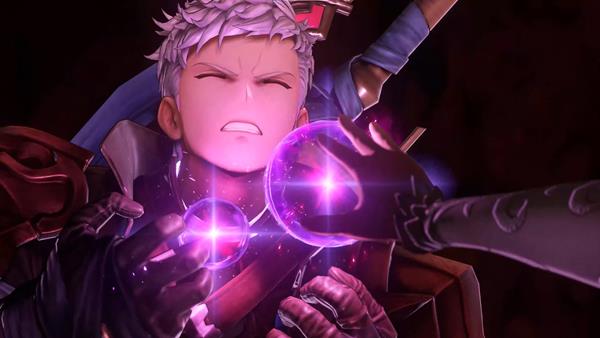
Id undergoes a dramatic transformation, transforming into a massive dragon, before ultimately killing her own mother before he soars into the sky and escapes. This concludes Chapter 9 and officially begins the Final Chapter: Id.
Chapter 9: Opposing Wills Quest Notes and Tips
Notes, Tips, and Other Trivia for Chapter 9: Opposing Wills quest in Granblue Fantasy Relink go here.
