Chapter 2: Tempest on the Horizon is a Main Quest in Granblue Fantasy Relink. Players are tasked to rescue the villagers from the goblins that have seized the small town. Main Quests in Granblue Fantasy Relink are primarily tied to the story or main campaign of the game which requires a player to complete it to progress story-related events, unlock more game features, discover new locations, and more. This page covers guides, quest objectives, and a complete walkthrough for the "Chapter 2: Tempest on the Horizon" main quest in Granblue Fantasy Relink.
General Information
- Previous: Chapter 1: The Western Frontier
- Next: Chapter 3: Creation of the Stars
- Bosses: Greatshield Madbeat
- Location: The Hills, Zeghard Fortress
Quest NPCs
- Brave Man
- Caring Man
- Cowardly Girl
- Exhausted Man
- Gentle Old Man
- Impatient Man
- Listless Woman
- Muscle Connoisseur
- Rolan
- Skyfarer Fan
- Sobbing Woman
- Terrified Woman
Quest Bosses
Quest Enemies
- Greatshield Madbeat
- Goblin Archer
- Goblin Soldier
- Goblin Stormer
- Goblin Tanker
- Goblin Witch Doctor
- Goblin Wolfrider
Omen Stone Enemies
- Frenzied Archer
- Goblin Pyromancer
- Goblin Trooper
- Mud-Covered Swordsman
- Rowdy Bord
All Items & Rewards
Weapons
- n/a
Sigils
- Attack Power I
- Attack Power II
- Critical Hit I
- Health I
- Health II
Treasure
- Chieftain's Braid
- Cobblestone
- Fortitude Shard
- Glittercrystal
- Glitterstone (S)
- Rafale Coin
- Tempestone
- Valley Bloom
- Wind Shard
Key Items & Other
Enemy Drops
Quest Rewards
Chapter 2: Tempest on the Horizon Quest Information
Chapter 2: Tempest on the Horizon Quest Description
The party finds a floating island besieged and ransacked by Goblins who've become agitated and violent because of the unusually harsh winds in the area. They resolve to defeat the Goblins and rescue all the islanders that the Goblins have captured.
Chapter 2: Tempest on the Horizon Quest All Chests Locations
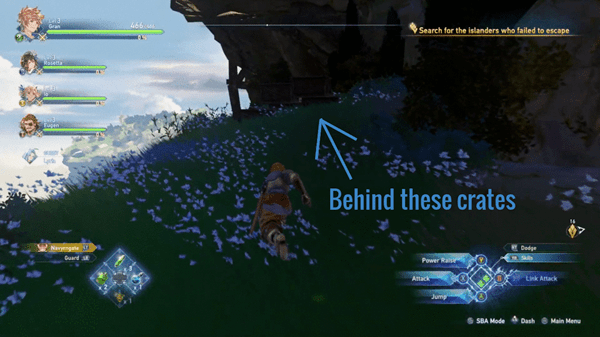
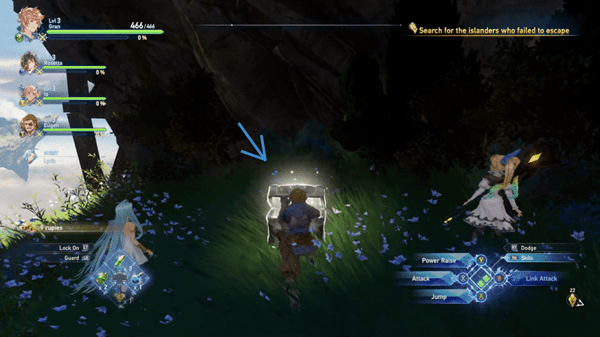
- From the first Hallowed Ground, head straight and turn left to find a wooden chest amidst some breakable objects containing a Wind Shard and rupies.
- As you formally enter The Hills, immediately turn left and follow the cliff until you reach another cliff that you can drop down to. You'll find a silver chest that contains a Wind Shard, Rupies, and 2 MSP
- From the entrance of the Hills, head straight until you reach the tunnel that's on the center of the mountain. A silver chest can be located after you free the first group of villagers just before the next Hallow Ground next to where you'll find a Wee Pincer that contains a Fortitude Shard, Rupies, and 2 MSP
- Just to the left of the last silver chest, you'll find a wooden platform that you can drop down to guarded by a Goblin Stormer. Once you defeat the goblin, you'll see a silver chest that contains Flitterstone S, Rupies, and 2 MSP
- Once you go through the mountain where you found the last 2 chests, move forward a bit until you see a house to your left. Loop around the house to find a silver chest on the right side of the house containing 3 Fortitude Shards and rupies.
- A wooden chest can be found in front of the first shrouded treasure that you encounter just before you cross the bridge going to the Windmill Settlement. The wooden chest is on the 2nd level of a very old broken-down stone building containing 4 Fortitude Shards and Rupies.
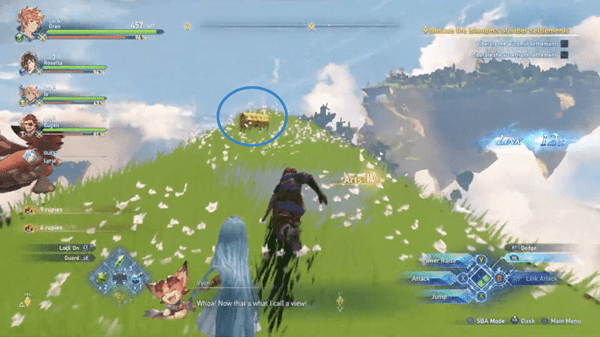
- A golden chest can be found just above the old stone building connected to a cliff. The golden chest is on the end of the cliff containing Critical Hit Rate I, Rupies, and 3 MSP
- From the second Hallowed Grounds, go right and you'll see another wooden chest guarded by multiple goblins in the upper part behind some wooden crates just before dropping down to the Water Settlement. It contains 3 Fortitude Shard and Rupies.
- In the waterfront settlement, find the golden chest behind the small waterfall to the right containing Attack Power I, 3 MSP, and rupies.
- In the Water settlement, jump to the top of the structure to the right of the wooden arch, on the same side as the waterfall, to find a silver chest containing a Glittersone (S), 2 MSP, and rupies.
- On the left side of the Water Settlement, climb up the wooden houses until you make your way to some broken houses in between the Windmill Settlement and the Water Settlement. A Wooden chest will be located in one of the broken-down houses here containing a Fortitude Shard, 1 MSP, and Rupies.
- Once you cross the bridge near the first shrouded treasure that you encounter, from the Windmill settlement, make a sharp right and hug the cliff until you find a wooden platform that you can drop down to. You can find a silver chest containing Health I, 2 MSP, and Rupies here.
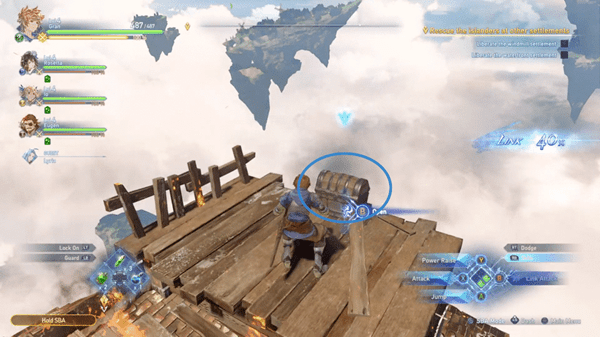
- In the windmill settlement, head to the lower left to find a burning house near a windmill. Hop to the top to find a wooden chest containing a Rafale Coin and rupies.
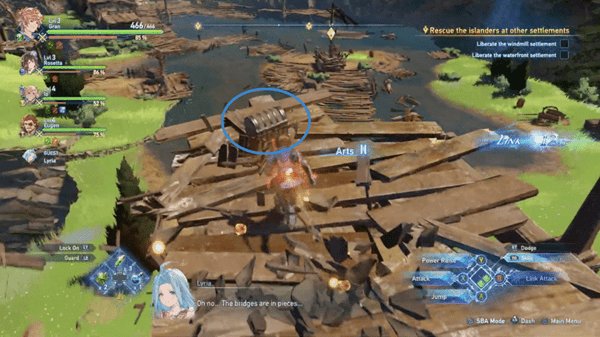
- Once you get past the Windmill Settlement or the Water Settlement, before proceeding further to the objective marker to rescue a new set of islanders, stop in the middle of the road that interconnects the 2 settlements and you'll find a wooden chest beside a tree containing a Wind Shard and 2 Rupies.
- A silver chest can be found in front of the tall wooden gate where you fought the three Gobline Soldiers.
- In Zeghard Fortress, the last chest can be found before dropping down to the boss area of this chapter. Walk past the Hallowed Ground and Siero, then check the right-hand side of the wooden platform with the red flags just before the drop point to find the last chest containing Fortitude Shard, Rupies, and 1 MSP.
Chapter 2: Tempest on the Horizon Quest All Shrouded Treasure Locations
- Past the second Hallowed Ground, on the way to the windmill settlement, you can find a Shrouded Treasure on your left facing the objective marker, containing Attack Power II and 1397 rupies.
- After freeing the villagers in the Waterfront Settlement, you can find another Shrouded Treasure just across where the villagers were being held captive.
Chapter 2: Tempest on the Horizon Quest All Omen Stone Locations
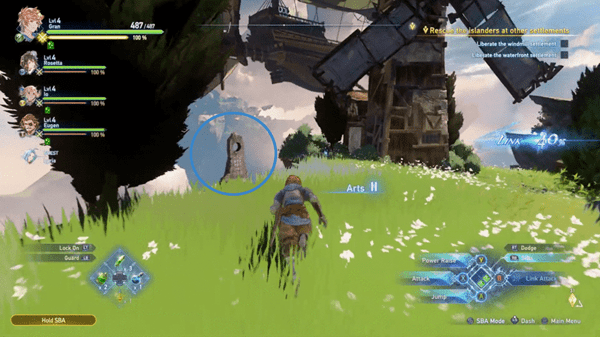
- In the windmill settlement on The Hill, past a burning structure with a wooden chest at the top containing a Rafale Coin, there's an Omen Stone at the edge of a cliff.
- Before completing the final objecting at The Hill and speaking to the rescued villagers, there's an Omen Stone nearby in the last mall area of The Hill.
Chapter 2: Tempest on the Horizon Quest All Wee Pincer Locations
- The first wee pincer can be found as you start Chapter 1. After the "Caring Man" npc shows you the hallowed ground, walk up a bit and look to the left, you'll see the Wee Pincer on a stone, just by the entrance of the cave leading to The Hills.
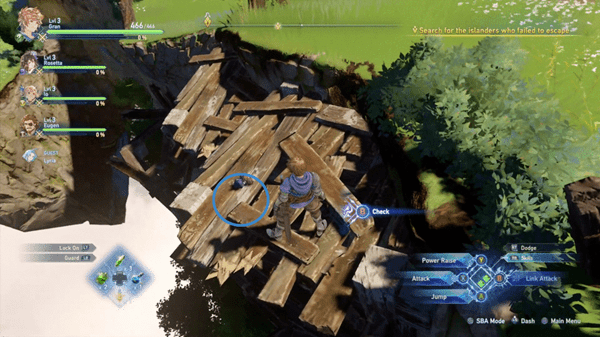
- As you formally enter The Hills, immediately turn left and walk onto the dilapidated wooden platforms, you'll see the second Wee Pincer on one of those wooden platforms.
- The third Wee Pincer can be located after you free the first group of villagers. Move to the next section right before the second Hallowed Ground and look to your right where you'll see a parted fence and a chest by the cliff. Walk to the edge of the cliff that has a parting to find the third Wee Pincer.
- The fourth Wee Pincer can be found inside the Windmill Settlement next to a Wooden Hay Hanger. The Wooden Hay Hanger can be seen to the right of a burning Windmill at the far back of that settlement.
- The fifth Wee Pincer can be found just to the right of the Windmill Settlement on a cliff beside a bridge with a bunch of barrels and boxes. It's easiest to find this if you go down the center of the map near the Giant mountain in the middle, then cross the little bridge, and immediately turn left to see the cliff with breakable barrels and boxes.
- Upon entering Zeghard Fortress, the sixth Wee Pincer can be found to the left behind a broken-down wagon, opposite of the Hallowed Ground. Walk forward slightly and you'll see the broken-down wagon on the left.
- Also in Zeghard Fortress, the last Wee pincer can be found before dropping down to the boss area of this chapter. Walk past the Hallowed Ground and Siero, then check the left-hand side of the wooden platform with the red flags just before the drop point to find the last Wee Pincer.
Chapter 2: Tempest on the Horizon Quest Quest All Slimes
- You'll be able to find a slime enemy after you run past the second hollowed ground just beside one of the stone walls before proceeding to the Water Settlement.
- The next Slime can be found before crossing the bridge and going to the Windmill Settlement to the left. It's near one of the Omen Stones in the Windmill Settlement.
- A slime can be found behind one of the burning houses to the left near the Wee Pincer and Omen Stone in that area.
- At the Water Settlement, a slime can be found beside a silver chest on top of one of the houses in front.
Chapter 2: Tempest on the Horizon Quest All Archives
- At the very beginning of Chapter 2, the archive: Ferry Service Pamphlet can be found just behind The Captain on the ship.
- Another Archive entitled Rules for using the Windmill can be found behind the second house to the right at the Windmill Settlement.
- An archive entitled Fisherman's Log can be found to the left of the wooden arch inside the Water Settlement.
Chapter 2: Tempest on the Horizon Quest Objectives
- Search for the islanders who failed to escape
- Rescue the islanders at other settlements
- Liberate the windmill settlement
- Liberate the waterfront settlement
- Rescue the pursued islanders
- Defeat the Goblins
- Speak to the islanders
- Rescue the captured islanders
- Defeat Greatshield Madbeat
GBF Relink Full Chapter 2: Tempest on the Horizon Walkthrough
Down The Hill
As they start, players will find the playable party, consisting of Gran, Katalina, Rackam, and Io, trying to navigate through unusually harsh winds to get to a floating island in Tempeal. Other characters appear to be with the party but are not playable and don't seem to contribute to the fights in any way. Once they finally land, they find out that goblins have become agitated by the unusual weather and have taken to attacking the islanders. Some were able to run away, but the rest got left behind. Eager to help, the party steps up and takes it upon themselves to find the other islanders and rescue them.

When players finally get control of the party, they'll be able to check the main menu and check on each member's Skills, Support Skills, Weapons, Sigils, and Skybound Arts. When you're ready, turn around first and look to the left of the flying ship near a shivering villager to find a blue orb which is two Cobblestone. Head back and move forward to progress the Quest.
As you move forward, look to your right to find another blue orb amidst some breakable objects. Pick it up to get a Tempestone. Approach the Caring Man near the floating green crystal to get a tutorial on Hallowed Ground and how to use the main character of the game. Before entering the opening, head to the left to find some breakable objects and a wooden chest containing a Wind Shard and 73 rupies.
Head back and then follow the objective marker through a short tunnel and come out to The Hills. Once you enter the Hills location, you'll find the first Wee Pincer of this area. Immediately go to the left of the area and you;ll find the Wee Pincer by a wooden platform by the ledge.
You'll hear some screams shortly and be prompted to help. For your first fight in the game, you'll be fighting some Goblin Stormers. They're weak to the Wind element which is probably why they they got agitated, but it means they're weak to Gran's attacks. Follow the various tutorials and dispatch them to rescue the first villagers. Interact with them to untie them and Rolan will come around with the ship to pick them up. There are more settlements to check so you'll have to continue on your way.
When you regain control, loop around the house to your left to find a wide ledge around the hill. There's a silver chest here containing three Wind Shards and 181 rupies.
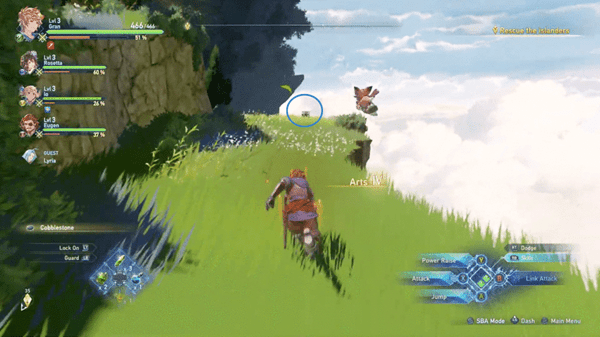
Head back and follow the objective marker to move forward. As you enter the enclosure there's another silver chest waiting for you, this time containing ten Fortitude Shards and 187 rupies. Across from it, you can check a blue orb on the wooden ledge for another Cobblestone. Afterward, just to the left of the silver chest, you'll find a wooden platform that goes downward and another silver chest that is guarded by a Goblin Stormer.
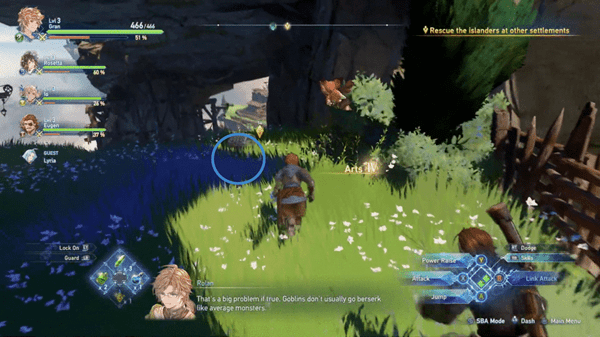
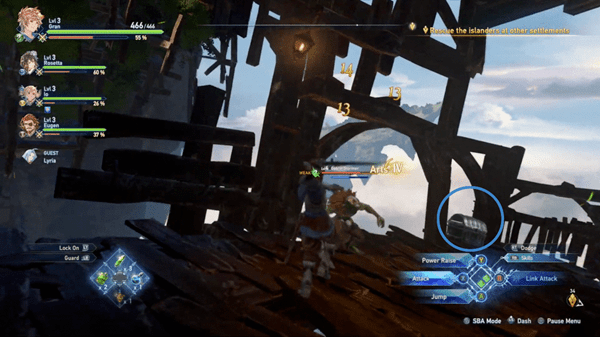
Head out of the enclosure to find another Hallowed Ground you can use if you need to on your left. From here there are two settlements to liberate. Head to the path to the left first to the windmill settlement. You'll be ambushed by some more Goblins near a raised house to your left. After you dispatch them, you can find a wooden chest near the house containing a Fortitude Shard and 73 rupies. Across the house is another blue orb of two Cobblestones in some bushes.

As you continue to the objective marker in the windmill settlement, you'll find your first Shrouded Treasure. After you dispatch the Goblin Wolfrider, examine the blurred treasure chest to your left to get a tutorial on Shrouded Treasures. These are special chests that you can only open after completing a mini-game of sorts entailing the collection of mirage stones within a set time limit. After you collect all the mirage stones you'll be automatically transported back in front of the golden treasure chest, containing Attack Power II and 1397 rupies.
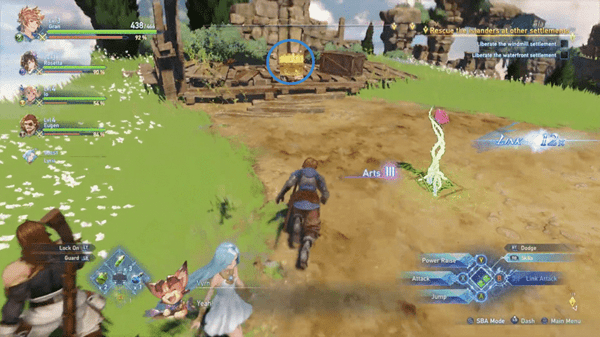
Head back across the Shrouded Treasure and head back up the ruins. Turn right after the first set of stairs to find a wooden chest containing four Fortitude Shards and 79 rupies. Head all the way to the top this time to find a high hill overlooking the plains. You'll find a golden chest here containing a Critical Hit Rate I and 656 rupies.
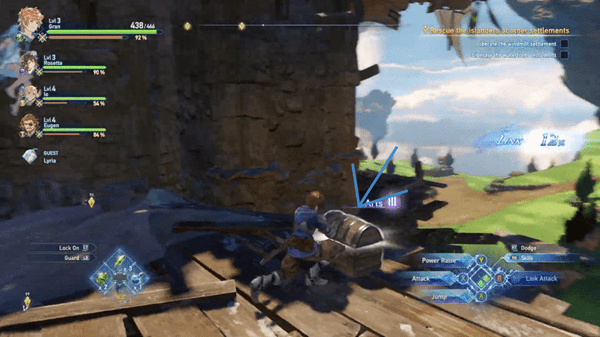
When you're ready, head to the objective marker to find the windmill settlement besieged by Goblin Witch Doctors, guarded by some Goblin Tankers. Both are weak to the water element so Katalina can make quick work of them. Afterward, jump to the top of the burning house to the left of the makeshift cart that the prisoners were tied on to check a blue orb and obtain a Valley Bloom. Turn around and head back down toward a windmill to find another blue orb and pick up another Cobblestone.

Turn around to find an Omen Stone on your right at the edge of the hill. These are stones with a red hue that when interacted with start a challenge wherein players will have to defeat empowered Enemies before the time limit runs out, and then a stronger opponent after that, in exchange for good rewards. Past it will be another burning house you can get to the top of by jumping, for a wooden chest containing a Rafale Coin and 73 rupies.
When you're ready, head back to the main center road. You can head back to the Hallowed Ground first and heal up if you need to. Head down the path to the right first to find some Goblin Stormers around a campfire. They're guarding a wooden chest on the broken bridge right past them. Ultimately, you'll now need to follow the objective marker down to the waterfront settlement. As you do, you'll find a blue orb as the path branches out to the left. Pick it up for a Whorlshroom. If you follow this path across the bridge to the end you'll find some Enemies and then you can jump to the top of a house again to find two Tempestones as you examine another blue orb.
Jump down from here to get to the waterfront settlement where some villagers have been tied up again. This time you'll be pitted against some Goblin Archers and a few Goblin Wolfriders. They're weak to Rackam's fire element so he'll be able to fight back against them easily. Be mindful of the laser lines that telegraph where their arrows will fly toward. When you clear them small fry out, a Goblin Soldier will try to come at you. This one's weak to Gran's attacks, but it's a bit larger than the rest. Watch out for when it glows red and make sure to dodge out of the way as he spins around to attack. He'll be alone though, so it'll be easy to build up his stun gauge and keep the pressure on.

After you defeat it, go the the captured villagers and free them. When you regain control, head to the small waterfall to find a golden chest behind it, containing an Attack Power I and 658 rupies. On the same side of the waterfall, toward the exit arch, jump on top of the structure to find a silver chest containing a Glitterstone (S) and 185 rupies.
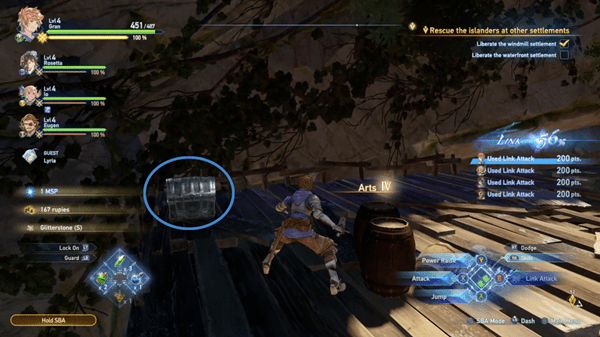
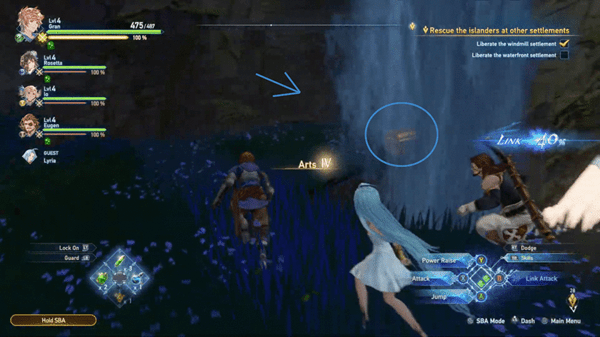
After freeing the villagers in the Waterfront Settlement, you can find another Shrouded Treasure just across where the villagers were being held captive.
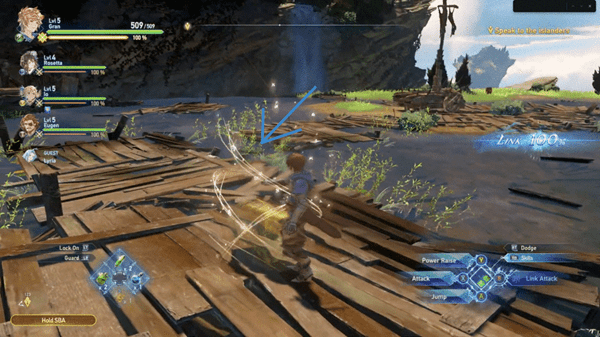
Flying on the ship, Rolan will find some more islanders running from Goblins so you should make your way to them post-haste. As you follow the objective marker, look to the left toward the burning windmill settlement to find a wooden chest containing a Wind Shard and 74 rupies.
Head to the objective marker and fight through the Goblins to get to the villagers. You'll be fighting a group of Goblin Stormers first and then three of the large Goblin Soldiers, so use what you've learned so far and give them a good beating. Your best bet is to pile on just one target, just as you dispatched the Goblin Soldier from the waterfront settlement.
When you're done you can speak to the villagers. However, before you do, you can find another Omen Stone here if you turn around and look to your right. This one will have you fight some empowered versions of the Goblin Archers you've fought so far, in addition to Goblin Pyromancers, Goblin Troopers, and Mud-Covered Swordsmen. You'll need to defeat them within a set period of time, so lay on your strongest attacks. Skybound Arts are essential here to hit as many of them as you can in a singular attack. After you slay them, you'll need to defeat a Rowdy Bord, but with no time limit this time. It's essentially a stronger version of the Goblin Soldier, but with way higher health and damage, so employ the same tactics but try to avoid getting hit as much as possible. If any of your party members die, revive them as soon as you can but time it right to keep avoiding damage. If you're successful with this challenge, a golden chest will appear containing Health II and 1407 rupies. Speaking to the villagers before examining the stone will have you skip to the next location immediately.
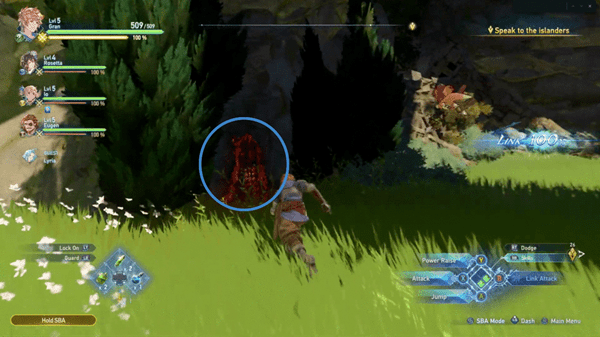
You can now move forward to speak to the villagers. They'll understandably be mostly frightened, but hearing Rolan's voice through the communication device will assure them of their safety. Unfortunately, there are more villagers that got taken deeper into the Goblins' territory. Naturally, the party will resolve to rescue them as well.

Storming the Fortress
You'll be automatically transported to Zeghard Fortress to rescue the captured islanders. Move forward to find a Hallowed Ground you can use if you need to, along with Sierokarte. Sierokarte makes it so that you can buy Items and access the Blacksmith whenever you're near a Hallowed Ground. However, this feature is just mentioned in this demo but is not actually accessible. Head toward the objective marker to find a blue orb you can pick up for a Whorlshroom. When you're ready, approach the edge for a scene.
It seems like you've stumbled into some kind of arena for the Goblins and they've let loose quite a contender for you to fight. This will be the Boss fight for this Main Quest so be ready with everything you've got.

Boss Fight: Greatshield Madbeat
This fight gives you a taste of what colossal Boss fights will be like for this game. You'll find their large health pool right at the top of the screen, as well as a Mode meter. Hitting the Greatshield Madbeat, aside from damaging its health, will also fill up the yellow Mode meter. As with any of the Enemies you've fought, it'll still have a Stun gauge so pile on the hits and keep the Link Attacks going for maximum damage. Greatshield Madbeat can charge with its shield and unleash an attack where it jumps up high into the air to crash into the ground, so keep yourself nimble and be ready to dodge any time you see the attacks coming. When it lets out a quick red aura, it'll lift up its shield and smash it into the ground in front of him a couple of times so be sure to dodge away.
The shield also greatly decreases damage done to it from the front so you'll want to keep trying to reposition behind it to deal any meaningful damage. Occasionally, it will let out a roar to push everyone away while calling some minor Enemies to help him out. They can get annoying, the way flies are annoying, so promptly deal with them so you can focus on the biggie.

When it fills up, Bosses go into an empowered state called Overdrive which can have various empowering effects. Greatshield Madbeat goes into Bloodthirst mode which makes it stronger while also lessening the damage it takes from Skybound Arts. However, your hits will now deplete the yellow meter instead of building it up, including hits from your weakened Skybound Arts, so still keep piling on the damage. Once the bar is depleted, Bosses will Break and be rendered exhausted and immobile, and so vulnerable to your biggest attacks. Repeat this cycle until the beast finally goes down.
Without their big bad, the Goblins will run away scared, and the party notes the harsh winds they encountered all throughout the fight. Lyria and the others determine that Tempeal's primal beast might be the real root of this problem and resolve to solve it.
Chapter 2: Tempest on the Horizon Quest Notes and Tips
Notes, Tips, and Other Trivia for the Chapter 2: Tempest on the Horizon quest in Granblue Fantasy Relink go here.
