Chapter 3: Creation of the Stars is a Main Quest in Granblue Fantasy Relink. Players are tasked to put a stop to the primal beast's rampage in the Tempeal area. Upon reaching the altar, they fight against the Primal Beast, Furycane. The Skyfareres emerge victorious, but a mysterious group emerges from the clouds and surrounds the party. The Skyfarers are no match for the Mysterious Swordsman, and the group abducts Lyria in the process. Main Quests in Granblue Fantasy Relink are primarily tied to the story or main campaign of the game which requires a player to complete it to progress story-related events, unlock more game features, discover new locations, and more. This page covers guides, quest objectives, and a complete walkthrough for the "Chapter 3: Creation of the Stars" main quest in Granblue Fantasy Relink.
General Information
- Previous: Chapter 2: Tempest on the Horizon
- Next: Chapter 4: Skies Forever Blue
- Bosses: Furycane
- Location: Mines of Tempeal / Halewind Altar
Quest NPCs
Quest Bosses
Quest Enemies
All Items & Rewards
Weapons
- N/A
Sigils
Treasure
- Tempestone
- Prism Chip
- Valley Bloom
- Cobblestone
- Whorlshroom
- Glitterstone (S)
- Fortitude Shard
- Fortitude Crystal (S)
- Standard Refinium
Key Items & Other
- Miner's Meeting Minutes
- Tempeal Disaster Report
Enemy Drops
- Rupies
Quest Rewards
Chapter 3: Creation of the Stars Quest Information
Chapter 3: Creation of the Stars Quest Description
Rolan drops off the Skyfarers near the primal beast's rampage. The party needs to stop the primal beast before it ultimately destroys the nearby village. The Skyfarers don't know that the primal beast isn't the only one waiting for them at the altar.
Chapter 3: Creation of the Stars Quest All Chests Locations
- From the starting area, turn right and go near the edge of the broken bridge, you'll spot a chest there, open it to obtain a Prism Chip, some rupies, and 1 MSP.
- Follow the quest marker and along the way you'll find a chest inside a small hut that contains a Rafale Coin and some rupies.
- Complete the first Omen Stone challenge to receive a Gold Chest. Opening this chest will reward you with Attack Power II, some rupies, and 5 MSP.
- Continue following the quest marker and as you reach the tracks, make your way up the platform on your right, there's a chest at the top that contains a Health I Sigil and some rupies.
- After lowering the second bridge, take the path on the right before crossing the lowered bridge and open the chest to obtain a Glitterstone (S), some rupies, and 2 MSP.
- After escaping the collapsing bridge, you'll immediately see a chest nearby a purple loot (Miner's Meeting Minutes). Opening the chest reward you with Fortitude Shard x10, some rupies, and 1 MSP.
- After opening the shrouded chest, turn around and drop down on the area to your left, turn around and you'll see a gold chest in a corner. Open the chest to receive Fortitude Crystal (S) x3, some rupies, and 3 MSP.
- After exiting the cave and reaching Halewind Altar, you'll find a chest just ahead containing Fortitude Shard x10 and some rupies.
- A silver chest can be found next to a Hallowed Ground upon reaching Halewind Altar. The chest contains an Attack Power I, some rupies, and 2 MSP.
Chapter 3: Creation of the Stars Quest All Shrouded Treasure Locations
- After escaping the collapsing bridge and making it safely inside the cave, follow the path ahead and turn right, you'll spot the shrouded chest behind some barrels. This chest contains a Critical Hit Rate II, some rupies, and 2 MSP
Chapter 3: Creation of the Stars Quest All Omen Stone Locations
- Once the primal beast emerges through the altar, turn right and you'll immediately spot the Omen Stone from afar near the tracks.
Chapter 3: Creation of the Stars Quest All Wee Pincer Locations
There is a total of 3 Wee Pincers in this chapter.
- After picking up the chest inside the small hut, continue moving forward. Before following the quest marker, continue moving forward and make your way to the left-most area, you'll find a Wee Pincer around the corner.
- After lowering the first bridge, you'll encounter some Goblin enemies. After clearing the enemies, check the area under the broken tracks before you lower the second bridge. You'll find another Wee Pincer on the ground near the edge.
- After making it through the collapsing bridge, follow the tracks ahead. On the right side, you'll spot a shrouded chest behind some barrels. Climb up the platform and you'll also see a Wee Pincer behind one of those barrels.
Chapter 3: Creation of the Stars Quest All Slimes
- You can find a slime nearby the first chest you first looted. From the chest, turn around and move forward, and take a u-turn, you'll find a Slime next to the wall near a watchtower.
- From the first Omen Stone, climb up the stairs near it and turn right, you'll find a Slime near the tracks beside some boxes.
- After picking up the Miner's Meeting Minutes archive, check the left side of the area and you'll spot a Slime there.
Chapter 3: Creation of the Stars Quest All Archives
- After escaping the collapsing bridge, inside the cave you'll find an archive called Miner's Meeting Minutes. Just follow the tracks ahead and you'll immediately spot a purple loot on the ground.
- After your encounter with the mysterious group who abducted Lyria, check the bedstand beside you to pick up the Tempeal Disaster Report.
Chapter 3: Creation of the Stars Quest Objectives
- Stop the primal beast's rampage
- Escape the collapsing bridge
- Climb the shaft
- Escape the shaft
- Stop Furycane's rampage
- Defeat Furycane
- Defeat the mysterious man
- Meet up with your crew
GBF Relink Full Chapter 3: Creation of the Stars Walkthrough
Locate the Primal Beast
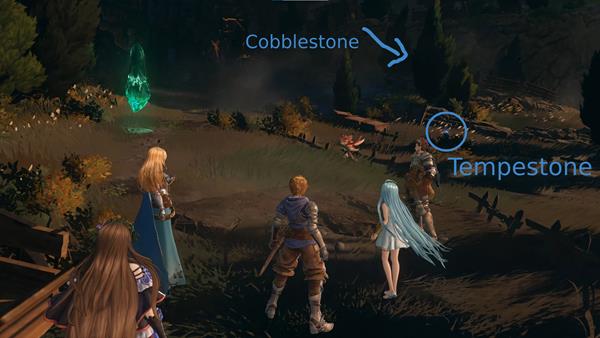
Upon starting the quest, the ship will drop you off at the Mines of Tempeal. From the get-go, you'll immediately spot a Hallowed Ground in front of you. There are a couple of nearby loot and a chest around the area that you can check before you proceed. On the right side, you can pick up a Tempestone, and on the far right you can pick up a Cobblestone x2.
There's also a chest at the edge of the broken bridge nearby, open it to obtain a Prism Chip, some rupies, and 1 MSP. On the left corner, you'll spot another loot behind some breakable objects. Attack the breakable objects to get some extra rupies, then pick up the loot to obtain a Valley Bloom and some rupies.
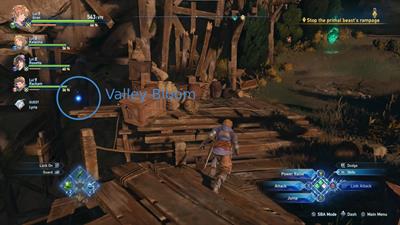
After picking up the loot near the Hallowed Ground, continue following the quest marker and pick up the loot on the left side along the way to receive Whorlshroom x2. Continue pressing forward and you'll spot a chest inside a small hut. Open it to receive a Rafale Coin and some rupies.
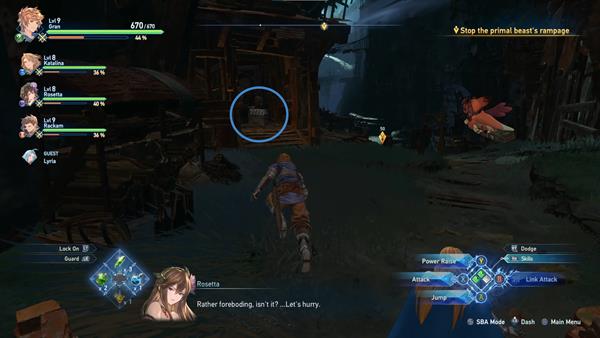
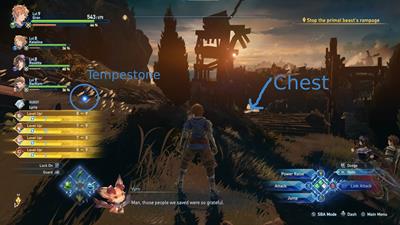
After getting past the small hut, a strong gust of wind sweeps through the air and a primal beast emerges from the altar. As you progress forward, turn right and you'll immediately spot an Omen Stone from afar near the tracks, and across it is another loot you can pick up that gives you another Tempestone.
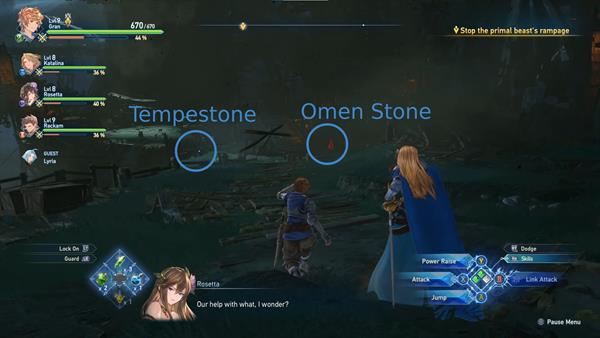
From the Omen Stone, climb up the stairs next to it and follow the tracks. As you reach the quest marker, make your way up on the platforms on your right before you proceed with the main objective, there's a chest at the top that contains a Health I Sigil and some rupies.
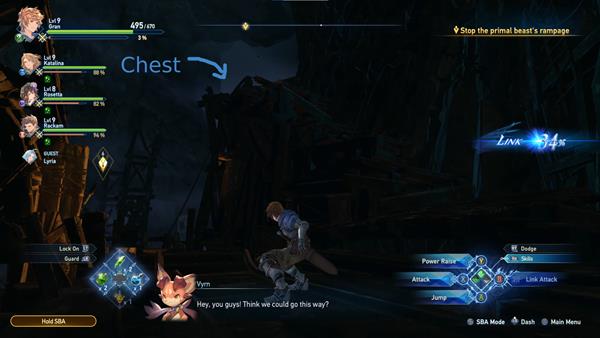
After opening the chest, drop back down and pull the lever to lower the bridge. Cross the bridge and defeat the enemies waiting for you. You'll have to defeat 2 Goblin Stormers and 2 Goblin Witch Doctors. After clearing the enemies, check the area under the broken tracks before you lower the second bridge. You'll find another Wee Pincer on the ground near the edge. Now follow the quest marker and pull down another lever to lower another bridge. But before you cross the bridge, take the path on your right and open the chest you'll immediately spot on the tracks. Opening it will reward you a Glitterstone (S), some rupies, and 2 MSP. Be wary that a Goblin Soldier will drop from above after opening the chest.
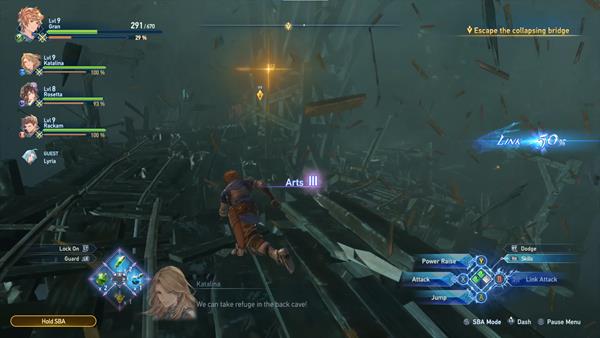
After dealing with the Goblin Soldier, cross the bridge to trigger a short cutscene. As you make your way through the tracks, the primal beast blasts through the bridge, destroying parts of it and making it slowly collapse. You are then separated from your party, and you'll have to escape the collapsing bridge as fast as you can and make it safely through the cave. Just follow the quest marker and don't stop running to reach the cave.
After making it through the collapsing bridge, you'll immediately see a purple loot on the left side of the path. Pick it up to obtain the Miner's Meeting Minutes document. Just next to it is a chest that contains Fortitude Shard x10, some rupies, and 1 MSP. On the right side, you'll find a Shrouded Treasure Chest hiding behind some barrels. Collecting the mirage of stones within the time limit will reward you with a Critical Hit Rate II, some rupies, and 2 MSP. You can also pick up a Wee Pincer beside the shrouded chest.
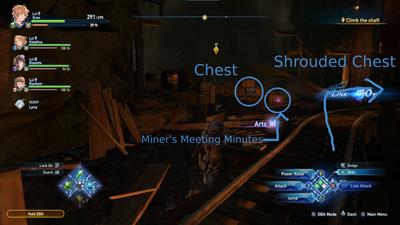
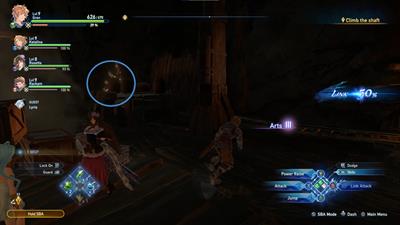
Before proceeding to the main path, drop down on the left and turn around, there's a gold chest there containing Fortitude Crystal (S) x3, some rupies, and 3 MSP.
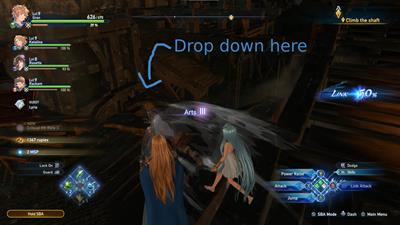
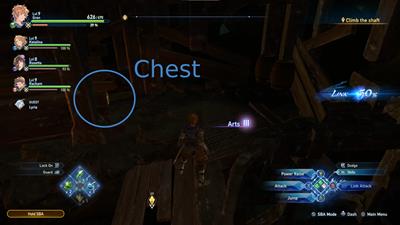
Now make your way back up and continue climbing the shaft. Once you reach the quest marker, the primal beast once again blasts through the area, making the structural integrity of the cave fall apart. Run as fast as you can til you reach the next quest marker. There will be some goblin enemies along the way but you can completely run past them and make your escape.
Boss Fight: Furycane
After exiting the cave, you'll find yourself at the Halewind Altar. Continue following the quest marker and just ahead you'll spot a chest. Open it to receive Fortitude Shard x10 and some rupies. Further ahead is a Hallowed Ground and next to it is another chest, this one contains an Attack Power I, some rupies, and 2 MSP. Make sure to use the Hallowed Ground to restore your party's health and save the game.
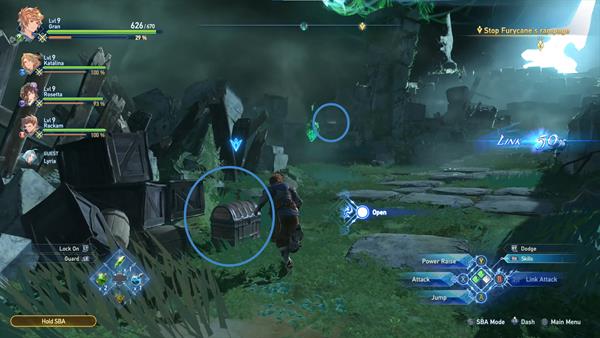
Now continue following the path ahead until you reach the altar. Once you reach the quest marker, a short cutscene will play out, and the primal beast will reveal its true form. Now you'll have to fight the boss called Furycane. This boss has a lot of Wind-based attacks, and it is weak against Fire. Just like most Bosses, this too will have an Overdrive Mode once the yellow meter below its HP fills up, it'll have access to more powerful moves, make your Skybound Arts weakened, and take less damage overall.
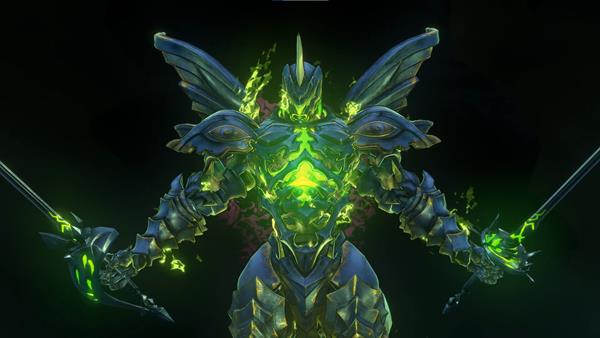
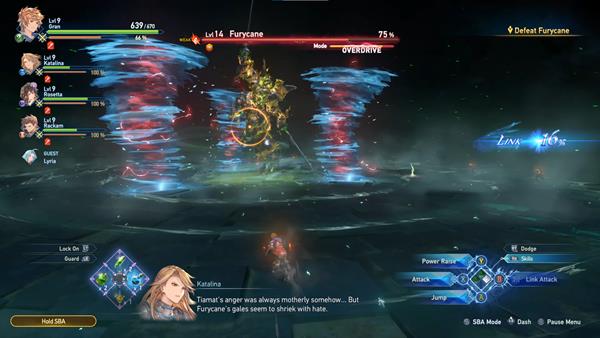
Once it enters into Overdrive, be cautious of the move called Savage Cyclone, this attack is where the Furycane jumps into the air and slams down on the ground, with the impact creating a powerful shockwave that constantly pushes anyone away from itself. After a brief moment, it summons multiple powerful cyclones that swirl aggressively throughout the entire arena.
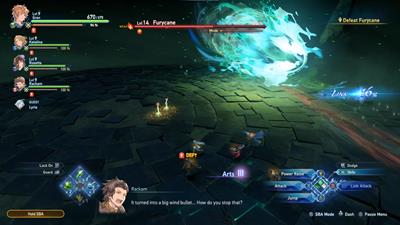
It'll also have a move called the Shrieking Squall where it transforms to its previous form and flies around the area, it then charges down in a straight line to knock anyone who gets in its way. You'll see a red line on the ground indicating where the Furycane is headed for this attack. You cannot hit the Furycane with melee attacks at this point, but after a few seconds, Lyria will summon a barrier where you'll need to go inside and shield yourself from the Furycane's attack. As it charges toward your party, the barrier breaks but it also stuns the Furycane. Lyria then summons a Bahamut and strikes the Furycane, dealing massive damage.
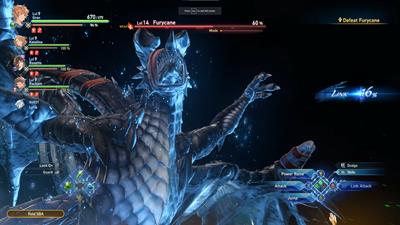
The Furycane then flies away for a brief moment, it then uses Transfiguration to transform into a different form that floats around, this time it only wields a single long sword. It has a move called Fluttersword where it slams its weapon onto the ground and the impact creates a cyclone that travels throughout the arena, similar to the Savage Cyclone move.
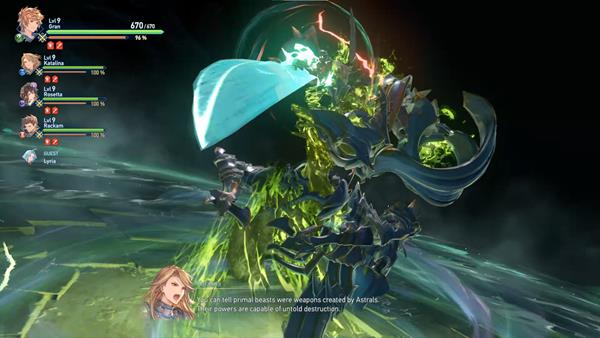
The move Ring of Death will suck everyone in the area, drawing everyone closer to the Furycane. There will be red circles marked on the ground indicating where a blast will occur. Try to avoid the marked area.
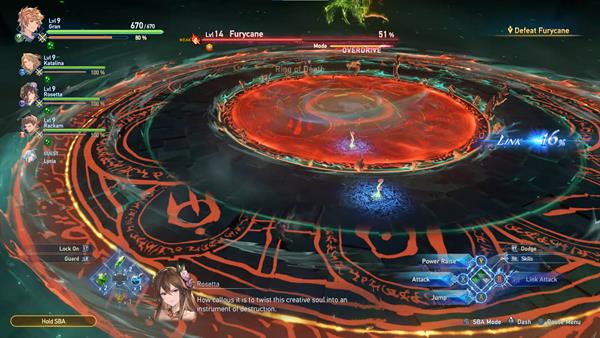
Most of its moves will be executed more than once throughout the boss fight, even the special moves performed during Overdrive Mode. Get a hang of the attacks, anticipate, and dodge precisely. Keep stacking up damage until you completely reduce its health to zero. After defeating the Furycane, you'll receive a Standard Refinium, Prism Chip, Fortitude Crystal (S) x3, Health I, and 10 MSP.
A Mysterious Swordsman Appears
Just as you defeat the Furycane, a short cutscene will play out. Lyria will unwillingly absorb the Furycane and a giant ship appears in the area. An army of soldiers march out of the ship and surround your party. They try to take away Lyria, but of course, your party will not let that happen. A Mysterious Swordsman then steps in and says he'll end the fight in 90 seconds.
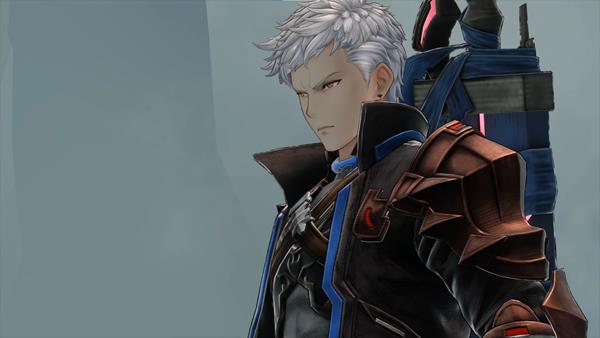
You will now enter into another boss fight but take note that you cannot win this fight, and will end with your party losing no matter what you do. He will cut everyone down one by one until you're the only one left standing. Another cutscene will play out where it ultimately shows your party's defeat. A mysterious woman also appears on the scene and introduces herself as Lilith. It's revealed as well that the mysterious swordsman's name is Id. Ultimately, they end up capturing Lyria in the process.
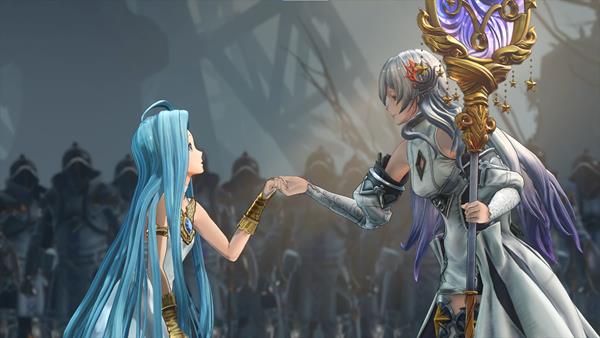
The Captain then wakes up from a nightmare and ends up on a bed with Vyrn waiting for the captain to wake up. Once you regain control of your character, check the bedstand beside you and pick up the Tempeal Disaster Report. Now meet up with your crew and discuss what happened. Rolan thinks that they took Lyria to Leautagne Island. The group that abducted Lyria is called The Church of Avia. Rolan insists on helping you and your crew as he cannot sit idly by after what happened. After the meeting with your crew along with Rolan, this quest is completed and officially starts Chapter 4: Skies Forever Blue.
Chapter 3: Creation of the Stars Quest Notes and Tips
Notes, Tips, and Other Trivia for the Chapter 3: Creation of the Stars quest in Granblue Fantasy Relink go here.
