Rock Golem |
|
|---|---|
 |
|
| Location | Dahli Relicbelt |
| Weakness | Wind |
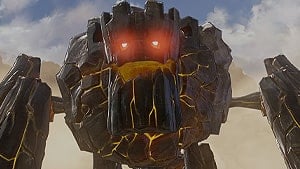
Rock Golem is a Boss in Granblue Fantasy Relink. The Rock Golem is a giant boss made entirely from stone, this behemoth of ancient rock towers the battlefield with its sheer size and impenetrable stature. The Rock Golem is a testament to the raw power of elemental forces harnessed for both protection and destruction. This boss was featured in the initial demo of the game. Bosses are special types of enemies that have distinct characteristics, and unique abilities that extremely challenge the player in strategy and combat. These formidable hostile beings are generally required to be defeated to advance the main campaign, to complete primary side quest objectives, and to earn unique rewards.
Granblue Fantasy Relink Rock Golem Boss Information
- Weak Against: Wind
- Strong Against: Earth
- Optional Boss: This boss is not optional when encountered in the main story.
Where to Find Rock Golem Boss in Granblue Fantasy Relink
- Rock Golem is encountered in the main story quest, Chapter 6: In Search of Hope and the side quest, Golemology 101: Desert Golems
Rock Golem Boss Rewards in GBF Relink
Chapter 6: In Search of Hope Rewards
- x5 Golem Finger
- x3 Fortitude Crystal (S)
- x1 Burn Resistance II
- x5 MSP
Granblue Fantasy Relink Rock Golem Boss Guide
Rock Golem Fight Strategy
The Best Tips for Rock Golem:
- Recommended Party: Gran, Ghandagoza, Lancelot, Siegfried
- Recommended Sigils: Combo Booster III, Stamina III, Critical Hit Rate III
The recommended party for this boss fight would include Gran, a well-balanced character that can provide both offensive and defensive capabilities for the team. Ghandagoza is a heavy hitter specializing in close-range combat that deals massive damage. Siegfried, another heavy hitter who specializes in strong swings that can result in devastating attacks when perfectly timed, and Lancelot, a dual-wielding master swordsman who specializes in evasion and overwhelming flurry of attacks. The best Sigils for this fight are the Combo Booster III, Stamina III, and Critical Hit Rate III. All the recommended sigils are best for players who focus on dealing continuous barrage of attacks against the boss for maximum damage. This boss fight will require you to defeat the Rock Golem in under 20 minutes. The Rock Golem demonstrates a lethargic tempo, enabling players to readily anticipate most of its attacks since most of its moves are easily discernible by its slow movements. Gran can be used to support other teammates with its healing ability, his element is also Wind, which is the most effective element against this boss fight. But the damage heavy hitters would be Ghandagoza and Siegfried. Lancelot can build up his combo by performing a relentless barrage of attacks, and since he can dodge and attack at the same time by pressing △ after performing combos, he can stay close and continue dealing damage against the Rock Golem.
Combat Strategy
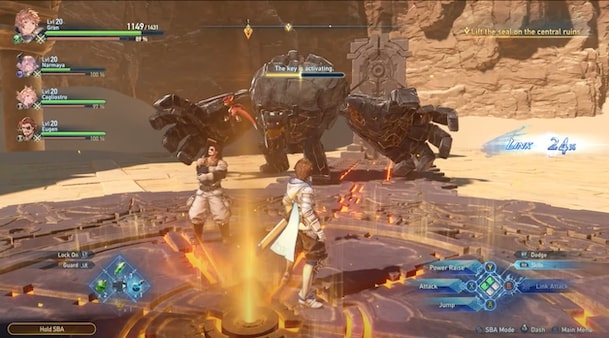
The Rock Golem will begin to animate as the player locates the key and starts to activate it in the Dahli Relicbelt in chapter 6 of the main storyline. Start by putting a target on the boss. The Rock Golem will also have several targetable body parts and when you're playing co-op, it's recommended to coordinate with your teammates and concentrate on a single body part at a time. By doing so, you can efficiently build up the stun gauge, speeding up the execution of link attacks., which, in turn, leads to a faster stagger of the boss and creates opportunities for you and your team to deal more damage when it's vulnerable. Once the boss fight begins, it'll immediately perform the Titanic Stonespike, a move where it slams its hand on the ground, creating a wall of giant rock spikes emerging in a straight line. The Rock Golem will perform this move multiple times throughout the fight. This can easily be dodged or blocked. One of its melee attacks consists of the Rock Golem executing a backhand swipe, followed by a powerful advancing punch. This move is signaled by the Rock Golem adopting a brief stance before performing this move. To evade the attack, you can dodge, block, or create some distance. The Rock Golem has two moves where you'll see it leap into the air, one is the Earthbound Slam, where it jumps back, then leaps toward a targeted player and punches the ground, creating a small shockwave. This can be easily avoided if you look out for the red indicator showing you where it will land. The other move is the Quakeslam Barrage. This move is where the Rock Golem jumps into the air and slams into the ground, resulting in a shockwave that launches a massive rock upward. This will be followed up with large chunks of rocks descending from the sky, scattering across the battlefield. Dodge the initial jump and try avoiding the red marks scattered around the area to avoid the rock projectiles. The final move it has while in base form is the Tectonic Eruption, this move is where the Rock Golem builds up seismic energy and after a brief moment, it releases a massive shockwave that ripples through the ground. Simply move away from the boss to avoid getting hit, but if you prefer to keep dealing damage in close range, time your dodge correctly to avoid getting hit.
Similar to the Greatshield Madbeat and the Quakadile, this boss features a yellow bar of meter just beneath its health bar. Once this gauge fills up, the Rock Golem will enter Overdrive Mode, triggering the activation of Bloodthirst. During this phase, Skybound Arts become ineffective against the boss, and its overall damage taken will be reduced. Some bosses can unleash special attacks while in Overdrive Mode, but in this case, the Rock Golem will only have access to one new move, maintaining the majority of its base form attacks. However, it can occasionally string together basic moves while in Overdrive Mode, adding an element of unpredictability. This phase will only be temporary but it can happen more than once during a boss fight.
Once the Rock Golem enters Overdrive Mode, it'll immediately perform the move Earth Shaker. This is when the Rock Golem brings both hands down to the ground, initiating a sweeping shockwave that ripples through the entire arena. Simultaneously, colossal rock formations emerge around the Rock Golem. The Rock Golem will then proceed to execute a spinning move that launches the massive rocks in different directions. Players caught in the initial shockwave will be knocked down and temporarily receive a reduction in movement speed. During this move, you can have Lancelot perform his skill Kaltzwinger, where he casts an ice trap to immobilize and freeze the Rock Golem. You can increase the duration of the freeze by holding △. This will give other teammates time to deal massive damage while the Rock Golem is invulnerable. As mentioned above, this will be the only new move that the Rock Golem will have access to during Overdrive Mode, but it will retain the same basic moves it has and can sometimes string together those individual moves to add some unpredictability to its attacks.
Once you've beaten the boss in under 20 minutes, the quest is cleared and you'll receive the Quest Mode Clear Reward 3.
Rock Golem Attacks & Counters
| Attack | Description | Counter |
| Titanic Stonespike | The Rock Golem slams its hand onto the ground, giving rise to an eruption of giant rock spikes in a straight line. | This move will immediately be executed by the Rock Golem just as the boss fight begins, you can run, block, or dodge on either side to avoid this attack. |
| Backhand Assault | The Rock Golem executes a two-part move where he performs a backhand swipe following up with a powerful advancing punch. | This move is telegraphed as you'll see the Rock Golem take a stance momentarily before performing the move. Dodge, block, or create some distance to avoid the attack. |
| Earthbound Slam | The Rock Golem jumps back, then leaps toward a targeted player and punches the ground, creating a small shockwave. | As the Rock Golem jumps back, be prepared as it can target anyone from the party. There will be an indicator on the ground as to where the Rock Golem will jump toward, so if you happen to be the targeted player, dodge at the right time to avoid taking damage from the shockwave. |
| Quakeslam Barrage | The Rock Golem jumps into the air and slams onto the ground, creating a large shockwave and propelling a massive rock into the air. This is followed by giant chunks of rocks falling from above in multiple areas of the battlefield. | The Rock Golem will glow red momentarily before he performs this move. Anticipate as he jumps, you can dodge this attack even if you're at point-blank range as long as you time your dodge correctly. If you happen to be away from him, be careful of the giant rocks falling from above, there will be red-marked areas as to where the rocks will fall. |
| Tectonic Eruption | The Rock Golem builds up seismic energy and after a brief moment, it releases a massive shockwave that ripples through the ground. | This move is highly telegraphed as you'll visibly see the Rock Golem charge up before unleashing the shockwave. You will also see a giant red circle marked on the ground indicating the radius of this attack. Make sure to create as much distance to avoid the shockwave. You can also perform a dodge if you can time it correctly. |
| Overdrive Mode | ||
| Earth Shaker | The Rock Golem slams both hands to the ground, triggering a sweeping shockwave that ripples through the entire arena. Simultaneously, giant rock formations emerge around the Rock Golem, he then follows it up with a powerful spin that propels the massive rocks in all directions. Players caught in the initial shockwave will get knocked down and also experience a temporary reduction in movement speed. | This move will be initiated as the Rock Golem enters Overdrive Mode. You can continuously keep attacking if you can time your dodges correctly, or you can create some distance and either jump or dodge through the shockwaves and incoming projectiles. |
Rock Golem Lore, Notes & Other Trivia
- Voice Actor: ??
- Other Notes and Trivia Go Here
Rock Golem Boss Image Gallery


