Shadow Id |
|
|---|---|
 |
|
| Location | Pillar of Vayoi |
| Weakness | Light |
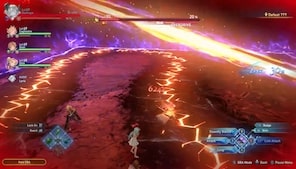
Shadow Id is a Boss in Granblue Fantasy Relink. Shadow Id is a late-game boss encountered in Chapter 0: Skybound Heart. It appears as a shadow and doppelganger of Id, with some additional dragon powers. His name will appear in '???' upon the first encounter on top of the Pillar of Vayoi. Bosses are special types of enemies that have distinct characteristics, and unique abilities that extremely challenge the player in strategy and combat. These formidable hostile beings are generally required to be defeated to advance the main campaign, to complete primary side quest objectives, and to earn unique rewards.
Granblue Fantasy Relink Shadow Id Boss Information
- Optional Boss: No
- Weak Against: Light
- Strong Against: Dark
Where to Find Shadow Id Boss in Granblue Fantasy Relink
- Shadow Id is encountered in the main story quest, Chapter 0: Skybound Heart at the top of the Pillar of Vayoi
Shadow Id Boss Rewards in GBF Relink
- Crewmate Card x1
- Fortitude Crystal (M) x50
- Fortitude Crystal (L) x10
- 30000
Granblue Fantasy Relink Shadow Id Boss Guide
Shadow Id Fight Strategy
The Best Tips for Shadow Id:
- Recommended Party: List of Party Members
- Recommended Sigils: List of Sigils
As players make their way through the nightmare monolith to the top of the Pillar of Vayoi, players will eventually encounter Id's doppelganger and will be trusted into a boss battle. At the start of the fight, target Id. This Id will have some familiar movesets seen during boss encounters with Id himself. Players can approach this attack similarly to how Id boss encounters were fought since his initial attack showcase will be similar until the next phase. Allow the team to charge up their Skybound Arts in order to deploy them together and successfully deal a full burst as a result to speed up the process of the fight before Id transitions to the next step of this encounter. Once Shadow Id reaches overdrive, he will be surrounded by a flurry of AoE attacks. Ally Id will begin to recommend dodging through them till they are completed. Watch the ground for where the next attacks will strike since these blast zones will appear just before the explosion, allowing you time to maneuver around them or clear away from the hazardous areas. Approach Shadow Id between his attacks when there are windows to run in and play aggressively to get him to Break. Eventually, Shadow Id transforms into a dragon figure and from here, the obstacles will begin to fill the arena.
Phase 2
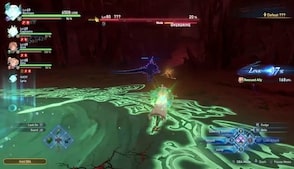
During this phase, Shadow Id will form a wall, constricting the arena to a smaller space and filling it with more obstacles and hazards while continuing his ranged and AoE attacks. During this part of the fight, you will always need to be wary of your positioning, the marks on the ground, and the orb that he can deploy in the area. Many large-scale attacks, lasers, and AoE attacks can occur simultaneously, so you will need to watch all marks in the arena indicating a possible hazard you could run into while also maneuvering your way toward Shadow Id in order to get a clear attack position on him. A lot of the attacks will really minimize your safe places for your characters so make sure you are not cornered into any of the walls of existing attacks. The walls and obstacles will be temporary so if you're having a difficult time approaching him, focus on preservation by prioritizing dodging the obstacles until the walls are cleared.
Once the walls are cleared go ahead and run in. Try to keep to his back since his melee attacks are more powerful and have added ranged in this form. In this phase, he will still be able to quickly dash around the arena, but if he is in overdrive, it will be worth it to continue pursuing behind him and stay on the offense till he reaches the Break. Let all your attacks out if you get the Break from Id then follow it up with a series of Skybound Arts from the party to deal a Full Burst as soon as he recovers. This will quickly deplete his HP. Continue aggressively until the fight is cleared.
Shadow Id Attacks & Counters
| Attack | Description | Counter |
| Dash Maneuver | A swift maneuver that allows Shadow Id to quickly reposition a distance away from his original spot. This can also be accompanied by an attack much like the regular attack. However, this attack is enhanced and can deploy 3 additional projectiles that fan out once he completes his action | Get ready to run toward his new spot to continue pressuring him with your attacks. If you think he is lunging towards you, try to dodge away in time with the lunge and keep to his back as much as possible. |
| Energy throw | Id can harness and throw energy out in a linear attack. | Quickly dodge out of the direction of the attack on either side. |
| Basic Melee Attack | If you get too close sometimes Id will resort to a regular melee combo. | These melee attacks can be dodged or blocked depending on your character. This is the best time for multiple characters to play aggressively. |
| Charged Melee Attack | Id can charge up a melee attack. This is seen with his long drawback of the weapon before the strike. | The drawback of this attack allows you time to reposition out of the way of the strike or dodge away from melee range. |
| Charged sword Strike | Id pulls back his sword and holds it to charge before releasing it in a downward strike and letting out a linear attack in the same direction. | Dodge to either side or stay clear of the direct front of Id. You can continue to attack him from the side or behind as this attack is in action. |
| Dark Pool AoE - Sentenced | Id can deploy a pool in another area within the arena. This is indicated with a purple circle and will then start in the middle of the marked area and quickly expand outward before he himself lands in the center of the marked pool area. | As soon as you see the red line marking you as a target, you will need to keep running around the arena. Try to gain some space between you and Id and stay clear of the marked areas on the ground. You should see the energy pool begin to expand outward. This will cause a lot of damage if you're caught in it. |
| Muli- Dark Pool Blast | Like the larger dark pool, Id can summon a pattern of smaller pools, usually in a circle that will each take time to form. The range of the damage and attack locations will be marked in purple on the ground before each pool releases a powerful blase. | As much as possible, you will need to be away from the ground around you and as soon as the markings appear, run away from them to avoid the blast of the marked area. You may be able to run in between the gaps of the pools to continue toward Id and continue an offensive approach. |
| AoE landing | Id lifts from the ground and lands causing an AoE ring around him | As soon as Id is lifted off the ground steer clear fro the area beneath him to avoid getting caught in this attack. Wait for the action to play out before resuming attacks if you can't attack at a distance. |
| Phase 2 | ||
| Rain of Dark Orbs | Dragon Id can summon orbs that will eventually explode upon contact with the ground. These hazardous zones where the orbs are set to land will be marked with a circle. | Since the landing areas are marked, players will need to maneuver the ground. This attack can happen simultaneously with other large-scale and ranged attacks. |
| Laser Carve | Dragon Id lifts himself in the air and releases a beam that carves a pattern into the ground which then later shocks those in its path. | The pattern will be difficult to predict, but if you find yourself caught in the path of this attack, prioritize running out of the way before the second part of the attack. |
| Thrash Combo | In his dragon form, he can deal a combo of wild powerful strikes that end with a slam. | When the combo starts try your best to stay clear of the area ahead of Dragon Id. Circle behind him to avoid his punches. |
Shadow Id Lore, Notes & Other Trivia
- Voice Actor: ??
- Other Notes and Trivia Go Here
Shadow Id Boss Image Gallery


